 | 1.
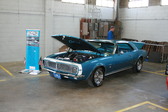
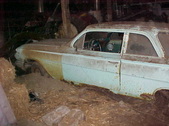
Local upcoming car shows (redo) Here is a listing of the upcoming Car shows 125 miles out from my location. If you see any errors or have one not listed you want on, contact me at:
kjinohio@gmail.com
For coverage of local shows Go4rider does an excellent job. You can check out his Youtube Channel at:
https://www.youtube.com/@GO4RIDER_trikelife937
Rob and Miami Valley Novas also has a lot of information and tons of still photos from shows. Here is his link:
https://www.miamivalleynovas.com/
Be sure to verify the event you want to go to is still on. I try to give updates but am not always alerted. |
| 5761 Visits
477 Images
Gallery Album | |
|
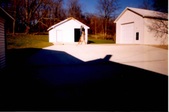 | 2.
Hooking up the shop to the Boiler. | Decided it was time to hook up my shop to the boiler. That way I can get the add on wood furnace out of there which will open up some space. Not having the wood supply in there will mean more space as well. I wanted to shop around to bundle all me insurance and found most all companies refuse to insure a shop building with a stove even if it is UL listed as mine was. Here we go. |
| 20520 Visits
48 Images
Gallery Album | |
|
 | 3.
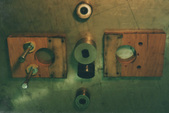
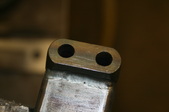
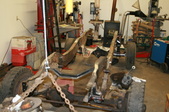
Tire jack/spinner | Decided to address making changing bigger tires a little easier. To lift them up and get the studs to align can sometimes be a pain so wanted to make it easier. Gojack makes one for wider tires and costs close to $400.00. I don't think it would work well anyway with the open lug tires I have so lets get something made from the scrap pile. |
| 27787 Visits
26 Images
Gallery Album | |
|
 | 4.
Wood Storage | This is what I did to store my firewood inside the barn. |
| 12061 Visits
34 Images
Gallery Album | |
|
 | 5.
2021 4 Wheel Jamboree Nationals Indy, IN | Drove 110 miles to attend the Largest Meeting of 4x4 in the United States. Great time with awesome people and fantastic trucks. |
| 36176 Visits
286 Images
Gallery Album | |
|
 |
|
 | 7.
Car show posters. Was at a show and met a girl who is in college that made up a super nice info/Layout poster for her Dad's car. I told her she should start doing them as people would want them so she has started. $65.00 and she sends you the file online so no travel is needed. Just send her the pics and your ideas and you get them printed in your area. Really easy and as you can see, she is good at it. Here is her note:
Car show display posters done by Sarah Fritz. For inquiries please email : sarah.fritz@artacademy.edu |
| 8715 Visits
4 Images
Gallery Album | |
|
 | 8.
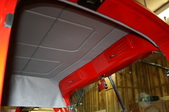
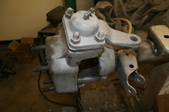
Engine Cover Project | Decided to try to make a piece to add to the engine on the truck. Had a few ideas to try and this is my attempt to make it happen. It will take some time and thought but projects always do. Want to incorporate a thanks to the people of our military into as well. Without them, we wouldn't have the freedom to do anything. |
| 40255 Visits
182 Images
Gallery Album | |
|
 | 9.
Comfy Creeper | Decided to make a heavy duty creeper that would actually be comfortable to work from. Wanted the back to be adjustable, meaning, when you are working from underneath you would have to do a sit up while your arms are extended. I'll loose some low clearance with my idea but it is for mainly working on higher sitting things like my Truck. For lower stuff I'll use a standard creeper. Will try to keep it low budget but won't sacrifice strength to do so. Lets see what we can come up with. |
| 30558 Visits
128 Images
Gallery Album | |
|
 | 10.
Dodge Brake install/adjustment | This is a step by step album on how to disassemble, rebuild and adjust the brakes on Dodge M37, 3/4 WC and 1946 - 1968 Power Wagons. |
| 12487 Visits
39 Images
Gallery Album | |
|
 | 11.
2016 Car Shows Pics from different car shows I went to in 2016.
Here is a link to online videos on YouTube done By Go4rider. He does a really good job at it. https://www.youtube.com/channel/UCJNL6Nz8jIaDqnW3JYAegvA/videos |
| 47795 Visits
483 Images
Gallery Album | |
|
 | 12.
2017 Car Shows Pics from different car shows I went to in 2017.
Here is a link to online videos on YouTube done By Go4rider. He does a really good job at it. https://www.youtube.com/channel/UCJNL6Nz8jIaDqnW3JYAegvA/videos |
| 7701 Visits
2065 Images
Gallery Album | |
|
 | 13.
2018 Car Shows Pics from different car shows I went to in 2018.
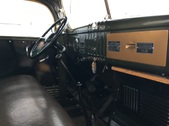
Here is a link to online videos on YouTube done By Go4rider. He does a really good job at it. https://www.youtube.com/channel/UCJNL6Nz8jIaDqnW3JYAegvA/videos |
| 10403 Visits
2761 Images
Gallery Album | |
|
 | 14.
2019 Car Shows Pics from different car shows I went to in 2019.
Here is a link to online videos on YouTube done By Go4rider. He does a really good job at it. https://www.youtube.com/channel/UCJNL6Nz8jIaDqnW3JYAegvA/videos |
| 38808 Visits
5318 Images
Gallery Album | |
|
 | 15.
2020 Car Shows Pics from different car shows I went to in 2020.
Here is a link to online videos on YouTube done By Go4rider. He does a really good job at it. https://www.youtube.com/channel/UCJNL6Nz8jIaDqnW3JYAegvA/videos |
| 3846 Visits
3242 Images
Gallery Album | |
|
 | 16.
2021 Car Shows Pics from different car shows I went to in 2021.
I apologize for all of them being mixed up and some Lost. Image Event refuses to restore them or respond to any inquires. They constantly have internal issues and their customer service has been very disappointing.
Here is a link to online videos on YouTube done By Go4rider. He does a really good job at it. https://www.youtube.com/channel/UCJNL6Nz8jIaDqnW3JYAegvA/videos |
| 5017 Visits
4606 Images
Gallery Album | |
|
 | 17.
2022 Car Shows Pics from different car shows I went to in 2022.
Here is a link to online videos on YouTube done By Go4rider. He does a really good job at it. https://www.youtube.com/channel/UCJNL6Nz8jIaDqnW3JYAegvA/videos |
| 55140 Visits
3666 Images
Gallery Album | |
|
 | 18.
2023 Car shows. Pics from different car shows I went to in 2023.
Here is a link to online videos on YouTube done By Go4rider. He does a really good job at it. https://www.youtube.com/channel/UCJNL6Nz8jIaDqnW3JYAegvA/videos |
| 6831 Visits
3450 Images
Gallery Album | |
|
 | 19.
2024 car shows Pics from different car shows I went to in 2024.
Here is a link to online videos on YouTube done By Go4rider. He does a really good job at it. https://www.youtube.com/channel/UCJNL6Nz8jIaDqnW3JYAegvA/videos |
| 6569 Visits
4418 Images
Gallery Album | |
|
 | 20.
2025 Car Shows | Here is a link to online videos on YouTube done By Go4rider. He does a really good job at it. https://www.youtube.com/channel/UCJNL6Nz8jIaDqnW3JYAegvA/videos |
| 6369 Visits
3849 Images
Gallery Album | |
|
 | 21.
2026 Car Shows Here is a link to online videos on YouTube done By Go4rider. He does a really good job at it.
https://www.youtube.com/channel/UCJNL6Nz8jIaDqnW3JYAegvA/videos |
| 960 Visits
186 Images
Gallery Album | |
|
 |
|
 | 23.
GMC S-15 | Out of High school I wanted a mini 4x4 truck. Had my heart set on a Toyota till I tried to sit in one. Didn't fit so plan B. A family friend rebuilt totals and I ask him to keep his eyes open and let me know if he found anything. He called a while later and said he found a 1985 s 15 4x4 shortbed and we went back to look. Decided to get it so here it is. |
| 5086 Visits
27 Images
Gallery Album | |
|
 | 24.
House redo, garage & furnace house | This is an album of redoing the house and heating system install, adding an attached garage and building a furnace house to put the wood and stove in. Lots of tile and groundwork had to be done so follow along. |
| 19117 Visits
416 Images
Gallery Album | |
|
 | 25.
2007 Iowa Rally | These are a few pics of the Power Wagon Rally I attended in 2007 in Fairfield, Iowa. If you see a truck whom you know the owner of, let me know and I'll add it. Either email me or add it in a comment and I'll put it in. If you wish to remain nameless, let me know and I'll remove the information. If mistakes are made please inform me. |
| 11014 Visits
79 Images
Gallery Album | |
|
 | 26.
Mid 90's Four wheel Indy Jamboree | Can't remember the exact year of this Indy show. First national I attended and was blown away. |
| 5741 Visits
24 Images
Gallery Album | |
|
 | 27.
Misc Truck pics. | An album of trucks I've taken pics or gotten pics of. |
| 5292 Visits
47 Images
Gallery Album | |
|
 | 28.
2001 Iowa Rally | These are a few pics of the Power Wagon Rally I attended in 2001 in Fairfield, Iowa. If you see a truck whom you know the owner of, let me know and I'll add it. Either email me or add it in a comment and I'll put it in. If you wish to remain nameless, let me know and I'll remove the information. If mistakes are made please inform me. |
| 3730 Visits
18 Images
Gallery Album | |
|
 | 29.
1999 Iowa Power Wagon Rally | These are a few pics of the first Rally I attended in 1999 in Fairfield, Iowa. If you see a truck whom you know the owner of, let me know and I'll add it. Either email me or add it in a comment and I'll put it in. If you wish to remain nameless, let me know and I'll remove the information. If mistakes are made please inform me. |
| 4850 Visits
22 Images
Gallery Album | |
|
 | 30.
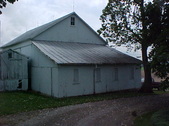
Building the Shop | This is an album of the building of my shop and doing the fence and driveway. Follow along on process. |
| 13191 Visits
78 Images
Gallery Album | |
|
 |
|
 | | 32.
shoulder | 1868 Visits
6 Images
Gallery Album | |
|
 | 33.
Our Family cabin in the woods. | This is an album about our family cabin. It was out by the road, behind the newer home and was in pretty bad disrepair when dad got ownership from his Father. The cabin was the original house and when they decided they wanted a newer, bigger home, they just built in front of it. They left the cabin there and used it as a wash house first, then as a storage for coal. Dad decided he wanted to move it back into the woods and repair it for family get togethers and such. Dad and I worked to clear the small brush and junk trees from a section of woods. Let me be clear on this. Dad did most of the work himself. I helped when I could along with our longtime neighbor who put a good bit of time in as well. He was Dad and I's wood cutting partner early on as he had a truck. Other friends pitched in for a few things as well but the credit goes to Dad. He was retired and enjoyed the process so here are some pics along the way and the finished result. Some of the pics may not be the best quality but they are scans and all we have of it. This was over a span of a few years and you'll see the seasons change as progress was made. |
| 35167 Visits
127 Images
Gallery Album | |
|
 |
|
 |
|
 | 36.
Wood lifter | A family friend gave me this jack and decided to use it to make a log lifter for the stove. Normally not a big deal as if I can pick it up, I'll burn it. This year I'm going to have shoulder surgery and be one armed through most of the heating season so I needed to come up with something before then. I had loaded the furnace house prior to all this and have 15 cord in there. Didn't want to bother family and friends to load so this is why I'm doing this. Don't want to modify the jack that it can't be put back and used normally so we'll see what we can come up with. |
| 5098 Visits
35 Images
Gallery Album | |
|
 | 37.
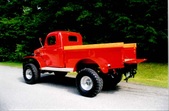
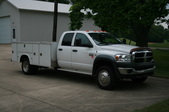
Wood hauler build | Time to finally build my wood hauling truck. Have some ideas that I've been kicking around in my head to make it easy/nicer so we'll see if they all pan out. Wanted the best base I could get so after about 5 years of looking for it, I finally found one. Wanted a bullet proof chassis and the best I know of is the Chevy Square body 1 ton 4x4. Here we go and lets get busy. |
| 9388 Visits
949 Images
Gallery Album | |
|
 | 38.
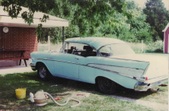
57 Chevy | This is the first car I bought. I started looking when I was 11 years old. Watched the ads and saved my money. Dad took me to look at several but everything in my price range was bad rust wise. Ohio is really hard on cars. When I was 13 I found this one for $750.00. It had been side swiped in front of the guys house and the driver never stopped. owner had no insurance so decided to sell it. |
| 6279 Visits
46 Images
Gallery Album | |
|
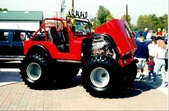
 | 39.
2016 4WD Jamboreee at Indianapolis | Got invited to go to the 4-WHEEL JAMBOREE NATIONALS in Indianapolis, Indiana by Fram Filters. They ask me to be in their booth and had a lot of people all day stopping by. Loads of trucks there and something to see if you are into trucks.. |
| 7366 Visits
99 Images
Gallery Album | |
|
 | 40.
Fence spinner | Here is the build of the making of a wire spinner. It can be used to wind up other things as well but I have high tensile wire fence. When you build it or repair you need something that will allow you to unspool the wire. I never cared for the ones they sell so lets get to making it. |
| 5019 Visits
46 Images
Gallery Album | |
|
 | 41.
Small projects | This is an album of little projects and fixes for problems that arise. Always try to come up with something that will last and will make things easier to do. |
| 2529 Visits
20 Images
Gallery Album | |
|
 | 42.
Asphalt Outlaws trophy | Went to a Car show that was put on by a local club. Super nice people and one of the better shows I have ever attended. I ended up winning best of show and the rule is that if you win that award, the next year you have to make the trophy for the next years show. No real rules but they want it to be made by the winner and incorporate the vehicle theme. Here is the build of what I did. |
| 26953 Visits
138 Images
Gallery Album | |
|
 | 43.
Surface grinder | This is my Reid Surface grinder I got from an Ebay auction years ago. I put a prayer bid on it and ended up winning as no else bid. They had quite a few of them and they were going pretty high but for some reason no bid and I got VERY lucky. Thye weren't real thrilled when I came to pick it up as it was complete with spindle. It was dirty and I tore it completely down and was REAL surprised. All the ways and Gibs still had all the original scrapping in very good shape. Basically no wear at all. Fixed a few broken oil springs and lube everything up. Painted it and has been a nice piece for me. I added a suction system and digital readout. Didn't have a chuck or dresser but I added those too |
| 5112 Visits
37 Images
Gallery Album | |
|
 | 44.
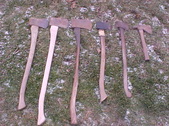
Saws | All the saws in the stable |
| 0 Visits
58 Images
Shared Album w/ Pass  | |
|
 | 45.
Depth Gauge/Raker Grinding Fixture | This is the making of the Fixture to grind Depth Gauge or Rakers on chainsaw chain to equal depths and easier. I've done it by hand for years bur wanted something that would make this job easier and better at the same time. I have a surface grinder here at home and will use that as the way to grind. the fixture will just hold the chain and be adjustable for any chain out there. |
| 13963 Visits
144 Images
Gallery Album | |
|
 | 46.
Century Farm sign build | Our homeplace has been in our family for over 100 years now. Ohio has a program that recognizes farms that have a 100 year tradition and make available signs stating that. Wanted to make something that would last with no maintenance and look nice at the same time. Here is what I came up with. |
| 8864 Visits
82 Images
Gallery Album | |
|
 | 47.
Saw keeper and length guide This is a little project that has turned out to be very simple to do and very handy. keeps the saws from sliding around in the back of the bed and holding folds up and stores in minimal space. Less than $30.00 and a few hours to do.
Also made up a length guide that attaches to any saws bar. This keeps them uniform in length when doing large rounds. Some times my eye gets off when you start cutting 3 ft plus diameter logs. |
| 4926 Visits
28 Images
Gallery Album | |
|
 | 48.
conveyor | This is an album of the build up for a wood conveyor. Bought the conveyor itself from a Kmart that was going out of business. I want to use it to make loading and unloading a little easier. Want to put some other features into it that will make it more versatile to use it for more things too so here we go! |
| 54596 Visits
406 Images
Gallery Album | |
|
 | 49.
EAB cleanup | Here is an album of the clean up project at my place. EAB (European Ash Bore) has or will kill all the ash trees around here. The small woods behind my home was mainly ash so it is devastated. It had also been overgrown with honeysuckle which we had not been taking care of. I will now get rid of the stuff and clean up all the dead ash on the ground. That way I can leave the standing dead till I have room for them here. I will seed grass and when the dead are out I will replant some trees so there is something up there. If I plant now I'm afraid of smashing them when felling what's left. |
| 6374 Visits
70 Images
Gallery Album | |
|
 | 50.
Wood Cart | Here's an album on how I rebuilt my little woodcart to stand up to the weight it hauls. Put about a 1/4 of a cord on it at a time so it can be around 1000 lbs. |
| 6934 Visits
48 Images
Gallery Album | |
|
 | 51.
Wood Gathering, hauling and such | This is just a place to store pics of the wood gathering. Whether it be cutting, splitting, chipping, hauling ,loading, oddities or what have you. |
| 21186 Visits
395 Images
Gallery Album | |
|
 | 52.
2014 Iowa Rally | Pics of the rally. A great time and if you never have been to one you need to attend. They are addictive though! |
| 12122 Visits
62 Images
Gallery Album | |
|
 | 53.
Ron in Indiana 2014 rally Ron hosted a get together and had quite a few trucks of various Dodge lineage. Great to see old friends and faces to catch up. Made some new ones as well!
Many thanks to Ron and the "crew" for the time invested and all the great food. Special thanks to Rons son and grandkids for helping me out with a wiring problem I had.
One highlight for me was to see Michael Verst's 4 door Power Wagon in person. Top notch in every detail and such an awesome thing to see in living color. |
| 2976 Visits
12 Images
Gallery Album | |
|
 | | 54.
61 chevy | 5520 Visits
29 Images
Gallery Album | |
|
 | | 55.
Storm | 4375 Visits
32 Images
Gallery Album | |
|
 | 56.
wood chipper Decided it was time to a medium size chipper to smaller jobs around the farms. We need something that will chip up the smaller limbs as we cut and use most everything over 2 inches in diameter. When we clean fencerows and such we'll burn those. When a single tree or large branch falls in a field it will be a lot nicer to chip it and blow it in the fencerow where a bush hog will spread it out. A plus will also be with other cleanups I can simply blow in the back of a truck to save hours of limb dragging or multible brush loads with the truck.
I wanted a PTO powered version with a power infeed system. Did some comparing of different ones and decided on a WoodMaxx. It will handle up to 8 inch material, which is more than I need but it's nice to have the option! Should be a strong unit that will last. Here is a review and how it is working for us. |
| 7115 Visits
54 Images
Gallery Album | |
|
 | 57.
Redoing barns | Some pics of fixing up the barns and such at the house. |
| 1689 Visits
574 Images
Gallery Album | |
|
 | 58.
Interior | The interior is the only thing I'm not tackling myself. I wanted leather and do not have a sewing machine so I left it to someone else. I'll never make that mistake again. |
| 5482 Visits
40 Images
Gallery Album | |
|
 | | 59.
5500 | 10671 Visits
121 Images
Gallery Album | |
|
 | 60.
wood splitter This is a log (pun intended) of my wood splitter build. Yes, Wood (pun intended) have been easier to just buy one but I wanted one that fits the way we work our wood and no one currently offers anything like it. Me and my dad use wood as our total heat sources and have done so for over 30 years now.
We currently have a self contained, fixed, horizontal homemade that Dad made and has been strengthened over the years. The other splitter is 3 point that someone else made that has been rebuilt so I've learned from these what I want. the 3 point is nice as you can lay it on the ground for the big ones.
With this splitter I want to get rid of the straining and a lot of the bending over. If you split a lot you day dream a lot about, "hey, it would be better if....." That's where a lot of these ideas came from.
Not saying this is the way everyone should do it, it just suits our needs and I'll try to give some tips along the way to help others. Here we go! |
| 65175 Visits
466 Images
Gallery Album | |
|
 | 61.
For Sale This album is for stuff I have for sale. All the items do NOT include the shipping. It will be actual but if you see something you want, send me your zip code so I can get a quote for you. Also let me know if you want insurance, I can't be responsible for Post office damage or loosing it. I've never had a problem in the past but it is up to you.
Things go out in order of emails. You can reach me at kjfoust@juno.com If you have questions or would like close up pics, let me know and I'll get it done. Thanks, Kevin |
| 6237 Visits
6 Images
Gallery Album | |
|
 | 62.
1941 Dodge WC40 Truck Build This is an album showing how things were made and assembled during the rough build of this truck. First off, I'm not a pro builder and worked on this project in my spare time. It took over 13 years and somewhere close to 3000 hours to do. I may be slow but I don't give up!
I got into working with stainless steel out of my frustration with chrome. Paying what it costs and having it last a short time were the main problems. In making copies of parts I can control the quality and it WILL last. I've always liked figuring out how to make things and most would be surprised about how some of the things were made. It's the end product that matters!
When I started the planning of this project I wanted to use all Dodge. My wish list was to have V8 power and upgraded axles to handle bigger tires. Power steering and brakes to stop the thing were important as well. I spent over 1 month taking measurements from over 12 different trucks, 8 Dodges, 3 Chevys and one Ford. My Goal was to have as little of the frame hanging down when looking from the side. I wanted to make it look like it was made to be together and not some cobbled afterthought.
As much as I didn't want to, a 1978 Chevy 1 ton was by FAR the clear cut winner. To me, it looks more factory than the original frame as all the curves and lines lend themselves to just plain working better.
In the future I'm going to do 2 more trucks and they will be basically stock. I have another 1941 WC 1/2 ton closed cab 4x4 and a 1961 WM300 Power Wagon waiting in the wings. |
| 22273 Visits
139 Images
Gallery Album | |
|
 | 63.
Hood Latches and Hood Work | I decided to make a set of hood latches. The originals were all rusty and worn so something was going to needed to be done. I wanted them to operate smoothly so I used poly washers on the shafts to help with that |
| 4476 Visits
28 Images
Gallery Album | |
|
 | 64.
Windshield Wiper Hardware | My original wiper hardware was all pitted out. Hard to find good ones and chroming would be $$ so I'll make them too. |
| 1743 Visits
12 Images
Gallery Album | |
|
 | 65.
Windshield Frame Hardware. I decided to try and make all the slide hardware for the windshield frame. I say try as this would take some pretty serious tooling to get done. Some of this stuff was uncharted territory for me as I had never tried what I guess is called draw forming. All the sheet stainless shown here is 1/8 inch thick and takes some serious force to get it to move around.
Learned a lot here as well and mirror polishing these small pieces wasn't fun. |
| 2292 Visits
18 Images
Gallery Album | |
|
 | 66.
Headlight Ring Retainers. | These are the parts Dodge should have made. They made stainless headlight rings as an option for the 2WD trucks and Power Wagons but the retainers were all mild steel. Quickly rusted and always look out of place painted. I decided to make some dedicated tooling to make/sell these as I thought others might want them. To make them exactly like originals takes quite a few steps and jigs so follow along as I take you through it. I'm currently selling them for $40.00 a set(enough for one truck) |
| 2071 Visits
9 Images
Gallery Album | |
|
 | 67.
The Grill | This was the largest stainless project I did for the truck. Lots of bending here and lots of different methods were used. I thought if I could get the main curve bent I could do the rest of it so I started there. I went to a local fab shop and ask if they could bend 1/4" X 2" stainless on edge for me in a curve. They said they had a $150.00 set up fee and labor would go from there. They also stated the didn't know if they could even do it so I opted to try it myself. I would modify a roll bender I had bought. |
| 2906 Visits
24 Images
Gallery Album | |
|
 | 68.
The Back Window Screen | Up next was the back window screen. These were only on the military trucks and if you have four, recessed, threaded holes around your back window, you definitely have a military cab. Originals had the wire wrapped around the edges and I wanted a cleaner look. I decided to try to drill on a 45 degree angle and weld them flush like the grill headlight guards. follow along as I show how I got it done. |
| 2344 Visits
14 Images
Gallery Album | |
|
 | 69.
Inside Handles | This section is about how I made the inside door handles and window cranks. I liked the simple design of the door handles I had but the window cranks didn't seem to fit with them I don't know if they were stock or not but I don't believe so as they were chromed. Stock door handles were OD green and I'd assume the window cranks should have been the same. |
| 1956 Visits
11 Images
Gallery Album | |
|
 | 70.
Outside Mirrors | For this project I decided to copy the original mirrors that came on the truck. Really a slick design as the same pieces can be reversed to be used on either side. They are also fully adjustable so that makes it nice as well. I knew I couldn't stamp the arms like original so the were turned on a lathe from bar stock. Heavier for sure but no lines from being halved either. |
| 2402 Visits
15 Images
Gallery Album | |
|
 | 71.
Small Stainless Projects Thought I'd throw some of the smaller stuff in an album. I've always liked figuring out how to make things like the original pieces.
You learn from everything you do and pull from past experiences to do the more complicated stuff. Some things work while others take a few tries. I normally do test pieces in mild steel then go to the stainless.
People ask what I do for a living and when I tell them I work in a manufacturing plant they say, "Oh, that is why you can do this. You have all those machines you can use" I always tell them that most all this stuff was made at home with some pretty basic tools. What I DO have is the DESIRE to try and see it through. I have bought some machinery while doing this project which makes it easier but it CAN be done without them, just a little harder to do.
My lathe is from the 1800's and was originally driven by an overhead line shaft. I still do not have a mill at home but will sometiime in my lifetime. All I can say if you don't try, you'll never get anything done. |
| 2247 Visits
15 Images
Gallery Album | |
|
 | 72.
Cab Rotisserie and Mover This section is to show the Cab Rotisserie and mover I made. This made it a lot easier in doing this project and was well worth the effort as I'm sure it saved me a lot of grief.
I work mainly by myself and don't like bothering others for help. Did some planning and kept in my mind things I wanted to do with this and ways I could use it for other projects so some adjustability would be in order. Taking the cab off and on before and after paint was the key. I didn't want to scratch it all up and wanted it to be a SAFE way to do it. Enough weight here to put some hurt on you if things go wrong.
I'm not saying this is the best thing going, it's just what I came up with based on my needs and they have served me well. In looking back I wouldn't change anything in the design. |
| 7517 Visits
31 Images
Gallery Album | |
|
 | 73.
Frame Work and Springs The frame is going to be very visible on this truck so all unused holes will be welded shut and smoothed. It was shortened and both ends modified as well so that will all be worked out so you won't be able to see that anything was ever done.
I'm going to completely take it apart and paint everything piece by piece and then bolt it all together once painted. All brackets will be rounded and smoothed And bolted back together with polished, stainless fasteners. |
| 6414 Visits
46 Images
Gallery Album | |
|
 | 74.
Front and rear axle work With this truck being as high as it is I knew the undercarriage would be easy to see. During planning of this project I decided to fully detail the chassis/running gear.
With everything smoothed and painted I decided to do the same to the axles. Major undertaking as these are cast pieces and very rough. Lots of curves, recesses and pieces make it pretty involved so here we go. |
| 2994 Visits
22 Images
Gallery Album | |
|
 | 75.
Tie down hooks I debated on whether to even put these on the truck at all. My first plan was to use originals so I smoothed out a set and got them ready for paint. After painting the bedsides i could see it would be too much red with the hooks painted the same so I decided to try to make them out of stainless steel.
It would be pretty involved to turn these all out on my 1800's era metal lathe so I said if I could get the blanks all turned the same I'd give it a try.
I did some searching and was able to find someone willing to do it for me. I gave a friend my measurements and he drew up a CNC print which I gave to another operator who turned them up. Without them I would not have been able to do this so thanks goes out to Tom. Jimmy and Lynne for helping me on this one. |
| 4524 Visits
27 Images
Gallery Album | |
|
 | 76.
Chrome pieces This album is of the few chrome pieces I have on the truck. Chroming is the reason I got into making/using stainless steel parts in the first place. I like the look of chrome but got so disappointed with the quality of a lot of it and how it just doesn't last anymore. Let alone the price you have to pay to have it done.
I have used several different shops on this. I always take the extra step to mirror polish my stuff so that part of the quality equation is taken care of. If something is wrong there I know who to blame. It's basically a dip and go for the chromer and they like that.
The last shop I used I asked if they would give a discount if I mirror polished everything. He said he doesn't like doing that as sometimes people mess things up but he said go ahead and try a couple pieces and we'd go from there. I took a couple pieces in for my "trial" and I guess I passed his test as he said, "You can polish out anything you want." He has offered me a job everytime I have gone in since so I took that as a compliment.
I start by sandblasting the piece if rusty. Then grind it out if it's a sand cast piece. Hard to reach areas I'll use a Dynafile, Dremel, die grinder or modied soft backed sanding pads. Start with 80 grit and sometimes I'll go clear to 2000 grit before polishing.This part is VERY labor intensive and this is where a lot of labor charges normally come in on a rough piece. The parts basically look chromed before I take them in. |
| 4265 Visits
35 Images
Gallery Album | |
|
 | 77.
Taillights | For taillights i wanted them tucked under the truck as opposed to on the fenders. I wanted the turn signals not to be so obvious so I'm using Visibolts. I wanted to hide all the wiring too as I never liked seeing wires coming out. It just looks unfinished to me. Went to the drawing board and this is what I cam up with. |
| 1929 Visits
6 Images
Gallery Album | |
|
 | 78.
Rear fender rework (July 19, 2011)This was a hard decision. The rear fenders for these truck are pretty hard to find. The passenger side has a large recess for clearance for the spare tire. I knew I'd never mount a spare there so I deleted the cast holder. To have the dent there just wouldn't look right so I decided to take it out to look like the other side.
I have never claimed or profess to be a bodyman. My plan was to tap it out with as little filler as possible. In the hands of an experienced guy this probably would have been easy but it proved to be harder than I ever thought. As with all the stuff shown here, I'm NOT saying this is the best way to do this. It is just A way to get it done. |
| 6797 Visits
34 Images
Gallery Album | |
|
 | 79.
Cab The cab on this truck is what makes it pretty rare. Only 275 WC40 closed cabs were made and even less WC41's. The giveaway to them is the round, standardized gauges instead of Dodges normally odd rectangular ones.
I went to great pains not to modify this cab and have a total of less than 15 holes that weren't factory. I researched them and filled all the holes that people had added over the years. I did add a passenger side wiper that isn't correct for the Military as they only came with a drivers side. seat belts and seat base are the other holes added. I centered the steering column to the gauges without adding any holes, that took a while to plan out.
I was lucky to find this truck as it was rust free. It came out of Colorado and was amazing to me here in Ohio. Stuff is gone here in less than 10 years sometimes due to salt and humidity. Blew me away to be able to unbolt stuff nearly 70 years old and it not twist off.
I knew I had to do a lot of work because this thing had dents everywhere, Top of cab looked like the hauled telephone poles up there across a plowed field.. I had 12 layers of paint on it and at least 2 were brushed on.
The best thing I've found to strip off paint is Brite Strip wheels from Standard Abrasives. They are plastic and eat it right off with very little heat plus they cut the same from start to finish unlike gumming up sandpaper. Trust me, I tried a lot of different things. I strip the flat surfaces with the discs, then sandblast the nooks and crannies before doing the body work.
I made up a spinning jig that also doubles as a lift to install the cab. It mounts on the door hinges and latch area and is EXTREMELY nice to have when doing this. It enabled me to completely finish the bottom of the cab to the same standard as the outside.
This was another learn as you go thing as I had never done some of this before and was open to others ideas and suggestions. Learned a lot here. |
| 5588 Visits
30 Images
Gallery Album | |
|
 | 80.
Painting (July 19, 2011)I'm pretty much a rookie when it comes to painting so the experts will pick this apart but this is what worked for me. I've painted some tractors and one other truck. Some smaller jobs along the way as well but I do have a willingness to learn and open to ideas. I've never painted base clear before so this was totally new to me.
On the frame I was planning on powder coating at first. After calling/emailing the big name local company they basically blew me off with the questions I had. I can only imagine how I would be treated after they had their money if they were like this BEFORE they had it. Couple that with hauling all the stuff back and forth and some of the horror stories I heard about peeling and repair I decided to look for another option.
I decided to go with Acrylic Urethane in gloss black as I frame would be smoothed and finished like outer sheetmetal. There is a lot more steps to this stuff than I had done before and this is what the supplier said to do for a "keeper" to make it last.
For the black this is my order of work: Sandblast, do all welding/straighting/smoothing, resandblast, filler if needed, block out dry with 80 grit, rage/slicksand, block out dry with 150 grit, 2 coats of epoxy primer(no sand), 2 coats of sandable primer, block out wet with 400, wash and wipe down with tack rags repeatedly, 1 coat of sealer primer(epoxy with no sand), 2-3 coats of black acrylic urethane.
Red is the same up to the sealer. After sealer I put 3 coats of base(no sand), 3 coats of clear. After it cured out I block sand starting with wet 2000 grit and buff out. I waited a month till I started the Block sanding for buffing. Paint was harder to come off but you don't have to worry about shrinking. Like I said, Painting techniques vary from person to person. Find someone with a nice paint job and ask them how they did it and do what works for you. That's what I did.
Lots of work here and that is what makes a good, lasting paint job so expensive. The guys at the store were quick to ask whether this was a "turnover" or a keeper as some of these steps can be avoided. It's just depends on what your plans are and you need to map this out before trying it. I'd never consider this for a working or trailriding truck. |
| 2565 Visits
7 Images
Gallery Album | |
|
 | 81.
Final assembly (July 17, 2011)| This album shows the truck being put together and a little fab work that was done while doing so. Follow along as the puzzle comes together. |
| 16129 Visits
231 Images
Gallery Album | |
|
 | 82.
Finished Truck | Included here are pics of the truck completed. It's nice to see this project come together as this is what has been in my head all these years while working towards this goal. When I told people I was working on a military truck while making the parts, they couldn't see what I did. Now that it is done, most can. |
| 174445 Visits
1787 Images
Gallery Album | |
|
 | 83.
THANKS!!!! Hat's Off to You | Over the course of years in doing this project I've had some help and made a lot of new friends. I always like helping others with their "homework" projects and we tend to do favors for each other. I'm going to try to list all who have helped and if you see an omission on my part, let me know and I'll add it in. Thanks to all of you again and Hat's off to all of you! Kevin |
| 5404 Visits
71 Images
Gallery Album | |
|
 | 84.
Recommended Parts Sources and Suppliers | This is is a list of vendors and suppliers I used while doing this project that I'd recommend. I'm happy with what I got from them and their service. |
| 5745 Visits
63 Images
Gallery Album | |
|
