 | 76.
1941 Dodge WC40 Truck Build This is an album showing how things were made and assembled during the rough build of this truck. First off, I'm not a pro builder and worked on this project in my spare time. It took over 13 years and somewhere close to 3000 hours to do. I may be slow but I don't give up!
I got into working with stainless steel out of my frustration with chrome. Paying what it costs and having it last a short time were the main problems. In making copies of parts I can control the quality and it WILL last. I've always liked figuring out how to make things and most would be surprised about how some of the things were made. It's the end product that matters!
When I started the planning of this project I wanted to use all Dodge. My wish list was to have V8 power and upgraded axles to handle bigger tires. Power steering and brakes to stop the thing were important as well. I spent over 1 month taking measurements from over 12 different trucks, 8 Dodges, 3 Chevys and one Ford. My Goal was to have as little of the frame hanging down when looking from the side. I wanted to make it look like it was made to be together and not some cobbled afterthought.
As much as I didn't want to, a 1978 Chevy 1 ton was by FAR the clear cut winner. To me, it looks more factory than the original frame as all the curves and lines lend themselves to just plain working better.
In the future I'm going to do 2 more trucks and they will be basically stock. I have another 1941 WC 1/2 ton closed cab 4x4 and a 1961 WM300 Power Wagon waiting in the wings. |
| 24918 Visits
139 Items
Gallery Album | |
|
 | 77.
Hood Latches and Hood Work | I decided to make a set of hood latches. The originals were all rusty and worn so something was going to needed to be done. I wanted them to operate smoothly so I used poly washers on the shafts to help with that |
| 5010 Visits
28 Items
Gallery Album | |
|
 | 78.
Windshield Wiper Hardware | My original wiper hardware was all pitted out. Hard to find good ones and chroming would be $$ so I'll make them too. |
| 2008 Visits
12 Items
Gallery Album | |
|
 | 79.
Windshield Frame Hardware. I decided to try and make all the slide hardware for the windshield frame. I say try as this would take some pretty serious tooling to get done. Some of this stuff was uncharted territory for me as I had never tried what I guess is called draw forming. All the sheet stainless shown here is 1/8 inch thick and takes some serious force to get it to move around.
Learned a lot here as well and mirror polishing these small pieces wasn't fun. |
| 2689 Visits
18 Items
Gallery Album | |
|
 | 80.
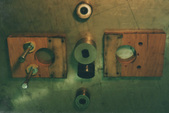
Headlight Ring Retainers. | These are the parts Dodge should have made. They made stainless headlight rings as an option for the 2WD trucks and Power Wagons but the retainers were all mild steel. Quickly rusted and always look out of place painted. I decided to make some dedicated tooling to make/sell these as I thought others might want them. To make them exactly like originals takes quite a few steps and jigs so follow along as I take you through it. I'm currently selling them for $40.00 a set(enough for one truck) |
| 2294 Visits
9 Items
Gallery Album | |
|
 | 81.
The Grill | This was the largest stainless project I did for the truck. Lots of bending here and lots of different methods were used. I thought if I could get the main curve bent I could do the rest of it so I started there. I went to a local fab shop and ask if they could bend 1/4" X 2" stainless on edge for me in a curve. They said they had a $150.00 set up fee and labor would go from there. They also stated the didn't know if they could even do it so I opted to try it myself. I would modify a roll bender I had bought. |
| 3284 Visits
24 Items
Gallery Album | |
|
 | 82.
The Back Window Screen | Up next was the back window screen. These were only on the military trucks and if you have four, recessed, threaded holes around your back window, you definitely have a military cab. Originals had the wire wrapped around the edges and I wanted a cleaner look. I decided to try to drill on a 45 degree angle and weld them flush like the grill headlight guards. follow along as I show how I got it done. |
| 2510 Visits
14 Items
Gallery Album | |
|
 | 83.
Inside Handles | This section is about how I made the inside door handles and window cranks. I liked the simple design of the door handles I had but the window cranks didn't seem to fit with them I don't know if they were stock or not but I don't believe so as they were chromed. Stock door handles were OD green and I'd assume the window cranks should have been the same. |
| 2157 Visits
11 Items
Gallery Album | |
|
 | 84.
Outside Mirrors | For this project I decided to copy the original mirrors that came on the truck. Really a slick design as the same pieces can be reversed to be used on either side. They are also fully adjustable so that makes it nice as well. I knew I couldn't stamp the arms like original so the were turned on a lathe from bar stock. Heavier for sure but no lines from being halved either. |
| 2666 Visits
15 Items
Gallery Album | |
|
