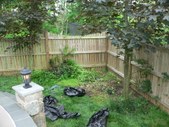
 May 18, 2008. Our "before" picture. The back of the yard was always a mess and wasn't used for anything. It was a blank canvas waiting for a checkbook to open. May 18, 2008. Our "before" picture. The back of the yard was always a mess and wasn't used for anything. It was a blank canvas waiting for a checkbook to open.
| 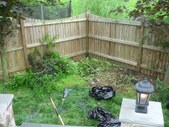 We're thinking a nice stone bar and patio area instead of the weeds and mud. It shouldn't be too much work - after all, the area is relatively level already... We're thinking a nice stone bar and patio area instead of the weeds and mud. It shouldn't be too much work - after all, the area is relatively level already...
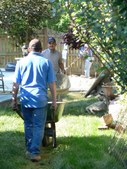
| 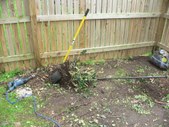 The cleanup begins. I used a power saw and breaker bar to coerce some stumps out of the ground in prep for the patio excavation. The cleanup begins. I used a power saw and breaker bar to coerce some stumps out of the ground in prep for the patio excavation.
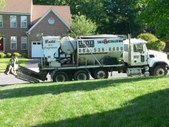
|  May 22, 2008. First sign of tangible progress - a dumpster for hauling out dirt. I would have never guessed so much dirt had to go. May 22, 2008. First sign of tangible progress - a dumpster for hauling out dirt. I would have never guessed so much dirt had to go.
|
 May 22, 2008. Oh crap. The excavation uncovered a confusing maze of sprinkler system pipes that were too high (in fact now standing in mid-air). May 22, 2008. Oh crap. The excavation uncovered a confusing maze of sprinkler system pipes that were too high (in fact now standing in mid-air).
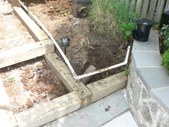
| 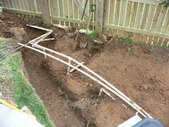 The pipes are in the way of the patio and have to be moved. The pipes are in the way of the patio and have to be moved.
|  | 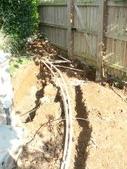 I dug trenches for the new piping. I dug trenches for the new piping.
|
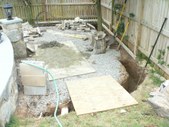
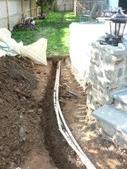 | 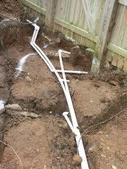 I then replumbed all the pipes that were up in the air - 135ft of new pipe was used. It doesn't look like much less of a mess, but it is low enough to go under the gravel and patio. I then replumbed all the pipes that were up in the air - 135ft of new pipe was used. It doesn't look like much less of a mess, but it is low enough to go under the gravel and patio.
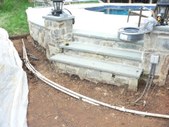
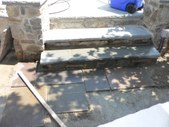
|  While the backyard was being worked on, the steps from the pool deck up to the front of the house were knocked out due to settling. These would be re-poured when the new patio concrete was poured. While the backyard was being worked on, the steps from the pool deck up to the front of the house were knocked out due to settling. These would be re-poured when the new patio concrete was poured.
| 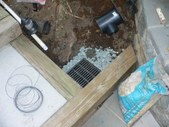 While I had access under the steps, I installed a new drain that ties into the pool deck drains - when it rained hard in the past, the mulch used to wash down and clog the deck drains, causing flooding in the basement. Our solution was to install a drain basin and re-landscape with river rocks instead of mulch on this side. While I had access under the steps, I installed a new drain that ties into the pool deck drains - when it rained hard in the past, the mulch used to wash down and clog the deck drains, causing flooding in the basement. Our solution was to install a drain basin and re-landscape with river rocks instead of mulch on this side.
|
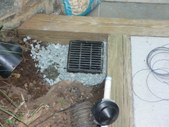 Hopefully, this means no more sprinting to the basement to see if we're flooding during monsoon season. Hopefully, this means no more sprinting to the basement to see if we're flooding during monsoon season.
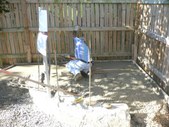
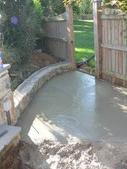
|  May 27, 2008. Excavation is done, gravel is down, and the bar wall footer has been poured. May 27, 2008. Excavation is done, gravel is down, and the bar wall footer has been poured.
| 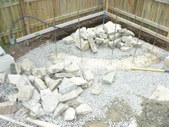 |  You can see the deep footers for the patio - lots of dirt had to go and lots of concrete would have to go in. Did I say earlier that this should be an easy job? You can see the deep footers for the patio - lots of dirt had to go and lots of concrete would have to go in. Did I say earlier that this should be an easy job?
|
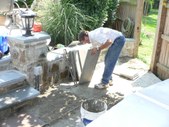
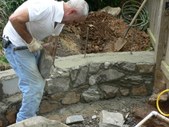 Liberto is the stone-mason who built the bar and retaining walls. Liberto is the stone-mason who built the bar and retaining walls.
|  May 28th, 2008. Finally, the concrete truck is here. May 28th, 2008. Finally, the concrete truck is here.
|  Footers around the patio, plus the patio and the stairs required a full truck. Lots of wheelbarrow trips to bring it all to the back yard. Footers around the patio, plus the patio and the stairs required a full truck. Lots of wheelbarrow trips to bring it all to the back yard.
| 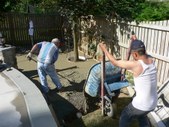 The pour is underway. The pour is underway.
|
 |  |  |  |
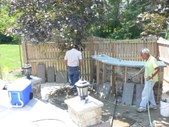
 August 4, 2008. Liberto is back to install the 2" bluestone bar top and build another small retaining wall. August 4, 2008. Liberto is back to install the 2" bluestone bar top and build another small retaining wall.
| 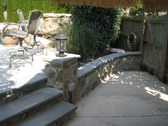 The semi-finished product. The wall is finished and the cap stone has been installed. It blends in well with the existing bluestone and light post. The semi-finished product. The wall is finished and the cap stone has been installed. It blends in well with the existing bluestone and light post.
| 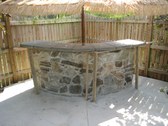 The almost-complete bar. Scaffolding is still attached to hold up the heavy bluestone top while the mortar dries. The almost-complete bar. Scaffolding is still attached to hold up the heavy bluestone top while the mortar dries.
| 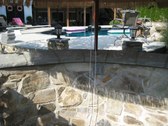 View from behind the bar towards the pool and house. View from behind the bar towards the pool and house.
|
 August 6, 2008. Liberto and his helper are preparing to put down flagstone on the concrete patio. August 6, 2008. Liberto and his helper are preparing to put down flagstone on the concrete patio.
|  |  A bit more than 300sf of flagstone was used to cover the new bar-area patio. A bit more than 300sf of flagstone was used to cover the new bar-area patio.
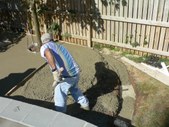
|  View from the deck down to the new bar area. I'll try to get a better shot when everything is finally done. View from the deck down to the new bar area. I'll try to get a better shot when everything is finally done.
|
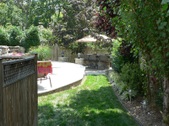 | 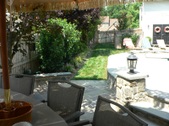 |  Some color really brings out the tropical feel. Some color really brings out the tropical feel.
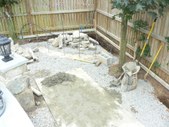
| 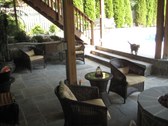 We tried to use materials that tied the new patio in with our other patio area, just off the walkout basement and and under a covered deck. We tried to use materials that tied the new patio in with our other patio area, just off the walkout basement and and under a covered deck.
|
