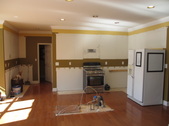
 Day 1. The kitchen is 18 years old and needs a facelift. But it's getting more of an organ transplant. Day 1. The kitchen is 18 years old and needs a facelift. But it's getting more of an organ transplant.
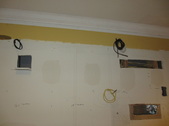
The kitchen has been cleaned out and we are ready for the installers to arrive.
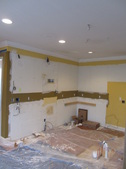
| 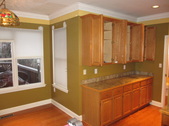 Installation of new two-piece crown throughout the kitchen and family room has just been completed. Wanted to get the new crown up before the new cabinets are installed. Installation of new two-piece crown throughout the kitchen and family room has just been completed. Wanted to get the new crown up before the new cabinets are installed.
| 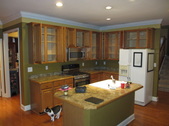 The cabinets are in good shape. We donated them to Habitat for Humanity for use in one of their project homes. Glad to recycle and help another family out. The cabinets are in good shape. We donated them to Habitat for Humanity for use in one of their project homes. Glad to recycle and help another family out.
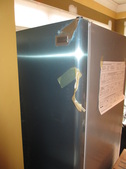
That old white fridge is really ugly!
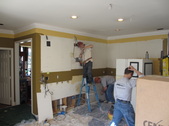
| 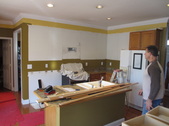 Demolition has begun! Demolition has begun!
|
 |  Believe me, it takes much less time to make a kitchen disappear than to make it reappear! Believe me, it takes much less time to make a kitchen disappear than to make it reappear!
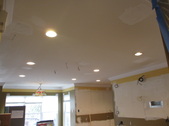
|  Electricians are on site. We had four trucks out front for a day and half. They ran a couple of new circuits down to the panel in the basement, installed seven new recess cans in the ceiling, moved a bunch of switches, and ran wiring for power and dimmers for the over and under cabinet lighting. Electricians are on site. We had four trucks out front for a day and half. They ran a couple of new circuits down to the panel in the basement, installed seven new recess cans in the ceiling, moved a bunch of switches, and ran wiring for power and dimmers for the over and under cabinet lighting.
| 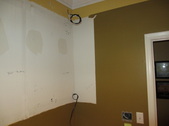 |
 Collateral damage from wiring Collateral damage from wiring
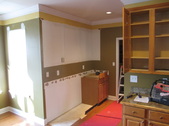
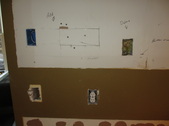
|  | 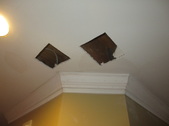 Prepare for your walls and ceiling to look like swiss cheese - no remodel is complete without lots of holes everywhere. Prepare for your walls and ceiling to look like swiss cheese - no remodel is complete without lots of holes everywhere.
| 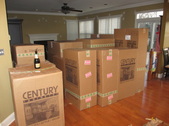 Cabinets have arrived. Pop the bubbly - progress is always worth celebrating! Cabinets have arrived. Pop the bubbly - progress is always worth celebrating!
|
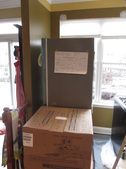 The counter-depth fridge and dishwasher have arrived The counter-depth fridge and dishwasher have arrived
|  |  The new lighting is working The new lighting is working
|  We added some additional recess lighting in the family room at the same time. Required rewiring a 5 gang switch - no problem for the pros We added some additional recess lighting in the family room at the same time. Required rewiring a 5 gang switch - no problem for the pros
|
 More new lighting More new lighting
|  These three switches are new; they had to be moved from beside the fridge, which will be hidden in an enclosure. They control the overhead recess lighting in the kitchen, the sink spotlight, and the pendants. All on dimmers. These three switches are new; they had to be moved from beside the fridge, which will be hidden in an enclosure. They control the overhead recess lighting in the kitchen, the sink spotlight, and the pendants. All on dimmers.
|  In this pic, the sink spot and the pendant boxes are stubbed out; won't install until island is reconstructed and countertops are installed In this pic, the sink spot and the pendant boxes are stubbed out; won't install until island is reconstructed and countertops are installed
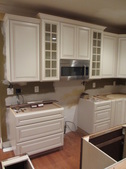
| 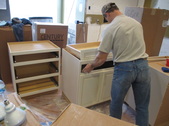 Some cabinets being prepared Some cabinets being prepared
|
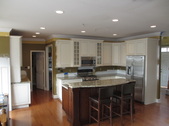
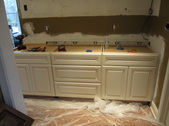 Kitchen cabinets are antique white with a brown glaze Kitchen cabinets are antique white with a brown glaze
|  |  Some of the crown has gone up Some of the crown has gone up
|  |
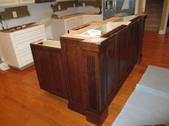
 |  | 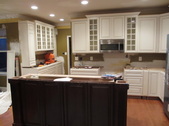 The island is taking shape. It's two levels, and we went with a contrasting color - it's not really as dark as it appears The island is taking shape. It's two levels, and we went with a contrasting color - it's not really as dark as it appears
| 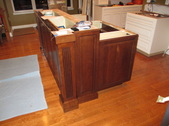 This is a better representation of the island color This is a better representation of the island color
|
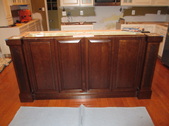 The island has 60 inches of cabinets integrated into the front. It is larger than the old island and we splurged on high-end cabinets and trim to make it look like a piece of furniture. The island has 60 inches of cabinets integrated into the front. It is larger than the old island and we splurged on high-end cabinets and trim to make it look like a piece of furniture.
|  | 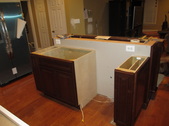 Sink will be on left; dishwasher to the right Sink will be on left; dishwasher to the right
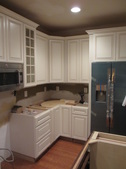
| 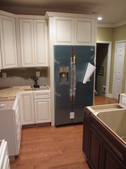 Fridge has been connected and rolled back. Still waiting on some fluting for the left and right sides of the enclosure frame. Fridge has been connected and rolled back. Still waiting on some fluting for the left and right sides of the enclosure frame.
|
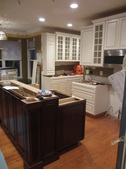 Waiting on countertops Waiting on countertops
| 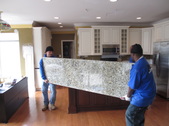 End of week three of construction. Granite has arrived! We chose a Santa Cecilia Napoli. It has creams and browns and some black. It also has wine colored amethyst sprinkled throughout. End of week three of construction. Granite has arrived! We chose a Santa Cecilia Napoli. It has creams and browns and some black. It also has wine colored amethyst sprinkled throughout.
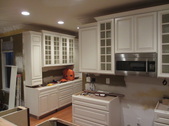
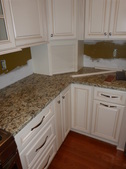
|  Granite countertops have been installed. We used a formal Ogee profile on the bar top, and a complementary waterfall edge on the cook and buffet tops. Granite countertops have been installed. We used a formal Ogee profile on the bar top, and a complementary waterfall edge on the cook and buffet tops.
| 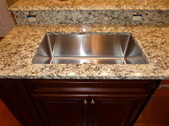 Kraus 30 inch, single bowl, stainless sink. The right-hand outlet includes switch for disposal. The island has nine inch slide out drawers at each end; one for cleaning supplies, one for baking pans. Kraus 30 inch, single bowl, stainless sink. The right-hand outlet includes switch for disposal. The island has nine inch slide out drawers at each end; one for cleaning supplies, one for baking pans.
|
 After granite install, cabinets need to be lowered to surface. After granite install, cabinets need to be lowered to surface.
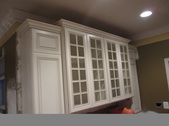
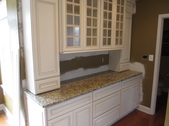
|  Stainless hardware has been installed. Appliance garage is a work in progress. Some of the light rail will have to be custom fitted around the garage, and the cabinet maker is working on some panels to dress it up a bit. Stainless hardware has been installed. Appliance garage is a work in progress. Some of the light rail will have to be custom fitted around the garage, and the cabinet maker is working on some panels to dress it up a bit.
| 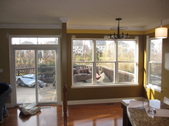 These are the old builder slider and windows in the kitchen area. Say goodbye to the builder slider and windows! These are the old builder slider and windows in the kitchen area. Say goodbye to the builder slider and windows!
| 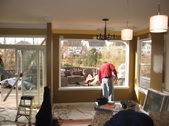 As part of the kitchen overhaul, we are replacing the 18 year old windows with a bay and french door. As part of the kitchen overhaul, we are replacing the 18 year old windows with a bay and french door.
|
