 enlarge 83KB, 640x480 enlarge 83KB, 640x480
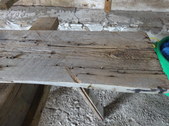
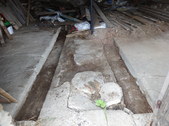
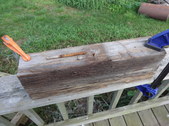
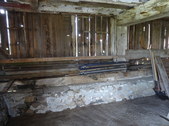
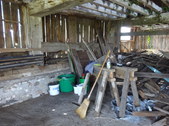
Aug. 16, 2017-day eight. My goal today is to clean the trenches on both sides of the center aisle to past the first bay and to de-nail some boards. Here is one with about 50 small old nails.
|  enlarge 109KB, 640x480 enlarge 109KB, 640x480
|  enlarge 79KB, 640x480 enlarge 79KB, 640x480
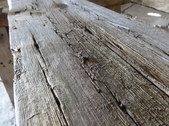
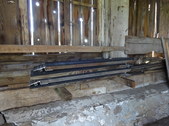
I have about another 45 min. on this and then I will de-nail a board and spend the rest of the day mowing.
|  enlarge 80KB, 640x480 enlarge 80KB, 640x480
3 boards finished
|
 enlarge 120KB, 640x480 enlarge 120KB, 640x480
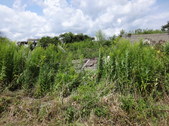
Aug. 15, 2017
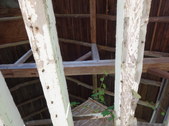
I hand cut all the ragweed and goldenrod back to some of the main barn beams to expose them
|  enlarge 112KB, 640x480 enlarge 112KB, 640x480
I cut most of the Sumac trees back to give the beams below to dry out
|  enlarge 87KB, 640x480 enlarge 87KB, 640x480
This has to be closed up by October 1st before the snow. Once we start getting the drifting snow the entire barn will be covered up to about 3' or drifts more and no access to the annex barn.
|  enlarge 124KB, 640x480 enlarge 124KB, 640x480
I got as much cut as possible but it was so hot I had to quit.
|
 enlarge 96KB, 640x480 enlarge 96KB, 640x480
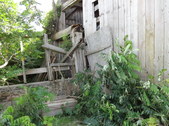
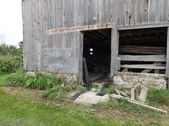
front of old barn to give access to beams
|  enlarge 70KB, 640x480 enlarge 70KB, 640x480
Day 6-Aug, 14, 2017
I worked 3.5 hours this morning and denailed and moved all the plywood I ripped off to the South West wall.
|  enlarge 85KB, 640x480 enlarge 85KB, 640x480
I de-nailed and stacked all the wide specialty pieces over the gate and swept up all the dirt and nails
|  enlarge 95KB, 640x480 enlarge 95KB, 640x480
I have 2 more bays to clear. This boards are 16-20' long and very heavy for me. All of this has to be sorted through and until the stands for the lumber are finished then this will be a long slog.
|
 enlarge 87KB, 640x480 enlarge 87KB, 640x480
The 4x6" x 16 ' beams hopefully will be picked up by the buyer this week.
|  enlarge 70KB, 640x480 enlarge 70KB, 640x480
I still have lots of dirt and pieces to dispose of, and will spend some time today hand cutting access to the larger beams where the old barn was
|  enlarge 63KB, 640x480 enlarge 63KB, 640x480
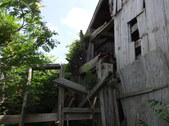
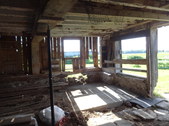
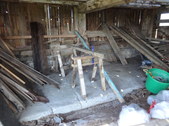
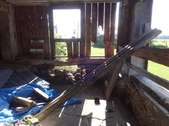
I still cannot get over how beautiful the upstairs is, and I hope it can be salvaged. Some of the roof truss' are just skinned logs from trees, and everything is pinned and notched.
|  enlarge 88KB, 640x480 enlarge 88KB, 640x480
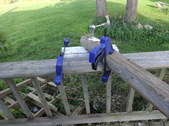
day 5-Sunday 13th Aug-I had a tough time removing the lag screws from the base of the 4x4s. I finally got them all finished.
|
 enlarge 87KB, 640x480 enlarge 87KB, 640x480
some of the bases broke off inside the long timbers and I was able to get them out.
|  enlarge 100KB, 640x480 enlarge 100KB, 640x480
I backed the truck up to take the poles and bases and tools and saw horses.
|  enlarge 79KB, 640x480 enlarge 79KB, 640x480
I unloaded them into the barn to set up a place to work
|  enlarge 80KB, 640x480 enlarge 80KB, 640x480
Here is what it looked like this am.
|
 enlarge 70KB, 640x480 enlarge 70KB, 640x480
I put the long 4x4s here until I got things moved around
|  enlarge 79KB, 640x480 enlarge 79KB, 640x480
I moved all the lumber from the second bay and put the blocks in there.
|  enlarge 71KB, 640x480 enlarge 71KB, 640x480
|  enlarge 80KB, 640x480 enlarge 80KB, 640x480
|
 enlarge 70KB, 640x480 enlarge 70KB, 640x480
I put the long poles in the first bay west, and added 2-2x4s to hold the trailer ramps temporarily.
|  enlarge 75KB, 640x480 enlarge 75KB, 640x480
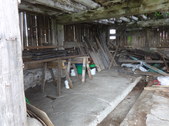
Here they are all set until I am able to clear more, clean more and make the stands to hold the lumber
|  enlarge 77KB, 640x480 enlarge 77KB, 640x480
|  enlarge 76KB, 640x480 enlarge 76KB, 640x480
This area has the only safe ladder to the upstairs so I have to keep about 5' clear.
|
 enlarge 81KB, 640x480 enlarge 81KB, 640x480
|  enlarge 87KB, 640x480 enlarge 87KB, 640x480
I've cleaned up everything, and took 5 bags of trash out to the road for pick up in the morning.
|  enlarge 79KB, 640x480 enlarge 79KB, 640x480
day 4-Aug. 11, 2017
|  enlarge 106KB, 640x480 enlarge 106KB, 640x480
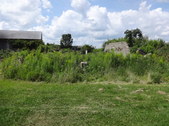
Today I'm going to hand cut weeds and stalks so I can clear out the plywood and extra wood from the front and side of the barn, then I'll mow it down
|
 enlarge 108KB, 640x480 enlarge 108KB, 640x480
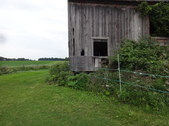
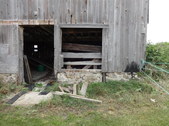
I need to remove the boards from this window and the nails
|  enlarge 56KB, 640x480 enlarge 56KB, 640x480
I've mowed the area and will tackle the right side of the center portion tomorrow
|  enlarge 71KB, 640x480 enlarge 71KB, 640x480
|  enlarge 90KB, 640x480 enlarge 90KB, 640x480
ready to remove extra boards, nails and wood
|
 enlarge 90KB, 640x480 enlarge 90KB, 640x480
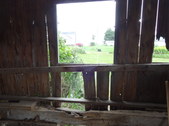
same with the front window
|  enlarge 91KB, 640x480 enlarge 91KB, 640x480
|  enlarge 89KB, 640x480 enlarge 89KB, 640x480
|  enlarge 54KB, 640x480 enlarge 54KB, 640x480
|
