
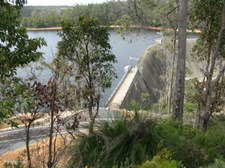
1
Wellington Dam from Carpark Level
Construction of the Wellington Dam began in November 1931 and was completed in less than 2 years.
| 
2
Wellington Dam beyond the Trees
Granite rock was blasted from the nearby quarry and then crushed into small sizes. This was then carried by conveyor belt to be mixed with sand and cement to make concrete for the dam wall.
| 
3
Walking down towards the Dam
During construction, the crusher, mixer and air compressors were driven by a large steam engine at the site.
|

4
Surrounding Vegetation and Granite Rock
Two giant towers were constructed on each side of the valley. Chutes slung between the towers carried concrete to timber formwork that shaped large sections of the wall.
| 
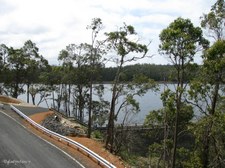
5
Wellington Dam from a lower Level
The wall was made up of two straight, 76-metre 'wings' that stretched from each side of the valley, joined by an 80-metre curved section in the middle. By diverting the river through two natural channels, the wall was gradually extended across the granite rock base that formed the river bed.
| 
6
Approaching the Viewing Platform
In 1944 the height of the dam wall was raised by a metre, and in 1960 it was raised by another 15 metres.
|
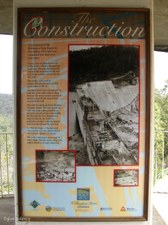
7
Construction Information
The wall is 366 metres across and 34 metres high. The dam stores about 186 million kilolitres of water when full.
| 
8
Collie River Information
The total Collie River Catchment covers about 4000 square kilometres and eventually flows into the Leschenault Estuary near Bunbury. In its natural state the River water was fresh but widespread clearing for farmland caused salinity levels in the water to rise making it unfit for drinking.
| 
9
Wellington Dam from Lookout
Because of its greater density the saline water forms a saline layer at the bottom of the reservoir. The volume of this saline layer is large (40Gl) and each year in an endeavour to reduce the dam salinity level, the Water Corporation scours the saline slug through a large gate valve at the bottom of the dam and discharges it out to sea.
|

10
Discharge of Saline Slug
Scouring usually commences 1 July and continues until late October. This saline water is discharged at the rate of 450,000 tonnes per day.
| 
11
Saline Slug flows to the Sea
This scouring process has been undertaken continuously over the past 20 years with a discharge of 20-40Gl annually as waste water to the sea.
| 
12
Wellington Dam
Currently filled to about 82% of its capacity. Since the salinity level became too high for drinking water, the Wellington Dam is now only used to supply up to 68Gl of irrigation water annually.
|

13
Zoom to Gate Valve at bottom of Wall
Saline slug is discharged at the rate of 450,000 tonnes per day.
| 
14
Zoom to Saline Slug flowing to Sea
The Saline slug is discharged at 20-40Gl annually as waste water to the sea.
| 
15
Traffic Bridge crossing discharged Saline Slug
|

16
Wellington Dam from a Lower Level
| 
17
Wellington Dam from another viewing spot
| 
18
Roadside Cutting
Roadside cutting shows gravel composition of soil beneath the Jarrah forest surrounding the dam.
|
19
Another view of Wellington Dam
| 
20
Vegetation surrounding Road below
Many species of Wildflowers grow here.
| 
21
Twining Fringe Lily (Thysanotus patersonii)
|

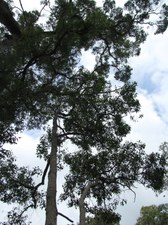
22
Hemigenia species
| 
23
One-sided Bottlebrush (Calothamnus)
| 
24
Bright Pea Flower
|

25
One-sided Bottlebrush (Calothamnus)
| 
26
Hemigenia species
| 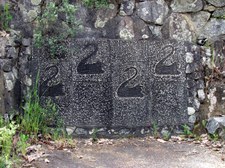
27
Mural of Black Swans etched into Granite Rock
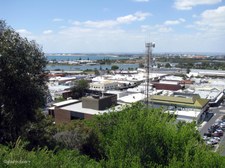
|

28
Old Quarry now a Picnic Area
Following the completion of the final stage of the dam wall in 1960, the quarry was developed into a picnic area with barbecues and shelters. The sheer quarry face provides an impressive amphitheatre backdrop.
| 
29
The Quarry Information
Rock to provide the coarse aggregate for use in making concrete for the dam wall was quarried from a granite outcrop close to the dam construction site.
| 
30
Bald Granite Face
A project engineer at the time described it as: 'a bald granite face some 40 feet high with practically no overburden'.
|

31
Sheltered Picnic Area
The availability of the granite rock and a sand pit 9 kilometres away made the whole project viable.
| 
32
Granite Rock Face
The rock face was drilled with jackhammers and then blasted. The rubble was carted to a crusher which reduced the stone to a size between 7 and 8 centimetres.
| 
33
Carpark in Old Quarry
The first rock crusher proved unreliable and after a succession of breakdowns a 'Jacques Jaw Crusher' was brought over from Harvey. The crushed rock was fed by conveyor belt into a bin where it was mixed with sand and cement, then gravitated by chute directly to the concrete mixer.
|

34
Rock Face now used for Abseiling
Large rocks, or 'plums' (bigger than 15cm) were originally fed into the crusher but this contributed to the regular breakdowns. Then engineers decided to source large rocks directly from the excavations for the foundation of the dam wall. The workers manhandled the rocks by wheelbarrow and tipped them into the conctete pouring boxes. It is estimated these 'plums' make up about 10% of the wall.
| 
35
Rock Face now used for Abseiling
The concrete mix ratio was 1 cement and 3 sand to 6 stone. The front two metres of the wall was made with a stronger mix of 1:2:4. The Quarry was again used to provide rock for the raising of the wall in the late 1950's.
| 
36
Granite Rocks
Following the completion of the final stage of the dam wall in 1960, the quarry was developed into a picnic area with barbecues and shelters. The sheer quarry face provides an impressive amphitheatre backdrop.
|

37
Lichen on Granite Rock
| 
38
Surrounding Countryside
| 
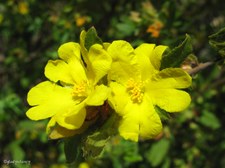
39
Cottonheads (Conostylis)
|

40
Yellow Buttercup (Hibbertia)
| 
41
Yellow Buttercup (Hibbertia)
| 
42
Yellow Buttercup (Hibbertia)
|

43
View from a Lower Level
Viewing Platform on left.
| 
44
Wellington Dam from a Lower Level
| 
45
Below the Lookout Platform
|

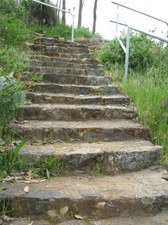
46
Some of the Stone Steps
| 
47
Lemon-scented Darwinia (Darwinia citriodora)
| 
48
Dainty White Wildflower
|

49
Twining Fringe Lily (Thysanotus patersonii)
| 
50
One-sided Bottlebrush (Calothamnus)
| 
51
Epiphytes on Branch
|

52
Lemon-scented Darwinia (Darwinia citriodora)
| 
53
Epiphytes on Branch
| 
54
Small Beetle on Yellow Buttercup (Hibbertia)
|

55
Wellington Dam
| 
56
Nearing the Top of the Stone Steps
Climbing back up to carpark.
| 
57
Stone Wall at Top of Old Quarry
Entrance to Abseiling Area on left.
|

58
Wellington Dam from Top of Quarry Face
| 
59
Looking down onto Quarry Picnic Area
| 
60
Top of Quarry Wall
|

61
Wildflowers and Granite Rocks
| 
62
Epiphytes on Branch
| 
63
Moss on Granite Rock
|

64
Stone Wall at Top of Quarry Face
| 
65
Looking over Quarry to surrounding Forest
| 
66
Looking down into Quarry Picnic Area
|

67
The Abseiling Wall with Dam behind
From top of Quarry face.
| 
68
Grasstrees (Xanthorrhoea preissii)
| 
69
Coloured Stones in the Steps
|

70
Scotch Broom (Cytisus scoparius)
Colourful flowers around carpark are a species introduced to Australia in the 1800s as an ornamental, but have become an environmental weed.
| 
71
Scotch Broom (Cytisus scoparius)
Colourful flowers around carpark are a species introduced to Australia in the 1800s as an ornamental, but have become an environmental weed.
| 
72
Scotch Broom (Cytisus scoparius)
The hybrids with red and yellow flowers also naturalise to become environmental weeds.
|

73
Scotch Broom (Cytisus scoparius)
The hybrids with red and yellow flowers also naturalise to become environmental weeds.
| 
74
Scotch Broom (Cytisus scoparius)
Colourful flowers around carpark are a species introduced to Australia in the 1800s as an ornamental, but have become an environmental weed.
| 
75
Scotch Broom (Cytisus scoparius)
The hybrids with red and yellow flowers also naturalise to become environmental weeds.
|

76
Scotch Broom (Cytisus scoparius)
Colourful flowers around carpark are a species introduced to Australia in the 1800s as an ornamental, but have become an environmental weed.
| 
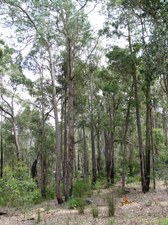
77
Jarrah Woodland
The Jarrah Woodland of the State Forest surrounding Wellington Dam catchment area.
| 
78
Yellow Buttercup (Hibbertia)
|

79
Tall Trees of Jarrah Forest
The Jarrah Woodland of the State Forest surrounding Wellington Dam catchment area.
| 
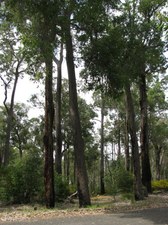
80
Looking up into the Treetops
| 
81
Jarrah Woodland
The Jarrah Woodland of the State Forest surrounding Wellington Dam catchment area.
|
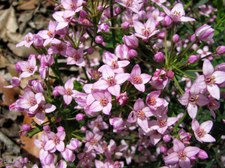
82
Pink Boronia
| 
83
Tall Trees
The Jarrah Woodland of the State Forest surrounding Wellington Dam catchment area.
| 
84
Pink Boronia
|

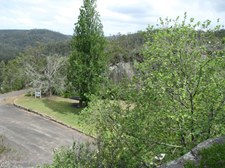
85
Surrounding Carpark Area
| 
86
Tall Trees surrounding Carpark
| 
87
Coach dwarfed by Tall Trees
All aboard for lunch at Bunbury.
|

88
Lunchtime views over Leschenault Estuary at Bunbury
| 
89
Zoom view downstream to Bunbury
| 
90
Upstream view of Leschenault Estuary
|

91
Zoom across the Estaury to Woodchip Operations
| 
92
Leschenault Quays
| 
93
Colourful Street Banners at Leschenault Quays
|

94
Laundrette Mural
| 
95
View over Leschenault Estuary towards Bunbury
| 
96
Boulters Heights overlook Bunbury
Boulters Heights is an important natural feature of the ancient Quindalup Dune System. It represents many layers of history over the years revealing the significant past of the Noongar People and the influence of European Settlers. Local Bunbury residents and visitors enjoy the panoramic views, interesting walks and native flora and fauna, such as Tuart and Peppermint Trees, Quandond Shrubs, Birdlife and much more!
|

97
Plaque by Apex
Direction and Distance to various places from Boulters Heights.
| 
98
View from Boulters Heights 1
| 
99
View from Boulters Heights 2
|

100
View from Boulters Heights 3
| 
101
View from Boulters Heights 4
| 
102
View from Boulters Heights 5
|

103
View from Boulters Heights 6
| 
104
View from Boulters Heights 7
| 
105
Rose Banjine (Pimelea rosea)
Growing on slope below the lookout.
|

106
Zoom View from Boulters Heights 1
| 
107
Zoom View from Boulters Heights 2
| 
108
Zoom View from Boulters Heights 3
|

109
Zoom View from Boulters Heights 4
In 2005, a tornado so severely damaged St Patrick's Cathedral that it had to be demolished. Construction work (centre) has commenced on the new Cathedral, offices and a restored parish house for the Bunbury diocese.
| 
110
Zoom View from Boulters Heights 5
| 
111
Boulters Heights
The City of Bunbury is committed to respecting, enhancing and maintaining our natural environment.
|

112
Panorama of Bunbury 1
Viewed from Boulters Heights.
| 
113
Panorama of Bunbury 2
Viewed from Boulters Heights.
| |
