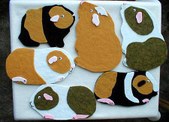
Guinea Pig magnets are fun!
They make cute decorations on your refrigerator! You can buy supplies at most craft stores to make your own.
| 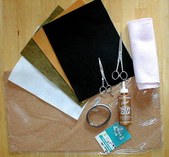
Guinea pig magnet supplies:
You'll need felt squares approximately 9"X 12", pink fleece or pink felt, scissors, Tacky glue, plastic google eyes, sheet of cork, magnet strips, paper, black thin fabric marker, and a pencil.
| 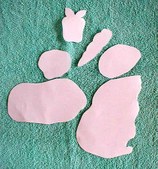
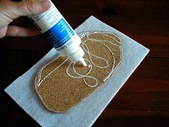
Paper cutouts:
Draw a picture of a guinea pig and cut it out. I also cut out shapes for the patches of color on pig. You can also cut out carrot and apple shapes too. If you can't draw, find pictures in magazines, books or on the Internet.
|
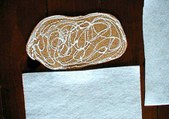
Apply Tacky glue:
Now you apply Tacky glue all over one side. I cut a white felt square in half. Make sure to get glue around edges. Also, try not to make big blobs because they soak through felt.
| 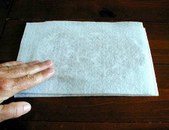
Now press white felt on Guinea pig:
I press 1/2 the white felt square on guinea pig.
| 
Now the other side:
Now you apply Tacky glue all over other side of Guinea pig. What's nice about Tacky glue is the felt will stick good to cork before it's even dry.
|