 I made several visits during the process and such and took some pictures. I didn't want anything gaudy or multicolor as I didn't feel it went with the trucks look. This is the design he came up with. I made several visits during the process and such and took some pictures. I didn't want anything gaudy or multicolor as I didn't feel it went with the trucks look. This is the design he came up with.
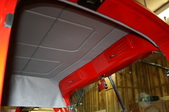
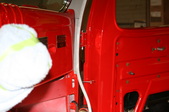
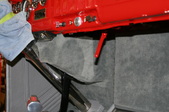
|  Here he is pulling the leather for the sides. there will be a joint midway on the back window as the cab has an attachment edge there. Here he is pulling the leather for the sides. there will be a joint midway on the back window as the cab has an attachment edge there.
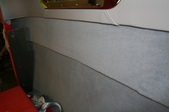
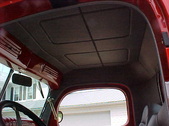
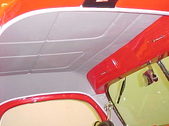
|  Lots of pulling and such to get the leather to conform to the contour. Lots of pulling and such to get the leather to conform to the contour.
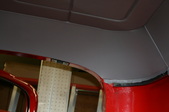
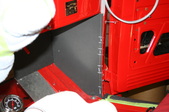
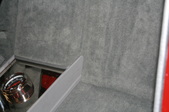
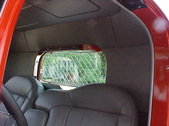
|  Leather goes to just below the rear window. From there down will be a carpet like material as it will be mostly hidden by the seats and I'll store stuff back there. Leather goes to just below the rear window. From there down will be a carpet like material as it will be mostly hidden by the seats and I'll store stuff back there.
|
 Hard to see but the stainless window surround I made sits flush with the leather, he inset that for a real nice touch. Hard to see but the stainless window surround I made sits flush with the leather, he inset that for a real nice touch.
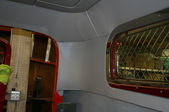
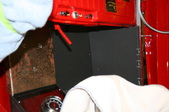
|  Material is all done here. Next is filler panels behind the door openings. Material is all done here. Next is filler panels behind the door openings.
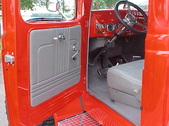
|  Filler panels done behind the doors. Filler panels done behind the doors.
|  Front filler panels are done next to the windshield. He used colored trim pieces to make the edges look better around the openings. Front filler panels are done next to the windshield. He used colored trim pieces to make the edges look better around the openings.
|
 Here he is working his way down to the kick panels. Why Dodge left those little spaces open is weird to me. Stock cardboard always looked odd to me. Here he is working his way down to the kick panels. Why Dodge left those little spaces open is weird to me. Stock cardboard always looked odd to me.
|  Close up of the edge treatment. Close up of the edge treatment.
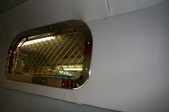
|  I gave him some of the metal kick panels and he transferred them to the material he likes for covering. I gave him some of the metal kick panels and he transferred them to the material he likes for covering.
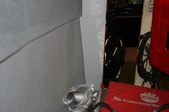
|  He used the same stuff on the firewall. Takes a lot of prefitting to do this stuff. He used the same stuff on the firewall. Takes a lot of prefitting to do this stuff.
|
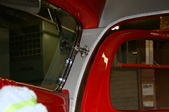
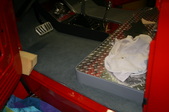
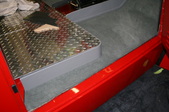
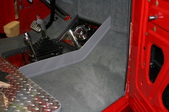
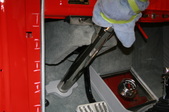
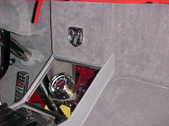
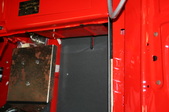 My wire runs run from the console up. I bent up a sheetmetal panel that is held in place with large magnets. He'll cover that as well. My wire runs run from the console up. I bent up a sheetmetal panel that is held in place with large magnets. He'll cover that as well.
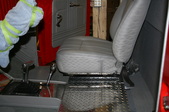
|  Here he has the carpet in and has wrapped the seat base in leather. The console will be done the same. I asked him what gaps he needed when I made all this stuff so it would make his job easier. Here he has the carpet in and has wrapped the seat base in leather. The console will be done the same. I asked him what gaps he needed when I made all this stuff so it would make his job easier.
|  Getting close now and looking good. Getting close now and looking good.
|  Firewall done as well as the console. Firewall done as well as the console.
|
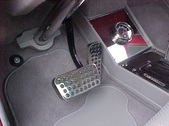
 Steering column mount hid. Steering column mount hid.
|  He carried the bead roll pattern from the lower portion of the doors into the kick panels. They are leather and I like what he did here. He carried the bead roll pattern from the lower portion of the doors into the kick panels. They are leather and I like what he did here.
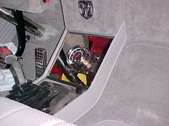
|  You can see the center panel pretty clearly here, It just pops off for quick access. You can see the center panel pretty clearly here, It just pops off for quick access.
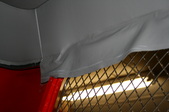
| 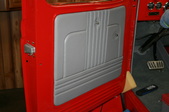 Door panels keep with the same pattern. The vertical section is actually a perforated leather. It is like a diamond pattern. I'm using that in the centers of the seats to set it off instead of a contrasting color. Door panels keep with the same pattern. The vertical section is actually a perforated leather. It is like a diamond pattern. I'm using that in the centers of the seats to set it off instead of a contrasting color.
|
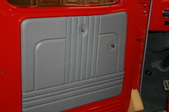 We had to send the leather out to another place to have it done like that. I saw a car he used that on and really liked the effect it gave. We had to send the leather out to another place to have it done like that. I saw a car he used that on and really liked the effect it gave.
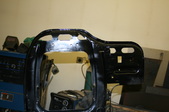
| 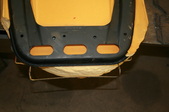 The seats needed some work as they were squared off in the back and were too high. They covered most of the rear window in stock form. Here is what I started with. He cut the foam to size and told me to make them fit it. The seats needed some work as they were squared off in the back and were too high. They covered most of the rear window in stock form. Here is what I started with. He cut the foam to size and told me to make them fit it.
| 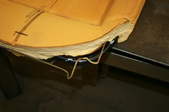 I told him I could handle the metal work and the inner support wires had to be addressed as well. I told him I could handle the metal work and the inner support wires had to be addressed as well.
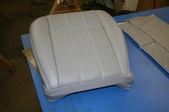
| 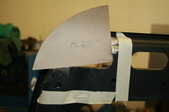 I made up a cardboard pattern and put on some masking tape for a non changing reference. Let the cutting begin! I made up a cardboard pattern and put on some masking tape for a non changing reference. Let the cutting begin!
|
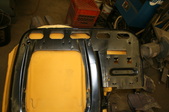 Here is the drivers side which will be more involved. 3 inches will be removed from the armrest support with an S curve to boot. It's like chopping a top, lots of Pie cuts and fill welding with a copper backer. Here is the drivers side which will be more involved. 3 inches will be removed from the armrest support with an S curve to boot. It's like chopping a top, lots of Pie cuts and fill welding with a copper backer.
|  here is the finished product, the metal edge itself is a big S bend and there was enough material to complete it as there was an overlay at the top. Got lucky there. This took me 9 hours to do all of this. Notice how the holes have changed on the corners and it's no longer straight. here is the finished product, the metal edge itself is a big S bend and there was enough material to complete it as there was an overlay at the top. Got lucky there. This took me 9 hours to do all of this. Notice how the holes have changed on the corners and it's no longer straight.
| 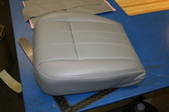 The passenger side seat bottom. We kept a simple pattern with the perforated leather in the center as mentioned before. The passenger side seat bottom. We kept a simple pattern with the perforated leather in the center as mentioned before.
|  Very happy with how these look. Hard to show the contrast the center section gives it. Very happy with how these look. Hard to show the contrast the center section gives it.
|
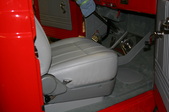 Passenger seat all done and installed. It's odd how pictures change shades of color from what the naked eye picks up. The surround looks identical in person but this pic makes it look way darker. Passenger seat all done and installed. It's odd how pictures change shades of color from what the naked eye picks up. The surround looks identical in person but this pic makes it look way darker.
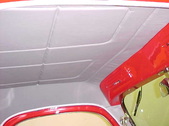
|  Glad I took the time to round the seats back. makes the rear window line much nicer to me. Glad I took the time to round the seats back. makes the rear window line much nicer to me.
|  Again, camera picks up reflections and puts them in the leather but rest assured, it's not there! One down, one to go. Again, camera picks up reflections and puts them in the leather but rest assured, it's not there! One down, one to go.
|  |
 |  |  |  |
 |  |  |  |
