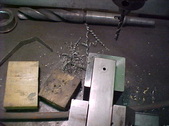
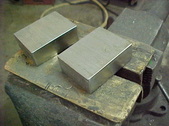
 Went to the metal piles and grabbed some stock. I'll use stainless on the guides and pins and mild steel for the base. That way it'll be magnetic when put on the surface grinder chuck and will hold. Went to the metal piles and grabbed some stock. I'll use stainless on the guides and pins and mild steel for the base. That way it'll be magnetic when put on the surface grinder chuck and will hold.
| 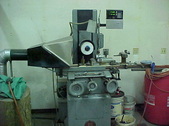 Here's my surface grinder. I put a digital readout on it so I can repeat easily and redress, going back to the exact spot. You can do it without, which I have, but this makes it a lot easier Here's my surface grinder. I put a digital readout on it so I can repeat easily and redress, going back to the exact spot. You can do it without, which I have, but this makes it a lot easier
| 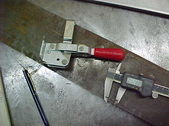 To hold the chain in place I'm planning on a snap clamp. They are adjustable and hold really well. To hold the chain in place I'm planning on a snap clamp. They are adjustable and hold really well.
| 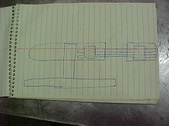 Here's a VERY rough sketch of what's in my head so you have an idea of where I'm trying to go with this. Here's a VERY rough sketch of what's in my head so you have an idea of where I'm trying to go with this.
|
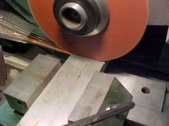
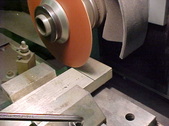
 I cut 4 pieces for the chain holder and want to round the ends like a saw bar so the chain doesn't catch. Cut them the same and marked the ends. I threw in on the surface grinder to cut 45 degrees of the excess stock off. I cut 4 pieces for the chain holder and want to round the ends like a saw bar so the chain doesn't catch. Cut them the same and marked the ends. I threw in on the surface grinder to cut 45 degrees of the excess stock off.
|  You can get real close and make straight cuts with these. You can get real close and make straight cuts with these.
|  This makes short work for rounding if you don't have a mill like me. This makes short work for rounding if you don't have a mill like me.
|  Marked a center hole and I'll do this on both ends. This will hold the together, evenly while I work them up. Marked a center hole and I'll do this on both ends. This will hold the together, evenly while I work them up.
|
 Center drilled and drilled all the holes. Center drilled and drilled all the holes.
| 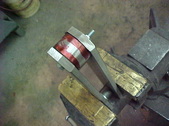 Now I put a round spacer between them and another spacer on the other end, bolting it together. Ink a line and will rough it in with an angle grinder, not touching the ink. Now I put a round spacer between them and another spacer on the other end, bolting it together. Ink a line and will rough it in with an angle grinder, not touching the ink.
|  Less than a minute to this. Less than a minute to this.
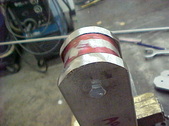
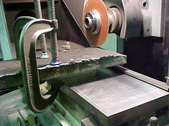
|  I then mounted a belt sander in a vise and blended to the ink. Just barely touching it. You can see it makes a nice, even, rounded edge. I then mounted a belt sander in a vise and blended to the ink. Just barely touching it. You can see it makes a nice, even, rounded edge.
|
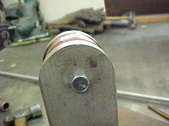
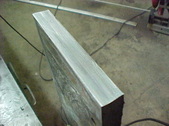
 Some 150 grit sandpaper on a soft back pad and you have this. Some 150 grit sandpaper on a soft back pad and you have this.
|  I need something to align the 2 halves when the chain is in it so a couple of dowels are in order. I'll put them fairly close to the ends on center so i marked and drilled them a little undersize of the final .375 hole. I'm reaming it here to the final size. I need something to align the 2 halves when the chain is in it so a couple of dowels are in order. I'll put them fairly close to the ends on center so i marked and drilled them a little undersize of the final .375 hole. I'm reaming it here to the final size.
| 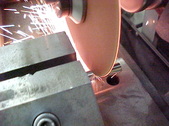 Cutting the dowels here in one swipo to 1.000 long. Touch of on the end of the rod and zero out. Move in 1.000 + .050 for the wheel and they are basically all the same. Cutting the dowels here in one swipo to 1.000 long. Touch of on the end of the rod and zero out. Move in 1.000 + .050 for the wheel and they are basically all the same.
|  The readout will spoil you in a hurry! ;) The readout will spoil you in a hurry! ;)
|
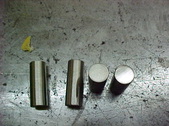 Quick deburr and they're done. Quick deburr and they're done.
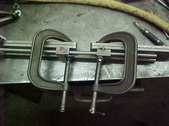
|  With both sides together I slide the dowel in to flush. If you are a little small and need a way to hold snug. Dimple it with a center punch on the end to be welded. An old trick that still works. With both sides together I slide the dowel in to flush. If you are a little small and need a way to hold snug. Dimple it with a center punch on the end to be welded. An old trick that still works.
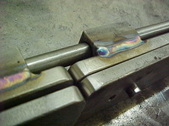
|  TIG weld it in. TIG weld it in.
|  No filler rod needed. No filler rod needed.
|
 Both sides are doweled here. On shorter chains I'll just need one side. On 18 inch and longer I wanted to have something that would hold the chain so it doesn't tangle and get caught on stuff. Just trying to cover a lot of different set ups while I'm doing it. Both sides are doweled here. On shorter chains I'll just need one side. On 18 inch and longer I wanted to have something that would hold the chain so it doesn't tangle and get caught on stuff. Just trying to cover a lot of different set ups while I'm doing it.
|  For the back half I wanted an adjustment for width. Might not be needed but it's nice to have options. I first drilled and tapped a 1/4 -20 hole through both pieces. while they were together. For the back half I wanted an adjustment for width. Might not be needed but it's nice to have options. I first drilled and tapped a 1/4 -20 hole through both pieces. while they were together.
| 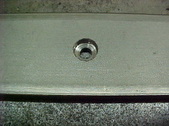 Then drilled to .250 and counterbored with a .500 drill on the inside of the bar. This is so a nut can be flush when completely closed. Then drilled to .250 and counterbored with a .500 drill on the inside of the bar. This is so a nut can be flush when completely closed.
| 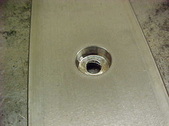 I then reamed it to a flat bottom I then reamed it to a flat bottom
|
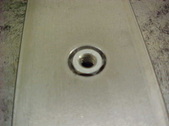 Nut sits flush now and I can locktight to a wingnutted socket head cap screw. This way this half will spin and with threads on the other side, it will move in and out with the dowels keeping it inline. Nut sits flush now and I can locktight to a wingnutted socket head cap screw. This way this half will spin and with threads on the other side, it will move in and out with the dowels keeping it inline.
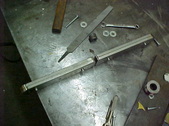
| 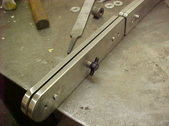 Here it is all together. Works really well. Here it is all together. Works really well.
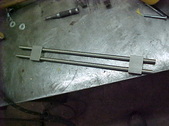
|  Now I need a couple pieces that will allow adjustment of the 2 halves. Decided to use a .750 x 2.000 bar stock and I'm cutting them here to 1.500 long. Now I need a couple pieces that will allow adjustment of the 2 halves. Decided to use a .750 x 2.000 bar stock and I'm cutting them here to 1.500 long.
|  Using this system I can cut right to size. Using this system I can cut right to size.
|
 The 2 blocks done so now I'll drill and ream them to .440. The 2 blocks done so now I'll drill and ream them to .440.
|  Clamped them both together and drilling all the way through. Spacer block supports the bottom so it doesn't move and drill has a gap. Having a mill with a mounted vise would be nice....some day. ;) Clamped them both together and drilling all the way through. Spacer block supports the bottom so it doesn't move and drill has a gap. Having a mill with a mounted vise would be nice....some day. ;)
|  Reaming to size here and they should be real smooth when adjusting. Reaming to size here and they should be real smooth when adjusting.
|  Works fine and now I'll drill and tap for a wing nut socket head cap screw to hold the adjustment in place. Works fine and now I'll drill and tap for a wing nut socket head cap screw to hold the adjustment in place.
|
 Doing some layout here to see the best position. I'm shooting for 36 inches at full extend. I do have a 4 ft bar and chain on one saw but I'll either make up longer rods or let it hang. I'll cross that bridge when I get there. Doing some layout here to see the best position. I'm shooting for 36 inches at full extend. I do have a 4 ft bar and chain on one saw but I'll either make up longer rods or let it hang. I'll cross that bridge when I get there.
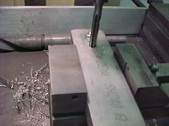
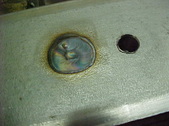
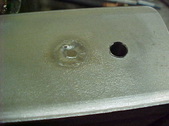
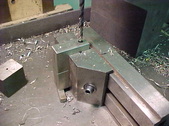
|  Need a thick piece for the upright so off to the scrap pile. Improvising on the cut. I do these by putting a large, true plate on the magnetic chuck, then clamp the cut material to that to get a straight edge. I can cut clear through this way with one set up. Need a thick piece for the upright so off to the scrap pile. Improvising on the cut. I do these by putting a large, true plate on the magnetic chuck, then clamp the cut material to that to get a straight edge. I can cut clear through this way with one set up.
|  With this edge I can just put it on the chuck and they will be parallel. I cut half way through, then flip it over and finish. With this edge I can just put it on the chuck and they will be parallel. I cut half way through, then flip it over and finish.
| 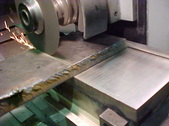 Here you can see how it works. for the other 2 sides I'll use a straight edge square on the cut and it will be a true 90 degree cut. Here you can see how it works. for the other 2 sides I'll use a straight edge square on the cut and it will be a true 90 degree cut.
|
 Back to the holders. Clamped it all up on the table and double check to ensure easy movement. I then Tack it and recheck. Back to the holders. Clamped it all up on the table and double check to ensure easy movement. I then Tack it and recheck.
|  TIG weld it to finish so they are set in place now. TIG weld it to finish so they are set in place now.
|  Really like how this is turning out. Really like how this is turning out.
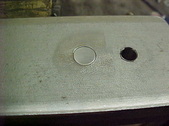
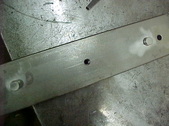
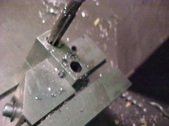
|  Decided I wanted the upright plate on the same side as the rods. I want the opposite side clear as the clamp needs to be over there. Ended up drilling all the way through the plate for the rods to pass through here when collapsed down, I over sized these top .500 Decided I wanted the upright plate on the same side as the rods. I want the opposite side clear as the clamp needs to be over there. Ended up drilling all the way through the plate for the rods to pass through here when collapsed down, I over sized these top .500
|
