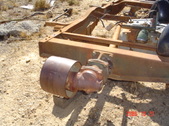
 Original pulley set up and rear driveshaft; front shaft was missing. Original pulley set up and rear driveshaft; front shaft was missing.
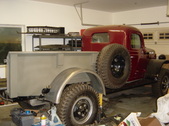
| 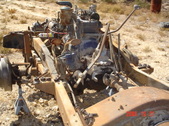 Truck with body removed. Original engine had been replaced long ago. Front springs were flat and the driver's side had two broken leaves. Truck with body removed. Original engine had been replaced long ago. Front springs were flat and the driver's side had two broken leaves.
| 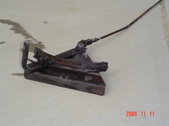 Governor control lever. It was mounted under dash, right of center. Governor control lever. It was mounted under dash, right of center.
| 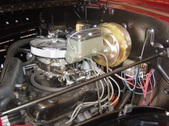 Dodge 360 V8 with Thermoquad carb. Dodge 360 V8 with Thermoquad carb.
I welded up all the firewall holes(dozens) and sprayed the firewall, bottom of cab and interior(except dash) with Hippo liner. I drilled new holes as required.
|
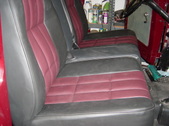 My upper seat frame was completely rotten. The bottom was salvagable... I went with buckets and center console strictly for comfort. My upper seat frame was completely rotten. The bottom was salvagable... I went with buckets and center console strictly for comfort.
| 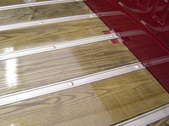 The wood is Ash, I believe, which was very light. The stain was Black, applied and quickly wiped off. I tried different red stains but they did not compliment the color of the truck. The wood is Ash, I believe, which was very light. The stain was Black, applied and quickly wiped off. I tried different red stains but they did not compliment the color of the truck.
| 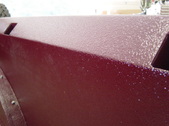 Spray on liner on sides only. Sides were pretty rough and pitted, liner saved alot of time and money that it would have cost to make flawless. Spray on liner on sides only. Sides were pretty rough and pitted, liner saved alot of time and money that it would have cost to make flawless.
| 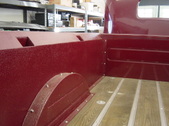 Another view of bed liner, wood and header panel. Another view of bed liner, wood and header panel.
|
 Bed / fender mock up. Bed / fender mock up.
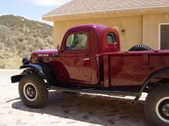
|  The Maroon paint is a Mercedes Benz color. I dont remember what year. It is a single stage solid color paint, no metallic, no clear coat. The Maroon paint is a Mercedes Benz color. I dont remember what year. It is a single stage solid color paint, no metallic, no clear coat.
The other Maroon paints I looked at from GM and Toyota are ok, but have a brown hue to them.
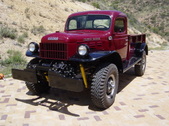
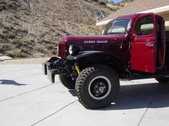
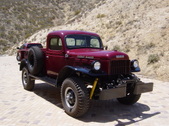
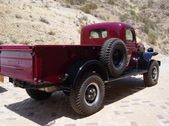
|  These trucks are deceptively tall. These trucks are deceptively tall.
Cowl lights were converted to parking lights/turn signals.
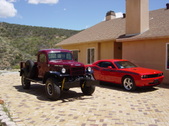
|  Totally stock suspension and the hood is higher than the roof of my Challenger. Totally stock suspension and the hood is higher than the roof of my Challenger.
|
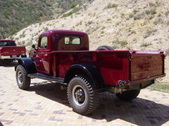 Tail lights not wired up, no tailgate chains, pintle hitch not installed. Tail lights not wired up, no tailgate chains, pintle hitch not installed.
Update: tail lights, brake lights and turn signals are now operational.
|  Roberts tail lights with nice glass lenses. The Roberts cups were ok but needed fabrication to mount a light socket inside. The cast iron arms were very very crude, so I fabbed my own. Roberts tail lights with nice glass lenses. The Roberts cups were ok but needed fabrication to mount a light socket inside. The cast iron arms were very very crude, so I fabbed my own.
|  I welded up a round tube to the top of a square tube to mount inside the cowl for the non-fuctional radiator cap. I welded up a round tube to the top of a square tube to mount inside the cowl for the non-fuctional radiator cap.
|  I mounted my aluminum radiator in front of the core support for more room; thus I had to move the rear winch angle forward by 1/2 inch. I made my own frame extensions and moved the front winch angle forward also. I mounted my aluminum radiator in front of the core support for more room; thus I had to move the rear winch angle forward by 1/2 inch. I made my own frame extensions and moved the front winch angle forward also.
|
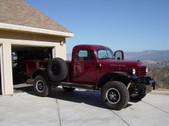 Barely clears the garage. Good view of window tint. Barely clears the garage. Good view of window tint.
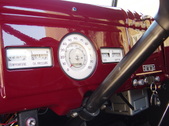
| 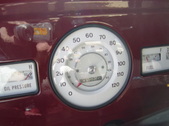 Original speedo rebuilt; all other gauges rebuilt with modern internals. I swithed to white (obviously)faces, but was disappointed the gauge shop used generic lettering instead of the original style. Original speedo rebuilt; all other gauges rebuilt with modern internals. I swithed to white (obviously)faces, but was disappointed the gauge shop used generic lettering instead of the original style.
| 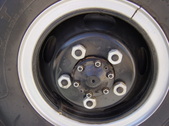 48 rim date. Blasted & powder coated rims and rings. I used allen screws in the axle flanges. I know the square bolts would be easier to use in the field.... 48 rim date. Blasted & powder coated rims and rings. I used allen screws in the axle flanges. I know the square bolts would be easier to use in the field....
| 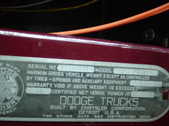 Original Data Plate, only 74 h.p. Original Data Plate, only 74 h.p.
But with 5.83 to 1 differential gearing!
|
 One piece door windows. All glass has a light green tint, incl windshield. The glass shop can also make them with smoke or gold tint. Tinted windows are legal in Calif. if the glass itself is tinted. One piece door windows. All glass has a light green tint, incl windshield. The glass shop can also make them with smoke or gold tint. Tinted windows are legal in Calif. if the glass itself is tinted.
| 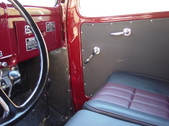 I used a flat glass power window kit from www.ballsrodandkustom.com/ American made, easy to install. I used a flat glass power window kit from www.ballsrodandkustom.com/ American made, easy to install.
Stock type door handle and window winders. The crank handles control the power/electric windows, just push down for down and up for up.
| 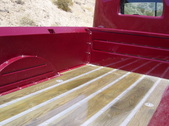 The black wood stain gives a weathered appearance. The black wood stain gives a weathered appearance.
| 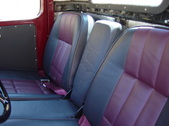 Fold down armrest with cup holders on top. Seat belts were added at this point... I know seatbelts, cupholders, and armrests are for sissys. Fold down armrest with cup holders on top. Seat belts were added at this point... I know seatbelts, cupholders, and armrests are for sissys.
|
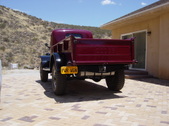 Pintle hitch added. Pintle hitch added.
|  Reproduction rear fenders. I added the original reinforcing plates & brackets for an original look. Reproduction rear fenders. I added the original reinforcing plates & brackets for an original look.
|  One piece power windows and electric door locks. I can unlock /lock the doors with a key fob (no chirp). One piece power windows and electric door locks. I can unlock /lock the doors with a key fob (no chirp).
| 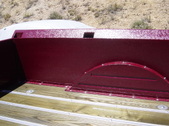 Good view of liner. I used "Hippo liner" tinted to match the paint. Hippo liner is fairly inexpensive $80 to $90 for a bed kit. It sets up/feels harder than Linex or Rhino liner. Good view of liner. I used "Hippo liner" tinted to match the paint. Hippo liner is fairly inexpensive $80 to $90 for a bed kit. It sets up/feels harder than Linex or Rhino liner.
|
 Removed this heater out of a 51 parts truck. I had the core cleaned and checked for $25. It was already 12 volt, and works fine. Removed this heater out of a 51 parts truck. I had the core cleaned and checked for $25. It was already 12 volt, and works fine.
The dash was color sanded and buffed like the exterior.
| 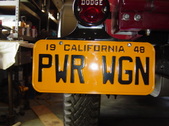 Reproduction plate for display only. From www.licenseplates.tv Reproduction plate for display only. From www.licenseplates.tv
Check their site, they will make just about anything u want.
Update: they no longer make California plates.
| 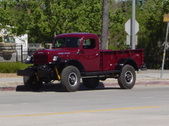 I drove it to the Spring fling, April 2011. It ran well and got lots of looks... I do think the expression "It drives like a truck" originated with these trucks. I drove it to the Spring fling, April 2011. It ran well and got lots of looks... I do think the expression "It drives like a truck" originated with these trucks.
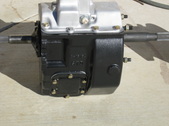
| 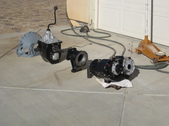 Manual Trans Transfer case set up. Manual Trans Transfer case set up.
I will set this up with a hydraulic slave cylinder, and throw-out bearing.
|
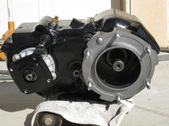
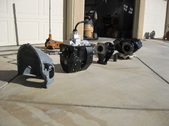 Small block bell, NP435 with dual PTO ports, T/C adapter, 23 spline coupler, NP 205 gear driven Transfercase. Small block bell, NP435 with dual PTO ports, T/C adapter, 23 spline coupler, NP 205 gear driven Transfercase.
|  Trans completely rebuilt with new bearings and seals. Trans completely rebuilt with new bearings and seals.
|  Transfer case completely rebuilt with new bearings and seals. Transfer case completely rebuilt with new bearings and seals.
| 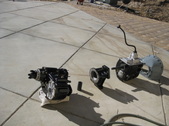 This set up will replace the 727 auto and NP 241 currently in the truck. This set up will replace the 727 auto and NP 241 currently in the truck.
|
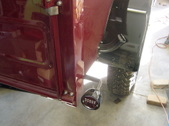
 I located the battery tray on the back of the cross member. It keeps it up nice and high, and away from the engine heat. I located the battery tray on the back of the cross member. It keeps it up nice and high, and away from the engine heat.
| 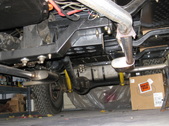 View of battery from left front tire. View of battery from left front tire.
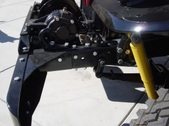
| 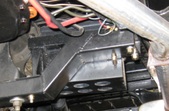 View of the battery box from the front. Well protected against rocks, screws and mud-balls. View of the battery box from the front. Well protected against rocks, screws and mud-balls.
| |
