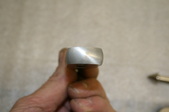
 Here is what I'm going to try to copy. Dodge gave these pieces the "snowflake" design. No two were exactly the same! Looks like they stamped/squished the mounting end for a flat surface. Here is what I'm going to try to copy. Dodge gave these pieces the "snowflake" design. No two were exactly the same! Looks like they stamped/squished the mounting end for a flat surface.
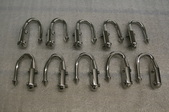
| 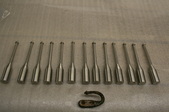 Here are the turned pieces.(Thanks guys) I deleted the 2 behind the cab so I needed 10. I had 13 made for boo boo's if they arose while bending and such. They were turned from an 1 1/4" stainless bar. Here are the turned pieces.(Thanks guys) I deleted the 2 behind the cab so I needed 10. I had 13 made for boo boo's if they arose while bending and such. They were turned from an 1 1/4" stainless bar.
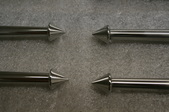
| 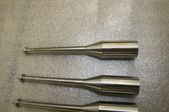 Close up shows the point end with long taper to radii to angle. Close up shows the point end with long taper to radii to angle.
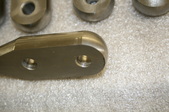
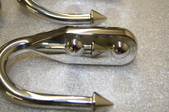
| 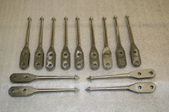 Here are all the hooks with the mounting flats done and holes drilled. I roughed one side in with an angle grinder then finished them on the surface grinder while they were held in a machinist's vise. Here are all the hooks with the mounting flats done and holes drilled. I roughed one side in with an angle grinder then finished them on the surface grinder while they were held in a machinist's vise.
|
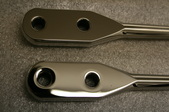
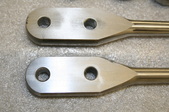 Close up shows how nice a surface ground finish is. Saves a lot of sanding steps. The ends were spun ground out of a Harig fixture I modified. Close up shows how nice a surface ground finish is. Saves a lot of sanding steps. The ends were spun ground out of a Harig fixture I modified.
|  I dress a radius in the grinding wheel and spin the parts. Gives it a rounded ball effect. I dress a radius in the grinding wheel and spin the parts. Gives it a rounded ball effect.
|  Here's a better view of if. Here's a better view of if.
|  I then sanded them all out and mirror polished them prior to bending. I then sanded them all out and mirror polished them prior to bending.
|
 I originally was going to carriage all these and change my mind. I'll just make the bolts be press fit with rivet style heads. I originally was going to carriage all these and change my mind. I'll just make the bolts be press fit with rivet style heads.
|  The pointed heads turned out nice but now I had to come up with a way to bend them without messing them all up. The pointed heads turned out nice but now I had to come up with a way to bend them without messing them all up.
| 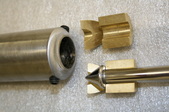 I cut some brass stock so I'd have two equal halves. I then ground a tapered slot to match the shaft size, then a notch on 90 degrees to catch the pointed head. Flats were ground on the OD of the brass for the set screws in the bar to lock onto. I cut some brass stock so I'd have two equal halves. I then ground a tapered slot to match the shaft size, then a notch on 90 degrees to catch the pointed head. Flats were ground on the OD of the brass for the set screws in the bar to lock onto.
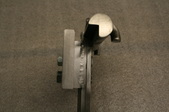
| 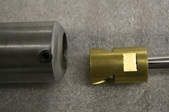 Here it is together and ready to be slid in. You can see how this will work now. Here it is together and ready to be slid in. You can see how this will work now.
|
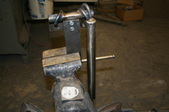
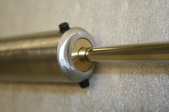 In the long bar it is held securely and gives me the leverage needed to bend when heat is applied. The brass doesn't marr the polished surface. In the long bar it is held securely and gives me the leverage needed to bend when heat is applied. The brass doesn't marr the polished surface.
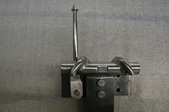
| 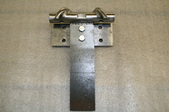 This is the bending jig I made. I wanted the hooks to "sweep" the same direction from side to side so this meant mirror image pieces. Always thought it looked odd on the tailgates to have one up and one down, now they will look uniform. This is the bending jig I made. I wanted the hooks to "sweep" the same direction from side to side so this meant mirror image pieces. Always thought it looked odd on the tailgates to have one up and one down, now they will look uniform.
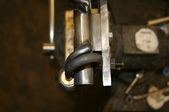
|  Side view show how bar bar almost 1/4 away so it would allow smooth bends and made it easier to weld it all together. Side view show how bar bar almost 1/4 away so it would allow smooth bends and made it easier to weld it all together.
|  Heavy rod was welded, then heated and pulled around for guides to keep the bends consistant. smoothed it out for less marring. Heavy rod was welded, then heated and pulled around for guides to keep the bends consistant. smoothed it out for less marring.
|
 Here is one mounted up so You can see the process. Here is one mounted up so You can see the process.
|  Modified some standard bolts for a wedge fit to hold the hooks in place as to not mess up the polish. Modified some standard bolts for a wedge fit to hold the hooks in place as to not mess up the polish.
| 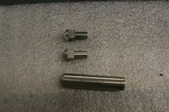 I had made up the fake rivets prior to changing to press fit so I'll have to spin grin these down to press in. I had made up the fake rivets prior to changing to press fit so I'll have to spin grin these down to press in.
| 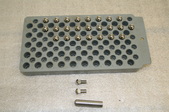 Got a few to do! Wish I had though of that before grinding all those flats while making them. Got a few to do! Wish I had though of that before grinding all those flats while making them.
|
 Here is the first attempt. Wasn't happy as I didn't follow the guide quite right so I'll correct that mistake on the rest. Didn't keep the heat low enough and couldn't pull it tight once started. Won't happen again! Here is the first attempt. Wasn't happy as I didn't follow the guide quite right so I'll correct that mistake on the rest. Didn't keep the heat low enough and couldn't pull it tight once started. Won't happen again!
|  Here is the next one correctly bent. Here is the next one correctly bent.
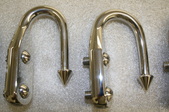
| 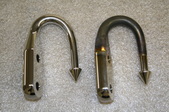 One after bending and one bent, sanded out and repolished again . One after bending and one bent, sanded out and repolished again .
|  The jig keeps them a lot closer to the same than Dodge ever did. The jig keeps them a lot closer to the same than Dodge ever did.
|
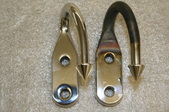
 All polished out the threaded press fit rivets in. All polished out the threaded press fit rivets in.
|  Close up shows how the rivet head looks. Close up shows how the rivet head looks.
|  I'll use thin poly for a gasket between hook and bedside. Acorn nuts will hold them all on. I'll use thin poly for a gasket between hook and bedside. Acorn nuts will hold them all on.
| |
