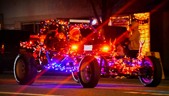
 Omak Christmas Lighting Parade Omak Christmas Lighting Parade
|  Just finished the Smoked Lexan Windshield today taken 2/26/26 Just finished the Smoked Lexan Windshield today taken 2/26/26
|  2/6/26 2/6/26
|  2/6/26 2/6/26
|
 Just showing it running with no smoke. Let it download first to hear and view. Just showing it running with no smoke. Let it download first to hear and view.
| 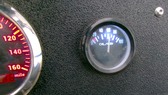 showing 60 PSI Oil and 16 miles on the GPS Speedometer since I restored it. showing 60 PSI Oil and 16 miles on the GPS Speedometer since I restored it.
|  I am a Disabled Vietnam Veteran and build things at home to try to stay healthy and sane great for PTSD too! Married 41 years to the Lovely Lady sitting next to me!!! I am a Disabled Vietnam Veteran and build things at home to try to stay healthy and sane great for PTSD too! Married 41 years to the Lovely Lady sitting next to me!!!
| 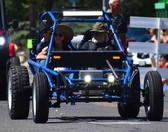 Wife and I had a Blast that day throwing Candy to the Kids on Okanogan Days Washington State. Wife and I had a Blast that day throwing Candy to the Kids on Okanogan Days Washington State.
|
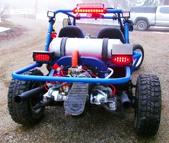
 Sitting outside of its Covered Parking Spot I keep it in with my Challenger and my 4044M John Deere Tractor in the Background. Sitting outside of its Covered Parking Spot I keep it in with my Challenger and my 4044M John Deere Tractor in the Background.
|  Put the Fan Belt Grill on.3rd LED Brake Light, LED Turn and Clearance Lights. Also has a Back Up LED Light Bar for Reverse Put the Fan Belt Grill on.3rd LED Brake Light, LED Turn and Clearance Lights. Also has a Back Up LED Light Bar for Reverse
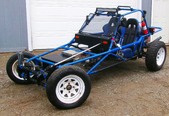
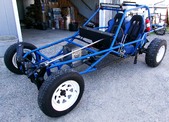
| 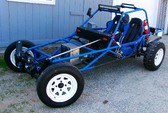 Just a Posing Picture before it gets dusty test driving it! Just a Posing Picture before it gets dusty test driving it!
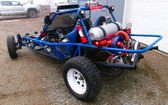
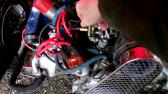
| 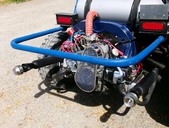 Engine all finished and installed. Engine all finished and installed.
|
 USFS Approved Removable Spark Arrestors on helps with the Noise a little too. USFS Approved Removable Spark Arrestors on helps with the Noise a little too.
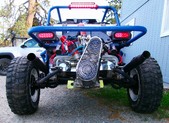
| 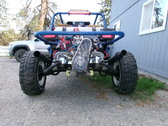 Back View I love to look at! LED Lights all on and working. Upper 15-Watt-LED Brake Flood Lights are not installed yet in this picture. Back View I love to look at! LED Lights all on and working. Upper 15-Watt-LED Brake Flood Lights are not installed yet in this picture.
|  2/6/26 2/6/26
| 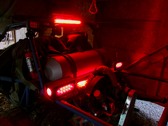 Just Clearance Lights and not in Reverse. Just Clearance Lights and not in Reverse.
|
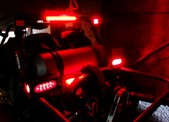 Right Turn Signal Clearance Lights on. Note Brite Upper 15-watt-LED Floods are Red for flashers and Brake Lights. Right Turn Signal Clearance Lights on. Note Brite Upper 15-watt-LED Floods are Red for flashers and Brake Lights.
| 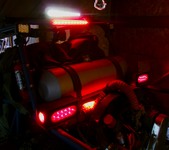 Reverse Light on and Clearance Lights on 15-Watt LED Upper Lights are Clear when off and Red when on. Reverse Light on and Clearance Lights on 15-Watt LED Upper Lights are Clear when off and Red when on.
| 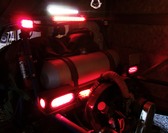 Left Turn Signal Clearance Lights on and Reverse Light. Note Brite Upper Floods are Red for Flashers and Brake Lights. Left Turn Signal Clearance Lights on and Reverse Light. Note Brite Upper Floods are Red for Flashers and Brake Lights.
|  You can see the Turn Signal Control lower left in picture. Set up for LED Lights You can see the Turn Signal Control lower left in picture. Set up for LED Lights
|
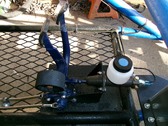
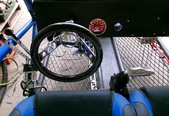 I replaced this shifter with the right one for drivers Thumb to work the lock out then learned you can reverse the Handle! Testing the Dash Lighting also. Complete new linkage to the Trans Axle I replaced this shifter with the right one for drivers Thumb to work the lock out then learned you can reverse the Handle! Testing the Dash Lighting also. Complete new linkage to the Trans Axle
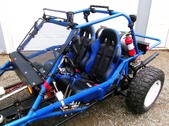
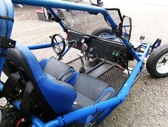
|  Dash, Seats and some of the many LED Lights Dash, Seats and some of the many LED Lights
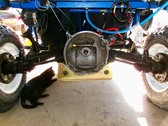
| 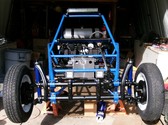 Installed the Front Axle and new Shocks Installed the Front Axle and new Shocks
|  Ready for the engine to go in Ready for the engine to go in
|
 Put a Nice Lockable Storage Box on the front end Put a Nice Lockable Storage Box on the front end
| 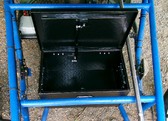 Added a Aluminum Lockable Storage Box on the front. Added a Aluminum Lockable Storage Box on the front.
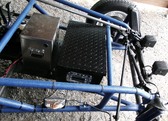
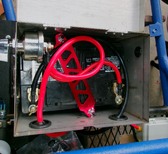
|  AGM Battery inside a Stainless-Steel box with Disconnect on it. AGM Battery inside a Stainless-Steel box with Disconnect on it.
| 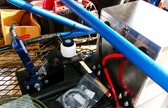 All new cables and Brake Parts plus the steel tubes they go in for the throttle and clutch. All new cables and Brake Parts plus the steel tubes they go in for the throttle and clutch.
|
 AGM $190.00 Battery no Acid to deal with. Platinum AGM Battery BCI Group 49-12v 95ah H8 Size 49 Automotive Battery, 160RC, 900CCA, AGM $190.00 Battery no Acid to deal with. Platinum AGM Battery BCI Group 49-12v 95ah H8 Size 49 Automotive Battery, 160RC, 900CCA,
|  2/6/26 2/6/26
|  Replaced the Complete Brake System with all new Turning Brake Controls, linings, Master Cylinder, Wheel Cylinders and Brake Lines. Replaced the Complete Brake System with all new Turning Brake Controls, linings, Master Cylinder, Wheel Cylinders and Brake Lines.
|  New Tubes to install the New Throttle and Clutch Cables inside. New Tubes to install the New Throttle and Clutch Cables inside.
|
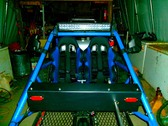
 Steering Brake Controls and Turn Signal LED Converted. Padded Side Rails and Quick Removable Steering Wheel Steering Brake Controls and Turn Signal LED Converted. Padded Side Rails and Quick Removable Steering Wheel
|  New seal and Throw Out Bearing. New seal and Throw Out Bearing.
| 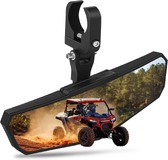 Added 2-Side and 1-Rear-View Mirror Added 2-Side and 1-Rear-View Mirror
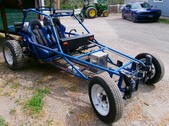
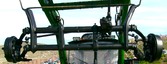
| 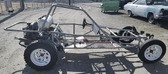 Started with this 1969 Frame and tore it all apart and started over. Started with this 1969 Frame and tore it all apart and started over.
|
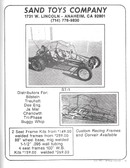 Add for the Original Sand Rail from the 60s Add for the Original Sand Rail from the 60s
| 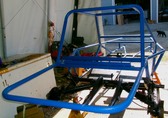 Took a long time to paint the frame after prepping it Took a long time to paint the frame after prepping it
| 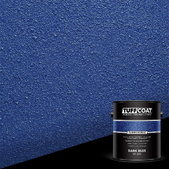 Used this to coat the Frame with. Tuff Coat UT-204 Dark Blue - 1 Gallon: Submersible, Water-Based, Rubberized Non-Skid Coating Used this to coat the Frame with. Tuff Coat UT-204 Dark Blue - 1 Gallon: Submersible, Water-Based, Rubberized Non-Skid Coating
|  Nice to have a Front-End Loader to lift stuff with Nice to have a Front-End Loader to lift stuff with
|
