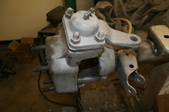
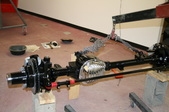
 To start I sandblasted to whole front axle assembly to get rid of the heavy rust and grime. I'm going to rebuild the King Pins as well while I got it to this stage. To start I sandblasted to whole front axle assembly to get rid of the heavy rust and grime. I'm going to rebuild the King Pins as well while I got it to this stage.
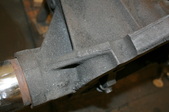
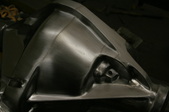
| 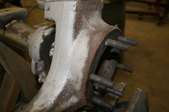 Lots of casting lines and rough surface on this. Lots of casting lines and rough surface on this.
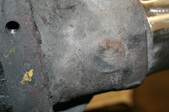
| 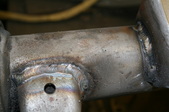 Cleaned up and rewelded the mounts and various attachments as the factory stuff was pretty bad. Cleaned up and rewelded the mounts and various attachments as the factory stuff was pretty bad.
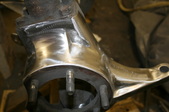
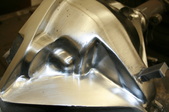
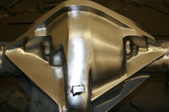
| 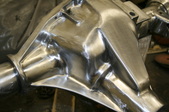 Started with grinding, then moved to 80 grit. I used the Dynafile, soft backed pads with 80 grit, dremel, die grinder or whatever worked to get into all these recess. Here it is after going over it with 150 grit. Started with grinding, then moved to 80 grit. I used the Dynafile, soft backed pads with 80 grit, dremel, die grinder or whatever worked to get into all these recess. Here it is after going over it with 150 grit.
|
 This is a lOT of work but hopefully when painted it will stand out. It took about 1 month to do. The rear axle was about the same timewise. This is a lOT of work but hopefully when painted it will stand out. It took about 1 month to do. The rear axle was about the same timewise.
|  For top coat I'm using acrylic urethane. When it's to this stage, I resanblast lightly, spray with epoxy primer. let sit a day and without any more sanding I spray on the black. I did this with the leaf springs when I smoothed them and couldn't believe the results. You'll see what it looks like when painted shortly. For top coat I'm using acrylic urethane. When it's to this stage, I resanblast lightly, spray with epoxy primer. let sit a day and without any more sanding I spray on the black. I did this with the leaf springs when I smoothed them and couldn't believe the results. You'll see what it looks like when painted shortly.
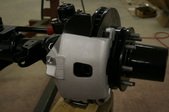
|  Painted and ready to go all back together. Painted and ready to go all back together.
|  Axles, caliper holder, spindles on along the the dust cover on. I powder coated the silver cover here at home. Axles, caliper holder, spindles on along the the dust cover on. I powder coated the silver cover here at home.
|
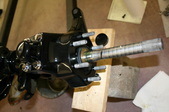
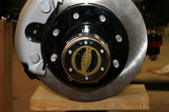
 Hubs, rotors and spindles installed. Hubs, rotors and spindles installed.
|  Top view and I put on the relay rod with tie rods. Top view and I put on the relay rod with tie rods.
| 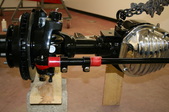 Used red poly sleeves to cover the threads and put on the diff cover. Used red poly sleeves to cover the threads and put on the diff cover.
| 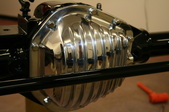 Cover is aluminum and polished it out. Cover is aluminum and polished it out.
|
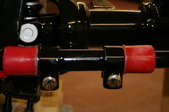 Close up show the poly sleeves and clamps. Close up show the poly sleeves and clamps.
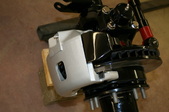
|  I'm running 4:56 gears and installed the Warn lock out hubs. I'm running 4:56 gears and installed the Warn lock out hubs.
|  I really like these classic units. I really like these classic units.
|  Axles all ready to put on now so I need to put some tires on there. Axles all ready to put on now so I need to put some tires on there.
|
 Rear axle was next and here are some before and after pics. Notice all the cast lines here. Rear axle was next and here are some before and after pics. Notice all the cast lines here.
|  I'll do some grinding on this to take out the ridges and most of that scallop. I'll do some grinding on this to take out the ridges and most of that scallop.
|  This will be a little easier as it doesn't have all the recesses like the front axle did. This will be a little easier as it doesn't have all the recesses like the front axle did.
|  All ground and sanded out to 150 grit. Welded on the brake line distribution block at this time. All ground and sanded out to 150 grit. Welded on the brake line distribution block at this time.
|
 There's quite a bit of difference in the way it looks now. This should look really nice when final painted. There's quite a bit of difference in the way it looks now. This should look really nice when final painted.
|  The soft backed pad I used to do this uses standard sticky back sandpaper. I get a a lot of it used from local body shops to keep cost down. Standard DA paper normally gets used on the outer edge and the centers are like new. I just cut smaller circles as the soft pads are 1 1/2 inches or less. Notice the scallop recesses are gone. The soft backed pad I used to do this uses standard sticky back sandpaper. I get a a lot of it used from local body shops to keep cost down. Standard DA paper normally gets used on the outer edge and the centers are like new. I just cut smaller circles as the soft pads are 1 1/2 inches or less. Notice the scallop recesses are gone.
| |
