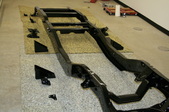
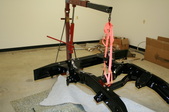
 A truck sure takes up a lot of space when all in pieces. It's time to start the final assembly as all of the black frame parts are done. A truck sure takes up a lot of space when all in pieces. It's time to start the final assembly as all of the black frame parts are done.
| 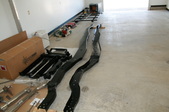 Framerails and crossmembers are ready to go. Framerails and crossmembers are ready to go.
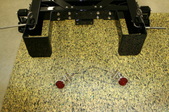
|  Here's where it will all happen. Here's where it will all happen.
| 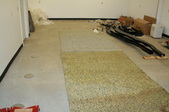 Got some carpet pad to lay down to help save the paint AND my knees! Got some carpet pad to lay down to help save the paint AND my knees!
|
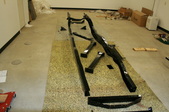 Loose bolted the front crossmember and worked my way back. I made up a notebook when I was disassembling for some of the order what went where. I'd HIGHLY suggest that and keep it all in one place. Saves a lot of headaches as time passes quickly and us "old" people tend to forget. Loose bolted the front crossmember and worked my way back. I made up a notebook when I was disassembling for some of the order what went where. I'd HIGHLY suggest that and keep it all in one place. Saves a lot of headaches as time passes quickly and us "old" people tend to forget.
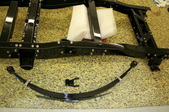
|  Rails with crossmembers loosely bolted till all brackets are in place. Rails with crossmembers loosely bolted till all brackets are in place.
|  Front bumper and gussets ready to put on. Front bumper and gussets ready to put on.
|  Cab mounts and spring hangers in their positions. Cab mounts and spring hangers in their positions.
|
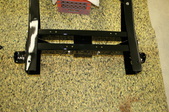 Ready to start the pintle hook mount. I made a double crossmember with angled gussets. Ready to start the pintle hook mount. I made a double crossmember with angled gussets.
|  All together and flat plat on bottom doubles as a license plate mount and hides the plate light. All together and flat plat on bottom doubles as a license plate mount and hides the plate light.
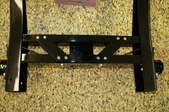
|  Close up of crossmembers. Some of the nuts were welded on prior to painting as getting a wrench in there would be impossible. All stainless bolt heads were surface ground on top, six flats and 30 degree angle spun on top. Then they were all mirror polished. Made up mandrels to help do all this. Close up of crossmembers. Some of the nuts were welded on prior to painting as getting a wrench in there would be impossible. All stainless bolt heads were surface ground on top, six flats and 30 degree angle spun on top. Then they were all mirror polished. Made up mandrels to help do all this.
| 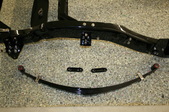 Front leaf springs ready to go on. They are new 6 inch lift springs. Front leaf springs ready to go on. They are new 6 inch lift springs.
|
 Used an engine hoist to lift frame up. Eye bolt with rubber washer underneath for no marring. Simple and easy. Used an engine hoist to lift frame up. Eye bolt with rubber washer underneath for no marring. Simple and easy.
|  Rear Springs laid out and ready to go on. Rear Springs laid out and ready to go on.
|  Once installed I needed a way to move it around. I used car dollys with oak boards. Bottom of springs have a socket head cap screw head as most spring packs do. I countersunk the oak slightly so the spring doesn't touch the board, just the shcs head does. Once installed I needed a way to move it around. I used car dollys with oak boards. Bottom of springs have a socket head cap screw head as most spring packs do. I countersunk the oak slightly so the spring doesn't touch the board, just the shcs head does.
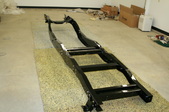
|  All together and starting to look like something! All together and starting to look like something!
|
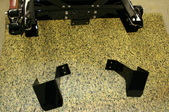 Rear bumperettes are next. I made these from 3/16's flat plate and copied the originals. Aren't exact as the frame and mounting points are different than stock. Rear bumperettes are next. I made these from 3/16's flat plate and copied the originals. Aren't exact as the frame and mounting points are different than stock.
| 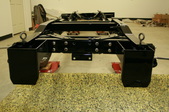 Bumperettes installed and put eye hooks through bed mounts for lifting points for rear axle install. Bumperettes installed and put eye hooks through bed mounts for lifting points for rear axle install.
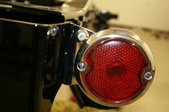
|  Taillights ready to put on. Had to see some brightwork on the truck! Taillights ready to put on. Had to see some brightwork on the truck!
|  Mounted them using the bumperettes mounting holes and they will be tucked behind filler panel of bedsides for protection. Mounted them using the bumperettes mounting holes and they will be tucked behind filler panel of bedsides for protection.
|
 Close up and you can see at the top left the Visibolt LED light. That is the rear turnsignal indicator Close up and you can see at the top left the Visibolt LED light. That is the rear turnsignal indicator
| 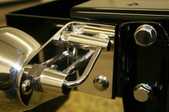 Close up off light back. All the wires are hidden inside the tubing and made up stainless contour nuts/pieces to make it all work. Everything is trapped when put together and tightened. Close up off light back. All the wires are hidden inside the tubing and made up stainless contour nuts/pieces to make it all work. Everything is trapped when put together and tightened.
| 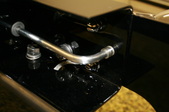 Inside framerail view of wire run. At this point, everything was tightened and torqued. Spring eye bolts are left loose till all weight is on. That way they are tightened in the "rested" position. Inside framerail view of wire run. At this point, everything was tightened and torqued. Spring eye bolts are left loose till all weight is on. That way they are tightened in the "rested" position.
| 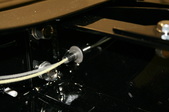 Passing through the second crossmember, From here it will be wrapped in black braided wire wrap. Passing through the second crossmember, From here it will be wrapped in black braided wire wrap.
|
 Prior to painting I took the time to lay out all the ground points. Everything has stainless bolts welded to the frame. Poly washers to stainless so no worries there, all pieces(frame to bed, frame to cab, etc) have their own dedicated braided ground straps. Prior to painting I took the time to lay out all the ground points. Everything has stainless bolts welded to the frame. Poly washers to stainless so no worries there, all pieces(frame to bed, frame to cab, etc) have their own dedicated braided ground straps.
|  With frame basically together it was time to get ready for axle installs. Original U bolts had the nuts down with hard 90 degree bends on the bolts. No way I could safely duplicate that so I decided run the nuts up. This allows for a normal, round U bolt install. Got some 1/2" stainless plate for the dogbone style top plates. Time to fire up the plasma! With frame basically together it was time to get ready for axle installs. Original U bolts had the nuts down with hard 90 degree bends on the bolts. No way I could safely duplicate that so I decided run the nuts up. This allows for a normal, round U bolt install. Got some 1/2" stainless plate for the dogbone style top plates. Time to fire up the plasma!
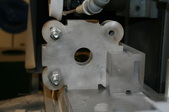
|  Undersize drilled the 4 holes in the 2 plates at the same time leaving the drills in for perfect alignment. Surface ground the edges to make them the same using the drills as a depth set. Undersize drilled the 4 holes in the 2 plates at the same time leaving the drills in for perfect alignment. Surface ground the edges to make them the same using the drills as a depth set.
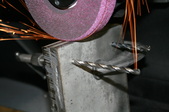
|  Roughed the corners in with an agle grinder then dressed a radius in the wheel to clean them up true. Roughed the corners in with an agle grinder then dressed a radius in the wheel to clean them up true.
|
 Action shot took some doing! Run the table with one hand and snap the pic with the other but I got one, Action shot took some doing! Run the table with one hand and snap the pic with the other but I got one,
|  Here you can see the set up and it coming to fruition. Center sections were roughed out with an angle grinder again and finished on the surface grinder. Here you can see the set up and it coming to fruition. Center sections were roughed out with an angle grinder again and finished on the surface grinder.
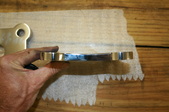
|  The finished plates ready to start sanding and polishing. The finished plates ready to start sanding and polishing.
|  Little bit of difference between polished an natural. Little bit of difference between polished an natural.
|
 Put the plates in the press and bent them so they have slightly more arc than the springs. That way when tightened they provide equal pressure with digging on just the ends. Put the plates in the press and bent them so they have slightly more arc than the springs. That way when tightened they provide equal pressure with digging on just the ends.
|  Another view of arc bend Another view of arc bend
|  Up next was to try to bend the U bolts. I wanted stainless but they would have to be custom bend which was over $100.00 per size. There are 3 sizes on the truck. I worked out the measurements and the manufacturer agreed to sell me a threaded straight to try. I was successful so I got the rest of the sizes needed. Up next was to try to bend the U bolts. I wanted stainless but they would have to be custom bend which was over $100.00 per size. There are 3 sizes on the truck. I worked out the measurements and the manufacturer agreed to sell me a threaded straight to try. I was successful so I got the rest of the sizes needed.
| 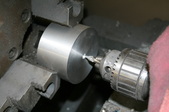 I had to make up some ID rollers for my bender so I got some tool steel and drill it out. I then had it hardened. I had to make up some ID rollers for my bender so I got some tool steel and drill it out. I then had it hardened.
|
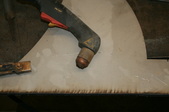
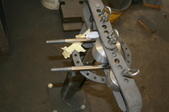
 I polished the straight lengths out and and proceeded to bend them. I used some wood to space it to the middle and it kept scratching down as well. I polished the straight lengths out and and proceeded to bend them. I used some wood to space it to the middle and it kept scratching down as well.
|  I did learn that the ID changes when switching to hardened stock. Using the same roller, the hardened stock will wind up being a 1/2" bigger. I adjusted for that on the rest of the U bolts when making the ID rollers. I did learn that the ID changes when switching to hardened stock. Using the same roller, the hardened stock will wind up being a 1/2" bigger. I adjusted for that on the rest of the U bolts when making the ID rollers.
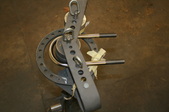
|  It takes all I can do to bend this 5/8" hardened rod. Manufacturer of the bender probably wouldn't approve of this project. It takes all I can do to bend this 5/8" hardened rod. Manufacturer of the bender probably wouldn't approve of this project.
|  I worked with The manufacture of the stainless rod lengths and he now does his bending inhouse as well. I worked with The manufacture of the stainless rod lengths and he now does his bending inhouse as well.
|
