1
Not having a lot of time to get this done, February being a short month, and the winter Olympics being televised. I grabbed a piece of masonite and shot a coat of Aquaflow white over it. Then I lightly sketched a window.The theme is "skulls". This topic is one that's been done-to-death, and I'd like to avoid the demonic skulls with horns and fangs.
| 
2
For a change of pace, I'd like to do a glass skull. This will be different and take some careful planning to pull-off. I want to give it an Edgar Allen Poe feel, he's the master of the macabre.First I tried an internet search of Victorian architecture, to find an appropriate window. Unable to come up with anything, I'll have to use my imagination.I masked off the frame of the window and put in some paper to cut down on the tape time.
| 
3
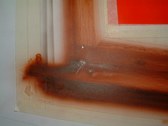
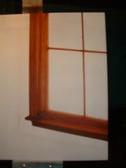
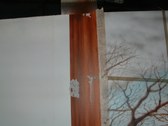
Now I start shooting in the wooden pieces of the frame. The sill has a bullnose edge, so despite it being in the shadow area, I keep the layers light and build them gradually. Hopefully this will give it form and depth.
| 
4
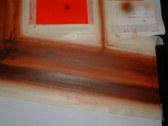
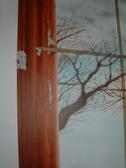
Here's a close up of the grain. Luckily you don't need a steady hand for this step.
|
5
The frame has lots of different wooden pieces joined at anlges, so a business card is the principal tool to cut-in the angles. I have to be aware of the fact that the light is coming through the window, and the shadows will be heavy in many spots.
| 
6
After I shot the white paint, I let the piece sit for four days, and I gave it a heat setting with a hair dryer. It obviously wasn't enough. here you can see where the business card left marks on the paint. This project is already off to a shaky start. I'd planned to make this as close to photorealism as I could in the time left. That is a fading hope. Just finishing in time is a challenge now.
| 
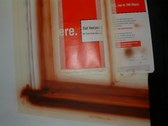
7
I was able to cover the scratches, but made the corner very dark in the process. Mistakes force one to get creative to make them less noticeable. Maybe I can put a nail in the corner, which many homeowners did to keep mortise & tennon joints from coming apart.
| 
8
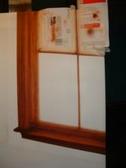
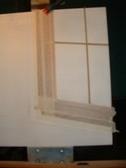
Here it is with most of the masking removed. I see now that my fingernail left scratches where I use it to brace while making the woodgrain. I'm going to have to be very diligent as far as heat setting each step. Otherwise I'll never finish this.
|
9
I finish the details on the mutton bars and remove the mask. Next I planned to add hints of the glass in the corners, but I discovered that I was out of the transparent colors I needed. I wasted a lot of time trying to mix my own, but it looked muddy. Luckily, I live near a LARGE retail art outlet, so I walked up only to discover that their airbrush dept. looked like the seventh sack of Rome. They had nothing that I needed, so I had to order the paints online. The place I deal with is fast, but it's going to be touch and go to get this done in time for the deadline.
| 
10
I masked off the woodwork after I heat-set it. I used a heat gun, as opposed to a hair dryer. This insures that I won't have the peeling problems, it also guarantees that I will trip over the heat gun every time I move.
| 
11
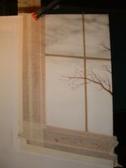
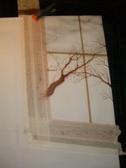
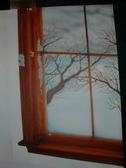
I dust in some clouds in the upper corners, and begin adding branches. This is all freehand, so I can work quickly.
| 
12
I have a tendency to overwork many of my pieces, so I back off here and try to decide what the outside should look like. Dark, Overcast and Foreboding? Or cloudy with some Stark, Bright sunlight cutting through the clouds?
|
13
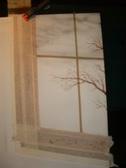
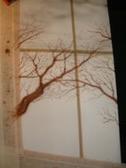
I shot a reference pic of trees out a window, and the amount of branches is mind-boggling. I could spend the rest of the month just filling in background twigs.
| 
14
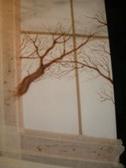
A closer look with more branches.
| 
15
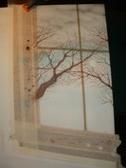
This is getting bor-ing real fast! I think I've got enuff for now. I'll move on to another portion before I go nutso. I had wanted to paint the walls as if they'd been wallpapered, but that is overly ambitious. Wood paneling will also take a large chunk of time, so I'll just cover it like it was plaster and paint. Time's drawing near.
| 
16
Even the greyest of days has a bit of blue sky...so I add a touch. I can always make it gloomier later.
|
17
OHHHH NOOOO!!! When I remove the masking tape, part of the window casing goes with it! Now I'm not only faced with a REALLY close deadline, but I don't know if I can rematch the paint color and get
this mess fixed in time. The fluted pilasters on the casing will be tough to make look right. NUTZ!
| 
18
Today is the twenty seventh, tomorrow's the deadline, so I don't know if I should just leave the flaws and try to finish, or if I should spend even more time trying to fix the problems. I haven't even gotten to the focal point of the exercise, the skull yet. I was pretty happy with the way it was turning out too.
| 
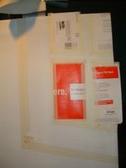
19
I've decided to soldier on, and I tape off the spot where I want to render the panes of glass. I mist some transparent blue on the corners, the spots that're the darkest and hopefully that will make it look enough like a real window. I'm a little gun-shy now, I still have to establish the horizon line outside and time is running short.
| 
20
The project is ruined. The tape has pulled off even more paint, it would be a mad-scramble to retouch it in time to finish by the deadline, but there's no guarantee that it won't peel again. I suppose it just wasn't meant to be. Maybe I'll post it as a "How Not To Do".
|
21
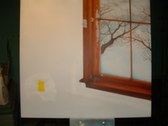
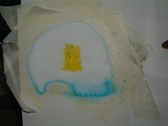
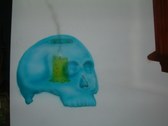
Having invested so much time and effort into this, I hate to quit now, but clearly this won't be one of the top finishers. I decide to do the skull anyway. I haven't even done the desk that the skull will sit on. I airbrush a candle in Hansa Yellow where the skull will sit.
| 
22
Afraid of any masking, I draw the skull on white paper, cut it out and place it where I want it on the non-existent desk. I'd like it to look like blown glass ( hey Beavis, he said "Blown" heh heh) I shade the edges to make them look smooth and not jagged like real skulls teeth.
| 
23
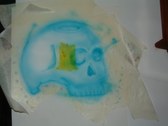
I begin to shade the areas that will give the skull shape, trying to maintain the see-through appearance.
| 
24
I use my elipse stencil to put the hole in the top of the glass skull where the wick can be lit. I then give it a rolled edge look by airbrushing around it.
|
25
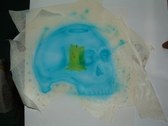
A closer look as I try to shade the darker edges keeping the glass illusion in mind.
| 
26
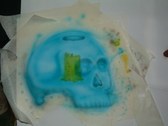
I switch to Shading Grey to darken the lower portions where the glass is thicker and less light will pass thru. I'm not so sure this was a good move, it looks muddy.
| 
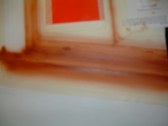
27
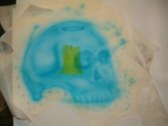
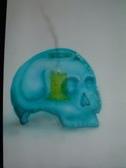
I take away my paper mask, but I'm not sold on the glass look. I add smoke but if you've ever spent time in a black-out, you'll know that candles only smoke after the flame has been extinguished. I'll try doing the desk underneath and see if I can put the woodgrain thru the glass skull, enhancing the transparent effect.
| 
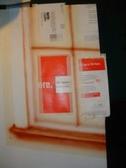
28
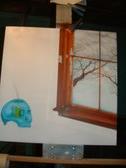
A distance shot of the skull and the window. I think this would've looked Killer if things had gone according to plan.
|
29
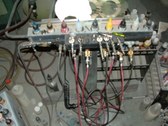
To add insult to injury, One of my airbrushes has a coily cord which has a tendency to snag on other airbrush cords when it's least advantageous. Today it snagged on my Grex brush, pulled it out of it's space and naturally it fell right on the tip, bending it like a piece of soft licorice. I'll have to replace that damn cord next time I put in a paint order!
| 
30
Now I'm back to my HP-C to do the remaining details.
| |