1
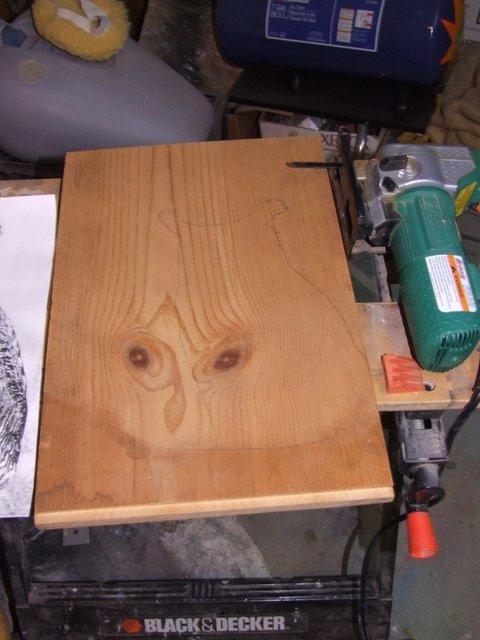
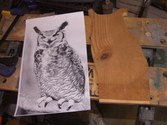
I grabbed a piece of pine shelving, sanded it quickly and sketched an owl onto it, using a picture as a guide.
| 
2
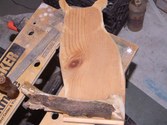
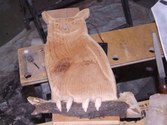
Here's the photo and the cut out. I wish I could have elminated the knot in the center, but beggars can't be choosers.
| 
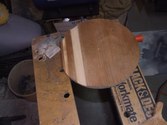
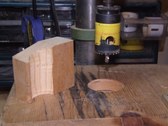
3
I begin by roughing the outline with a set of small files and rasps.
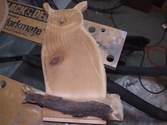
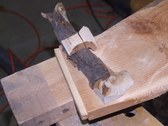
| 
4
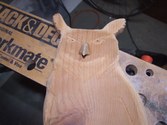
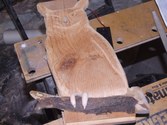
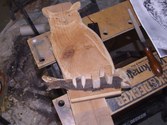
The next step is the beak. I put a sanding drum in my drill press and use that along with small files and sandpaper to shape the beak. Because it's such an odd shape, it isn't easy to hold while doing the contours.
|
5
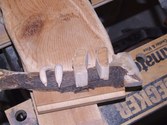
Hootie will need something to perch on, so I grabbed a piece of scrap from the neighbors trash pile and sanded one side flat. I'll carve out his talons to wrap around it, but that'll come later. Here I'm roughing out his basic form with files and rasps.
| 
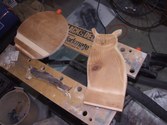
6
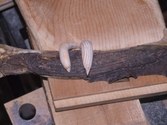
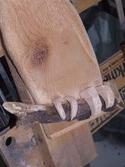
This menu-holder will have a round base. The first one I made, I placed the furrow where the menus stand too close to the owl. I made the same mistake here. I widened the slot by running it through the router twice and sanding the bottom smooth with my Dremel contour sander.
| 
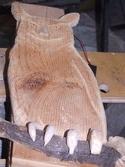
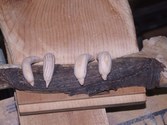
7
The branch that Mr. Hooter will perch upon is too thick, so I'll have to sand it down...a lot! Since it's an uneven shape, this will be a royal painus in the anus.
| 
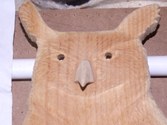
8
I glue on the beak and drill holes in the eyes, where the L.E.Ds will be.
|
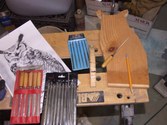
9
I used a dovetail to slide the owl into the spot on the base. Unfortunately I made the slot too close to the edge and it broke off. When I repaired it, the owl no longer fits tight, so I'll have to use glue and screws to make sure he doesn't loose his footing.
| 
10
The first Hoot Owl that I made was rather cartoonish. I "drew" the feathers by engraving them into the wood. This time I made a series of short lines, that give the bird texture without being overly dramatic. I'll airbrush in more details than the last one.
| 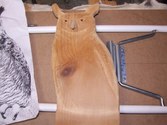
11
Here's a wider shot of Mr. Hoot. If you enlarge the picture, you'll be able to see the engraved feathers better.
| 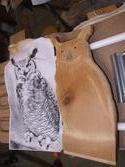
12
A side by side of the reference photo and the carving. The talons will be the hardest part, but one of the aspects that will make it stand out. I'm thankful there are only four.
|
13
Adding the talons is the most daunting task of this project. I took a piece of scrap 2 X 4, and drilled it with a hole saw to replicate the inside arc of the claws.
| 
14
Placing it on the owl to give me a starting point for the talons, I draw in the first one.
| 
15
I sarted cutting it with a coping saw, but the blade kept moving, so I switched to a sabre saw, which caused the wood to crack along the grain. This might work to my advantage, making it easier to carve in sections rather than one piece. Three more to go.
| 
16
I carved the first two talons and they fit pretty well. A litle more sanding and some fine tuning will make them grip the tree branch like Hootie himself!
|
17
Here's a close up. The claws should be a little longer, so I'll have to modify them a bit, but if I decide not to, I don't think anyone will challenge me about it.
| 
18
Here are the last two roughed out. I was able to get all four from one piece of scrap wood. That saved me a lot of cutting time.
| 
19
Another close up. Compare the difference in size between the finished claws and the ones I just cut out.
| 
20
I used a coping saw to cut away as much wood as possible. You can see the flat appearance of the claws before they get sanded down to a closer representation.
|
21
I put the drum sander back in my drill press, then began wearing away everything that didn't look like a talon. I may not be a Michelagelo or DaVinci, but I AM a maestro when it comes to making sawdust!
| 
22
After a lot of work with the drum sander and my Dremel tool, the claws are about the same size. Some fine sanding will smooth out the lumps from the previous steps.
| 
23
The funny thing is, the talons have feathers on them as well, so after a lot of sanding, I'm about to etch more roughness into them.
| 
24
I had taken shots of the steps to mill out the base, but everytime I remove the batteries from my camera, when I reinstall them, it automatically goes to the highest megapixel choice. I cannot load those shots into the album for that reason. But I made a jig to guide my router in scooping out the base.
|