
1
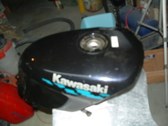
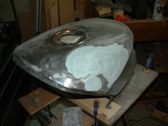
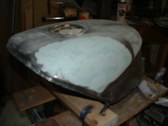
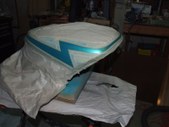
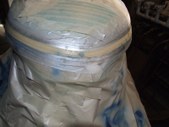
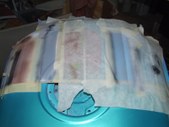
Here's the Kawasaki tank I was given, it looks pretty good...right?
| 
2
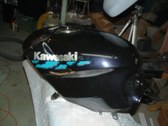
...not bad...not bad at all...
| 
3
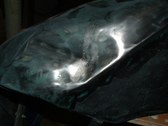
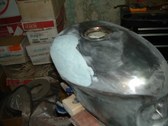
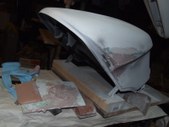
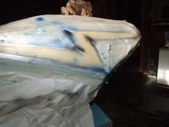
...wellll, maybe I spoke too soon. A serious crunch that I cannot just patch up with filler. I could cut the tank in half, which would make it easy to hammer out the dent-ola, but I don't have the resources to reattach the two halves, so I could either mount the halves like a hunters' trophy, or use a dent puller to pop out the worst spot and only use it as a demo piece. That seems like the way to go, it would leave the most surface area to display my airbrushing talents (or lack thereof...hehe)
| 
4
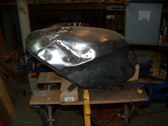
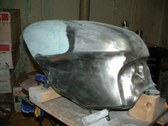
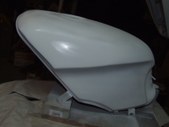
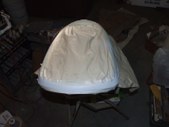
The other side...of the black Kawi tank minus itz paint and stickers.I still have to go to town on this tank, a few hours and the grinder'll get the remnants of the paint removed.
|
5
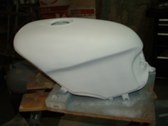
This is the Kawasaki tank that was in pathetic shape. I'm going to go out on a limb, and see if I can restore it to acceptable quality.
| 
6
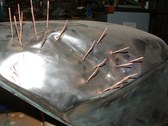
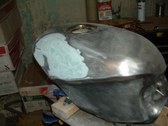
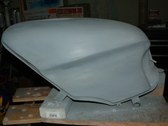
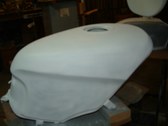
I'm no metal master, but I discovered that instead of trying to pull out the deepest part of the dent first, that I should start on the shallower sections, and get them raised. Once that's done, the deeper portions should be less work to pull and fill. I had to mount the tank to a scrap piece of plywood to make a way to keep it from rocking while I pulled the dents.
| 
7
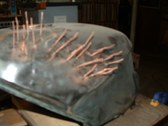
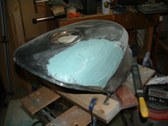
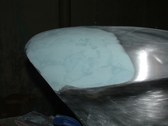
My theory seems to be holding up, but I've got a longggg way to go. To make matters worse, my slide hammer is giving me problems.
| 
8
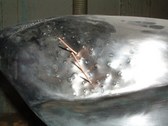
It's hard to tell here, but the dent is nowhere close to the depth that it was when I started.
|
9
Having raised all around, I have to see how much I can get the deep trench to come to the surface.
| 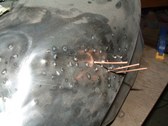
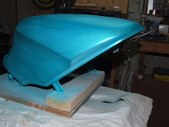
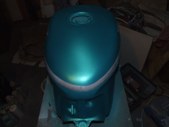
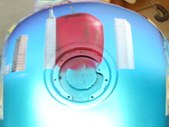
10
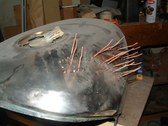
Considering that I'm an amateur, I'm impressed with the stud welder's ability to repair a job like this. If I can get these kind of results, just imagine what an experienced metal-worker could do!
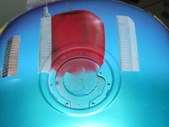
| 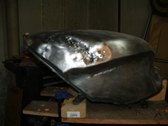
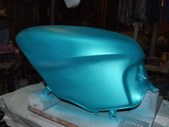
11
The stud welder I bought was a budget brand, and the slide hammer quickly wore out. I ordered a better one from a reputable company, but that wasn't compatible with the studs I used. After several weak attempts to coerce the dent out further, I decided to call it quits.
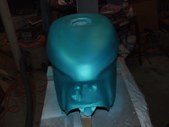
| 
12
Here's the Kawasaki tank. The sheet metal is thin, and I'm afraid that if I use heavier studs, they'll burn through. So I will glop on gobs of body putty to fill the dent rather than trying to massage it out.
|
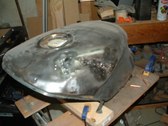
13
The first layer of bondo.
| 
14
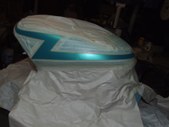
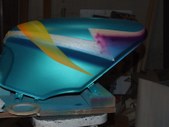
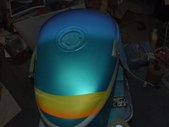
A quick sanding and I can see where I need to build it up more.
| 
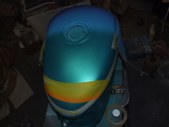
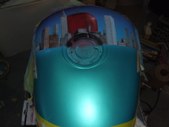
15
More putty and more sanding and it's starting to look better.
| 
16
Sanded and starting to look more uniform.
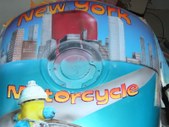
|
17
A fresh layer of filler.
| 
18
Again with the high spots knocked down.
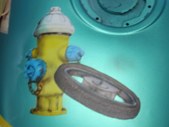
| 
19
Getting close to the time for some primer.
| 
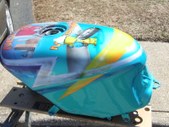
20
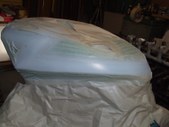
After several skim coats, sanding, primer, more bondo, sanding, more paint, more filler, sanding, a final coat of primer... Considering that I'm not a body man, I think the tank looks damn good. Now I've got to get it ready for some artwork. This is the fun part!
|
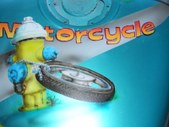
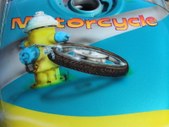
21
You can see the dark areas where the filler leaves hollows. These spots need to be filled some more. You can guess what comes after that.
| 
22
Body work is a strange thing, you put putty on, sand it off and then put more back on top of where you just finished sanding. Go figure.
| 
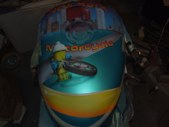
23
No matter how many times you do this, there always seems to be just a little bit more to do.
| 
24
The gray primer is good to keep the tank from rusting while it's idle, but a contrasting color is needed to highlight the spots that need work.
|
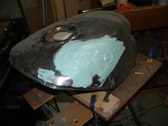
25
I had another project that I was spraying with Auto Air basecoat/sealer, so I gave the tank a coat as well.
| 
26
Nothing like a coat of paint to make the flaws in bodywork show up like neon signs!
| 
27
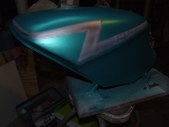
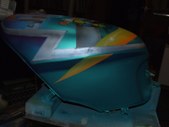
Getting antsy, I laid down a coat of Auto Air iridescent pearl blue. It looks good, but it also shows all the spots I missed when filling the dents.
| 
28
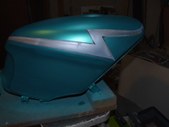
The ridge where the legs slide under is one of those spots that never seem to look right, no matter how many times I fill, sand and paint.
|
29
Despite trying to do a professional quality job, you can see that the tank isn't quite even from side to side.
| 
30
I could spend many more days working on the metal, but instead I start laying out the design for the artwork.
| 
31
Here's the flip side.
| 
32
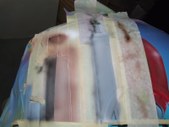
All masked off, I laid down some white so the coverage is easier to achieve without so many coats.
|
33
Another shot of the white.
| 
34
Now for the dirty work, more masking to do the shadows and highlights.
| 
35
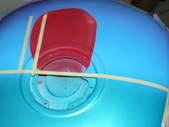
It's hard to tell here, but there's a strip about 1/8th inch wide at the top and bottom.
| 
36
The bulk of the silver has been masked over, so just the trim lines are exposed for airbrushing.
|
37
This isn't a very good photo, but this is what it looks like once the mask is removed.
| 
38
The opposite side.
| 
39
Now I get to cover it all over again, to keep the painted portions from getting overspray on them.
| 
40
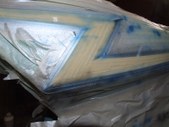
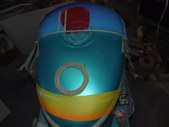
Once it's taped over, I painted a yellow slash with flourescent orange along the bottom edge to give it some flair.
|
41
Here's a top view.
| 
42
Through the camera lens, the tank didn't look so dark, there's purple shading along the top edge of the tank.
| 
43
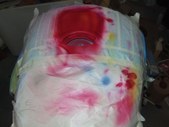
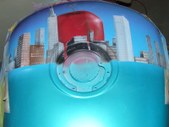
Now I'm going for the guts of the design. A Big Apple. I used Auto Air Deep Red, toned down with some flourescent orange. I painted it in vertical stripes, since apples aren't uniform in color. I kept the coverage minimal, so I can add different tones later.
| 
44
Here I've added some yellowish green, some purple and some brown to give the apple a bit of depth.
|
45
Now I strip off the masking and begin to remask the next step.
| 
46
A close up of the Big Apple.
| 
47
I had a hard time finding pictures of the New York skyline, that weren't heavily pixelated when I enlarged them. So I'm taking artistic liberties in painting the buildings.
| 
48
I'd wanted to add the Citicorp building, with it's distinctive slanted roof, but I goofed up the angle so it'll just have to be another ordinary building.
|
49
I used fine-line tape to mask off the windows of the buildings. Because it's made of a plastic and not crepe, it tends to peel off the areas I so painstakingly placed it on...
| 
50
Once the tape is off the tank, it sticks to everything I don't want it to. I suppose that Murphy's Law has a tape clause.
| 
51
I've knocked out the bulk of the buildings. Once I get the foreground finished, I'll fill in any empty spots.
| 
52
The logo of the shop I'm sending this to, is a motorcycle rim chained to a fire hydrant. So that's the next step in this project.
|

53
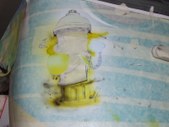
I first tried using chalk to sketch out the hydrant, but it was scuffing up the basecoat. I laid down some 3" tape and sketched the hydrant on there. I'll use the Auto Air white to basecoat the hydrant, but then I'm switching to Golden airbrush colors, they go through my airbrushes much better than the AA.
| 
54
After sketching the hydrant, I cut out certain elements and start the filling-in process.
| 
55
I've worked my way up. Most of this is free-hand, but I like to keep a masked outline to give me someplace to test-fire the airbrush so I don't get bloops and blotches on the work. You can see them on the tape surrounding the image.
| 
56
Now that I've peeled the mask off, I don't like the angle the hydrant is tilted at. I'll have to find a creative way to disguise this blunder. Despite the fact that I've heat-set the paint, when I tried to wipe away some speckles that got on the surface, it took the paint with it.
|
57
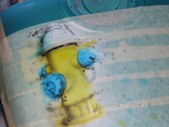
In the words of General Anthony McAuliffe, "NUTS!" The paint ran under the tape and left yellow glops around the lettering. Since this will be clear coated and I don't have the specs of the paint, I can't use 1-Shot enamel to outline the letters and hide the errant paint. I'll have to use some Auto Air to do this, and I'm skeptical about the turn-out.
| 
58
I decided to outline the letters with irridescent violet. The emphasis seems to distract the eye away from the yellow runs, but any close inspection makes it pretty obvious that I goofed-up. For anyone looking to paint lettering with a brush, I'd advise against using Auto Air. It doesn't flow smoothly, and it doesn't cover well. Maybe a pinstriper with real talent can do a better job than I did, but it still isn't the best choice.
| 
59
I added the chains to the hydrant and shot some brown here and there to give it some outdoor, aged, rusty patina.
| 
60
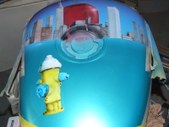
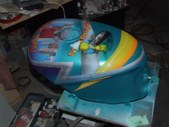
New York Motorcycle's logo is a drawing of a bike wheel chained to a hydrant, as if the bike got stolen and the thief left the wheel behind. I'm using that theme just not exactly as their trademark represents it. I started the wheel with white, since coverage on this paint isn't great. I added the black for the tire and tread, and next I'll try to get the chrome look of the rim.
|
61
It looks good so far, I'm reluctant to add the spokes, for fear of messing it up.
| 
62
Lock & chains added, it looks less odd than it did with just the hydrant at the weird angle. I'll have to practice the strokes to make my lettering less sloppy.
| 
63
It's funny how many of the images are flashed-out when I photograph them, and others appear too dark. I could have slaved over this for another week or two, but I don't think it would have accomplished much to add to the project. I think it's bold enough and still conveys my ability to do minor details.
| 
64
Here's a close up. Since I'm not working with professional quality products, many of the difficulties I had are my own fault.
|

65
A side view.
| 
66
The flip side.
| 
67
Top side.
| 
68
Top view side B. Now it's off to get clear coated. Can you image some goofball riding around on the bus, toting this thing to try and get work? If not, then you're not riding the right buses!
|
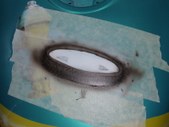
69
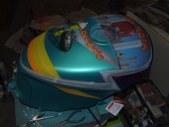
The tank is back from being clear coated, it's truly amazing how much depth the clear addds to the artwork. It's also truly amazing that I missed so many little details, I found at least three pieces of masking tape that I'd neglected to remove. They're a part of it now.
| 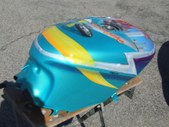
70
A view of the top and side.
| 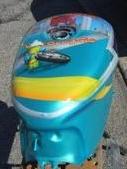
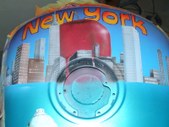
71
Another angle...
| 
72
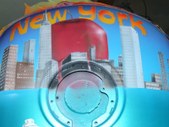
A look at the Big Apple...
|
73
And a closer view. Now this will still need some wet sanding and polishing, then I can bring it around to hawk my talents to potential customers.
| 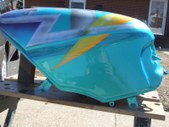
74
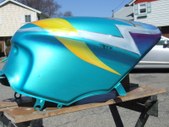
The "driver's side"
| 
75
Another compound view.
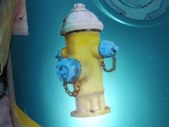
| 
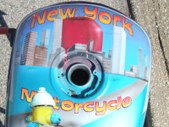
76
A close up of the logo revisited.
|
