 1 1
|  2 2
|  3 3
|  4 4
|
 5 5
|  6 6
|  7 7
|  8 8
|
 9 9
|  10 10
|  11 11
|  12 12
|
 13 13
|  14 14
|  15 15
|  16 16
|
 17 17
Impossible Mission (small size)
|  18 18
Engine damaged Bf109
|  19 19
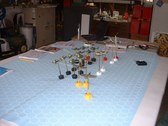
Big slow targets....
|  20 20
A quiet Belgian Village, December 1944
|
 21 21
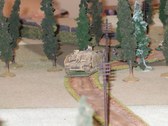
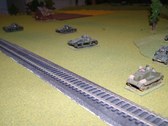
Stg III leads the German advance
|  22 22
US Forces HQ
|  23 23
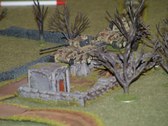
Germans infiltrate through the orchards
|  24 24
A US 57mm M1 Anti-Tank gun waits for its target....
|
 25 25
Target, Stg III 200 yards, Fire !!
|  26 26
Sneaking about....
|  27 27
Arras 1940, German MMG group setting up.
|  28 28
German 37mm PAK gun waits for its target.
|
 29 29
Targets front !!
|  30 30
German defensive line on the tree lined ridge
|  31 31
Our shots are ineffective against these British tanks !!
|  32 32
German HQ and AT Rifle Group
|
 33 33
If the 37's dont work, what makes you think this AT rifle will ?
|  34 34
British carrier platoon overrunning a German MG outpost
|  35 35
Carrier, Scout Mk I
|  36 36
German HQ and transport goes up in flames
|
 37 37
Matilda Mk I's move relentlessly towards the German lines
|  38 38
Command group of the 7th RTR directs the atack
|  39 39
Matilda II and Dingo Scout car
|  40 40
Matilda Mk II
|
 41 41
Hans, I think we need something stronger to deal with this....
|  42 42
err...where's that 88m that was supposed to be here ?
|  43 43
Over the railway embankment and on to Arras
|  44 44
7th RTR into attack formation..... at 8 MPH
|
 45 45
Matilda II and Matilda I speeding into the attack....(yeah right)
|  46 46
Not far to go now lads, lets get the Jerries !!
|  47 47
Italian post #40 at Bardia. December 1940
|  48 48
Italian post #41, Bardia 1940
|
 49 49
Its those Bloody Aussies coming to visit !!
|  50 50
And the supporting Matildas as well.
|  51 51
7th RTR now appearing in the Western Desert, after their sucessful tour in France........
|  52 52
Italian 47mm AT gun, This one managed to knock a track off of a Matilda before it was knocked out.
|
 53 53
It made the Australians very cross
|  54 54
Oh-Oh Guiseppe, there coming here next. Get the chianti....
|  55 55
Another view of post 41
|  56 56
Holding out valiantly
|
 57 57
A Matilda II viewed from the sharp end.
|  58 58
Commanders were usually unbuttoned
|  59 59
Aussies going through the wire and in with the bayonet
|  60 60
Australian 6th Division
|
 61 61
Supported by 7th RTR
|  62 62
a formidable combination !!
|  63 63
Get stuck in lads !!
|  64 64
Matilda's keeping the Italian heads down
|
 65 65
Italian 65mm Artillery gun.
|  66 66
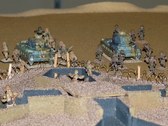
47mm and LMG in the gunpits
|  67 67
Italian post #38
|  68 68
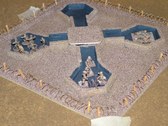
Italian post 42 with Anti-Tank ditch
|
 69 69
Stukas over the Channel. August 1940
|  70 70
"look out for the fighters"
|  71 71
Tally-ho !!
|  72 72
Free for all
|
 73 73
Splitting the formation up
|  74 74
Avoiding the 109's & 110's
|  75 75
Mixing it up
|  76 76
going after the stragglers
|
 77 77
Bf109 in trouble
|  78 78
110 in pursuit of a Spitfire
|  79 79
"Look out behind !!"
|  80 80
"Never fly straight & level in the combat zone for more than 30 seconds"
|
 81 81
A Stuka party....
|  82 82
Smoke & flames made from cotton wool & spray paint.
|  83 83
Damaged & heading for home
|  84 84
"Achtung Spitfire"
|
 85 85
Red 3 closing in
|  86 86
Red 3 claiming his first kill
|  87 87
Japanese raid on Darwin Late 1943
|  88 88
Defending Sptitfire V's from 453 Squadron RAAF
|
 89 89
Gaining height for the attack
|  90 90
Bouncing the Japs from out of the clouds....
|  91 91
HE 111's vs Hurricanes
|  92 92
Our first game of CY6, trying to learn the rules.
|
 93 93
Trying not to collide
|  94 94
2nd Game: He 111's & Bf 110's intercepted by Hurricanes
|  95 95
Hurricane I's
|  96 96
Heading through the formation.
Never go head to head with a 110 !!
|
 97 97
"He just blew up !! "
|  98 98
Glycol leak........
|  99 99
Just what you want to see on the wargames table....... A visit from Bomber Harris
|  100 100
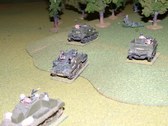
M36's overwatch some M4A3 76's advance
|
 101 101
Pzkfw V's advance
|  102 102
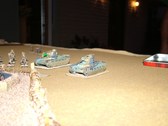
M4 Shermans approach the crossroads
|  103 103
Infantry dismounting
|  104 104
Danger lurks in the fog.
|
 105 105
And here is the danger in the shape of a Mk V
|  106 106
One knocked out, 3 more to go...
|  107 107
A lucky hit from a 75mm Sherman takes another one...
|  108 108
Sdkfz 251 goes up in flames from a Sherman on the flank
|
 109 109
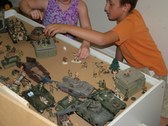
We all started like this....
|  110 110
| |
