OpenGen.ai Detailed Review
OpenGen.ai Tool Overview
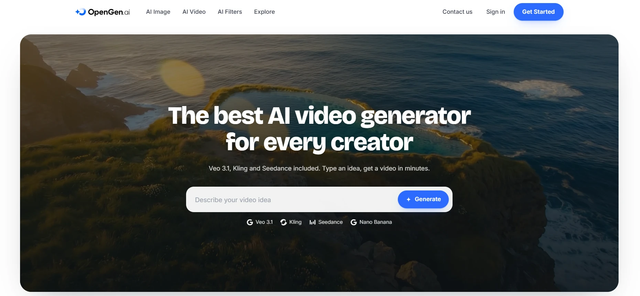
OpenGen.ai is a web platform for generating videos and visuals using artificial intelligence. After registering, users get a personal dashboard that brings together tools for working with videos, images, and photos. This means there is no need to pay for multiple subscriptions or get used to a new interface every time. All work is done in one unified space.
The service uses a model-based approach. The user describes an idea in text, selects the appropriate model, adjusts the generation parameters, and starts the process. The interface is built around a prompt input field. Everything is very simple.
More than 2 million creators already use OpenGen.ai. And this is not surprising, as the service gives the impression of being well-organized, with a wide range of tools and intuitive navigation. It is suitable for both beginners and experienced creators.
Next, let's take a closer look at the capabilities, features, and functionality of OpenGen.ai. You can also double check OpenGen.ai reviews on AITopTools, Trustindex and OpenTools AI.
Registration and Getting Started
The account creation process on OpenGen.ai is standard. On the landing page, you need to enter your email address and create a password. Alternatively, you can sign in using Google, Facebook, Apple, or Microsoft.
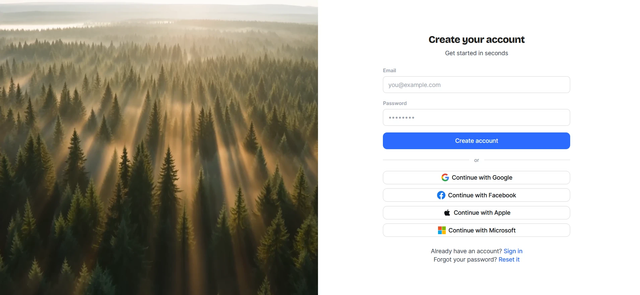
We decided to register for OpenGen.ai using email. Creating an account literally took 30 seconds. There was no identity verification or multiple CAPTCHAs – everything was very fast.
After that, the system redirects you to the homepage, which greets you with the question “What would you like to create today?” and a prompt input field. So, you can start working immediately without having to configure practically anything from the start.
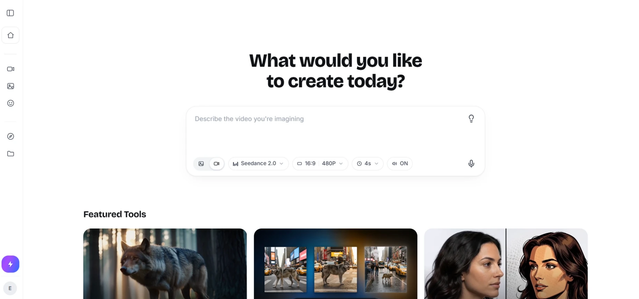
After signing in, it becomes clear that the platform uses a credit system. For free access to the basic features, users receive an initial balance of 25 credits.

However, paid plans are available for full access to all models and generations (5-day full access and an annual plan). Still, this is common practice for services like OpenGen.ai. After all, users can evaluate the platform themselves before making a purchase.
Main Features of OpenGen.ai
The platform positions itself as “the best AI video generator for every creator,” and this is supported by its range of tools. OpenGen.ai is not limited to text-to-video generation. It is a full-fledged creative hub that offers:
AI Video Generator: create videos from text or photos.
AI Image Generator: generate images from text descriptions.
AI Filters: restyle photos using 24 styles.
Explore: a gallery of community creations for inspiration.
Thus, OpenGen.ai is convenient for a wide variety of tasks: creating advertisements, social media content, concept art, portrait editing, and much more.
In fact, all of the tools deserve attention because each has its own set of features and strengths. So, let's look at them one by one, starting with the most popular one – AI Video Generator.
“AI Video Generator” Section
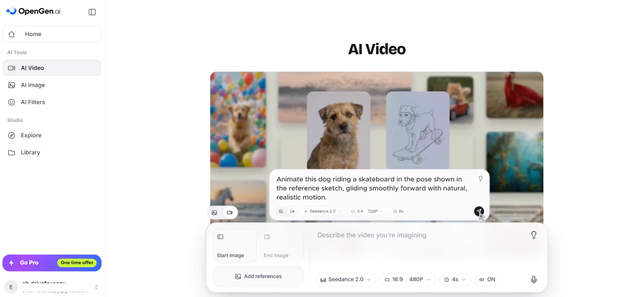
The AI Video section contains numerous tools for generating high-quality videos. The interface consists of a prompt input field, model selection, aspect ratio settings, resolution, and content duration.
1. Prompt Input Field
The central element is a large text field with the prompt “Describe the video you're imagining.” This is where you enter a description of the desired video. The field supports multiline text, allowing you to describe the scene, camera movement, lighting, and style in detail.
To the right of the field is a lightbulb icon – a hint or idea generator. This is a great feature, especially for beginners who do not yet know where to start.
2. Model Selection
A dropdown list of models is located below the input field. There are quite a few of them, but they all differ in their parameters (resolution, duration, etc.). In the upper-right corner of the selection window, there is a “Best for” filter that allows you to sort models by intended use.
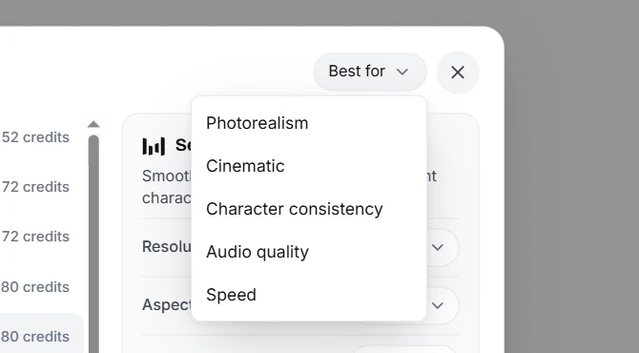
OpenGen.ai allows users to work with a number of leading AI models. There are currently 16:
Seedance 1.5 Pro – a model for creating videos with smooth motion.
HeyGen V3 Video Agent – creates videos with avatars and lip synchronization.
Seedance 2.0 Fast – a faster version of Seedance for draft videos.
Seedance 2.5 – video generation with support for multiple references.
Seedance 2.0 – multi-shot video with consistent characters.
Runway Aleph 2.0 – video editing based on a text description.
PixVerse V6 – fast, stylish clips.
Wan 2.7 – a versatile model for different styles.
Kling O1 – video generation with text support.
Runway Gen 4.5 – control over camera angles and style.
Gemini Omni Flash – fast generation for everyday tasks.
Kling 3.0 – cinematic video with realistic motion. Luma Dream Machine – smooth video from a prompt or image. Minimax Hailuo 2.3 – expressive character motion.
Luma Ray v3.2 – high detail.
Veo 3.1 – a Google model with native audio support and realistic physics.
Users can choose a model according to their task. There is no point in paying extra for a more expensive one if a cheaper option is sufficient for a particular job. For example, Veo 3.1 is better suited for realistic videos featuring people, while Seedance 2.0 is a better choice for a quick draft clip.
3. Aspect Ratio Settings
To the right of the model selection is a dropdown list for choosing the aspect ratio. The available options include:
16:9 – standard widescreen, for YouTube and advertising.
9:16 – vertical, for TikTok, Instagram Reels, and Stories.
1:1 – square, for Instagram posts.
4:3 – classic, for presentations.
3:4 – portrait, for mobile screens.
21:9 – cinematic, for widescreen videos.
This ensures that the video is generated in the desired format from the start. There is no need to crop the video after generation.
4. Resolution Selection
Each model supports its own range of resolutions. For example, Seedance 2.0 works in the 480p–4K range, while Kling O1 is limited to 720p. After selecting a model, the available parameters are set according to its capabilities.
In general, 480p is sufficient for generating drafts. For final renders, it is better to use 720p or higher.
5. Setting the Video Duration
Duration also depends on the model. Some support short clips, while others allow you to create longer scenes. After selecting a model, the available range is fixed.
You can choose from 4, 5, 6, 7, 8, 9, 10, 11, 12, 13, 14, and 15 seconds. Shorter clips are suitable for social media, while longer ones are better for scenes that require more time.
6. Additional Options
There are several additional settings below the input field. They relate to working with images and audio.
“Start Image” and “End Image” buttons. They allow you to animate a specific photo or define the beginning and end of a video.
“Add references” button. The model uses them as references when reproducing the desired style.
“ON/OFF” toggle for audio. Some models, such as Veo 3.1, support native audio generation, making videos even more realistic.
These options are optional. However, if you need a more precise result, they are indispensable.
“AI Image Generator” Section
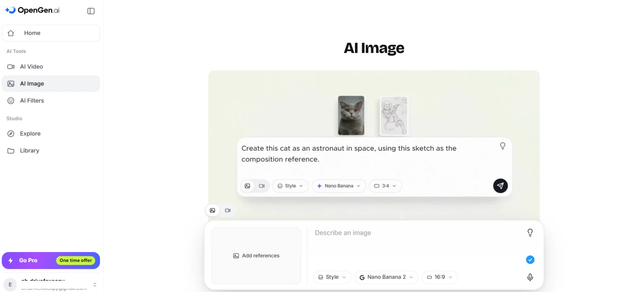
The AI Image section is designed for generating images from text descriptions and editing existing visuals.
1. Prompt Input Field
The field with the prompt “Describe an image” accepts a text description. To its right is a lightbulb icon for generating ideas.
2. Model Selection
The list of image models opens in a separate “Select Model” window. As with the AI Video Generator, there is also a “Best for” filter with the following categories: Photorealism, Character consistency, Speed, Text in images, Photo editing, and Illustration. There are currently 14 models available:
Grok – fast generation with a distinctive style.
Kling 3.0 Image – cinematic stills with depth.
Flux 2 Pro – studio-level detail with precise prompt adherence.
Qwen Image 2 – clean composition with multilingual text support.
Seedream 5 Lite – a lightweight version of Seedream with logical generation.
Seedream 4.5 – photorealism with cinematic lighting.
Seedream 5.0 Pro – web search and combined editing.
GPT Image 1.5 – precise prompt understanding for detailed visuals.
GPT Image 2 – understanding of complex prompts and typography.
Nano Banana – editing while preserving characters.
Nano Banana 2 – fast generation with good quality.
Nano Banana Pro – enhanced editing with clearer details and text.
Ideogram 3.0 – reliable text rendering for posters and logos.
Ideogram 4.0 – high resolution for posters and packaging.
The difference in credits between the models is significant (from 5 to 38). After selecting a model, a panel opens with its description and aspect ratio settings. The “Use Model” button confirms the selection.
3. Variety of Styles
The “Style” button opens 11 options. Photorealism produces an image that is difficult to distinguish from a photograph. Pixar 3D and Cartoon create a cartoon-like, animated look. Watercolour, Van Gogh, Pixel Art, Funko Pop, and Graffiti provide an artistic look. Cyberpunk and Surreal create a futuristic look.
4. Aspect Ratio
As with video, you can choose an aspect ratio: 16:9, 9:16, 1:1, 4:3, 3:4, or 21:9. So, creating images for any format is not a problem.
5. “Image to Image” Feature
This feature allows you to upload a reference image and reinterpret it in a particular style while preserving its structure. This is useful for creating design variations or adapting content for different platforms. You can add multiple references and combine elements from different images.
Testing the Feature and First Generation Experience
Since we had 25 credits, we decided to test the “Image to Image” feature and see how OpenGen.ai handles a real-world request.
First, we uploaded a portrait photo as a reference, selected the Nano Banana 2 model (20 credits), and entered the prompt: “Transform this portrait into a cyberpunk style with neon accents and futuristic clothing. @Image1”. The @Image1 symbol indicates the uploaded image. This is how the model understands which reference to use.

After starting the generation, the message “Generation started. Used 20 credits. It will appear in your library when it's ready” appeared. The credits were deducted immediately. The image appeared within a few seconds, with options to open it, view the details, and download it. Here is what we got:
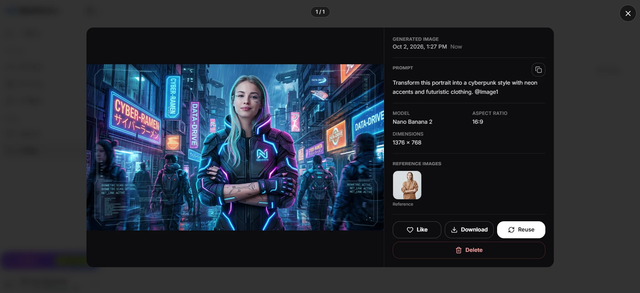
The panel on the right displays all the information about the generation: creation date, the full prompt text, the model used, aspect ratio (16:9), image dimensions (1376 × 768), and the reference image.
“AI Filters” Section
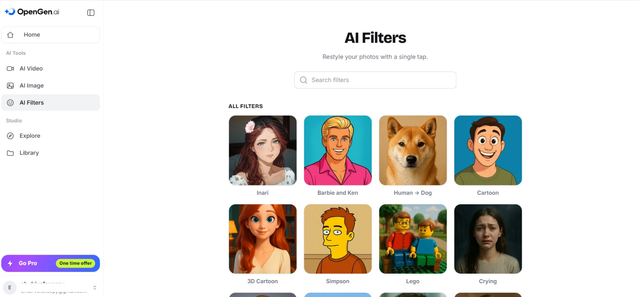
The AI Filters section contains a set of 24 ready-made presets for restyling photos. Each has its own panel with a description and a “before/after” example. For example, here is what is shown for the “Inari” filter:

After selecting a filter, a photo is uploaded. JPG, PNG, WebP, and HEIC formats are supported, with a maximum size of 10 MB. You can also select an image from the “Library.”
We tested the “Inari” filter on a portrait photo. After generation, a window with the result opened. It shows the filter name, model (Qwen Image 2), image dimensions (1024 × 1024), and reference. The result remained recognizable but had a distinct anime style:
Below the result, there are Download, Regenerate, Like, Reuse, and Delete buttons. If you click “Regenerate,” the service will generate a new version without requiring you to upload the photo again.
In summary, AI Filters are the fastest way to get a stylized image. There is no need to write a prompt or select a model. Simply upload a photo and click a filter.
“Explore” Section
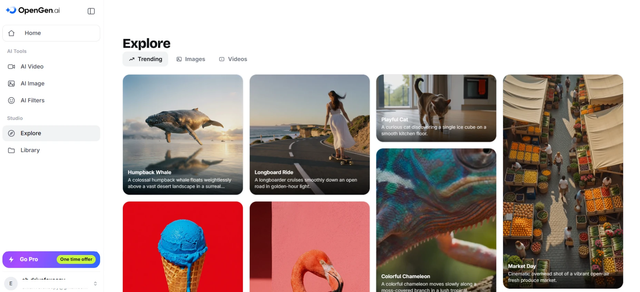
The Explore section is a gallery of creations made by other users with different models. Dozens of visuals and videos are available to view, making it easy to get inspiration for your own experiments.
The gallery allows you to filter creations by type (Images, Videos) and view them in a convenient format. This makes it easier to understand how different models work and which prompts produce the best results.
Auxiliary “Library” Section
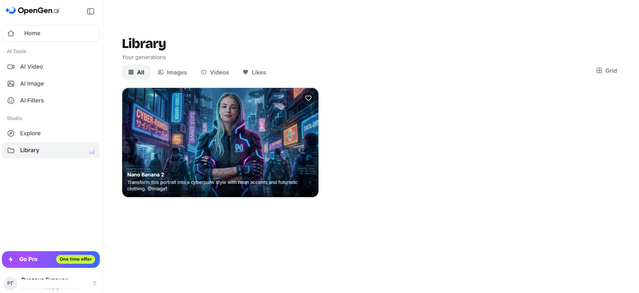
After the first generation, a new tab – “Library” – appears in the left panel. All created works, both images and videos, are stored here. In addition, users can:
view all generations in one place;
filter by type (All, Images, Videos);
mark favorite creations;
switch between grid and list views.
All of these features make it easier to work with a large number of generations. There is no need to remember exactly where an image or video was created.
Interface and Ease of Use
The platform has a clean and minimalist interface. The left navigation panel allows you to quickly switch between sections: Home, AI Video, AI Image, AI Filters, Explore, and Library. The user profile is located at the bottom of the panel.
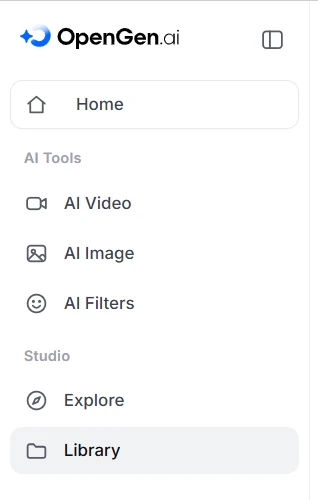
Switching between sections happens instantly. The page state is preserved, so when you return, you do not need to re-enter the prompt or settings.
The OpenGen.ai interface is responsive and works well on both desktop and mobile devices, although a larger screen is more convenient for complex settings (such as selecting video duration or resolution).
Customer Support
The “Contact us” page contains a feedback form. To submit a request, you need to provide your name, email, subject, and a text message of up to 3,000 characters. If necessary, you can attach a screenshot in PNG, JPEG, or WebP format. The maximum file size is 5 MB, with up to five files allowed.
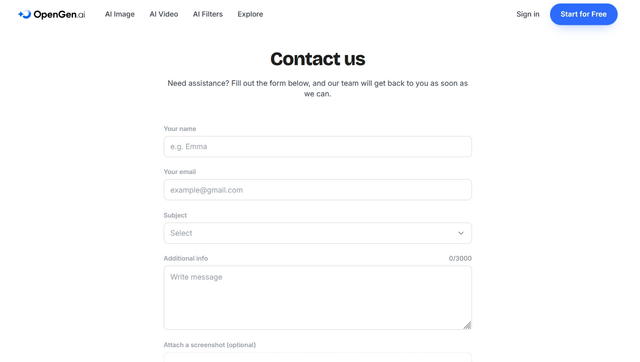
Further down the page, there is an FAQ section divided into three categories: General information, Account & security, and Subscription & billing. So, there is no need to read through everything to find an answer to a specific question.
Pros and Cons of OpenGen.ai
After testing OpenGen.ai, we can highlight several key features that have the greatest impact on the user experience. The platform demonstrates strong points in terms of model variety and interface convenience, but it also has some limitations worth considering.
Advantages:
Wide selection. Access to 16 models for video and 14 for images. There are also 11 styles for image generation and 24 filters for photo editing.
Versatility. Video and image generation, as well as restyling, are available in one unified space.
Convenient interface. An intuitive design that is not overloaded with unnecessary elements.
Fast registration. Creating an account takes only a few seconds.
Generation library. All created works are stored in the appropriate section. Nothing will get lost.
Flexible settings. Users can choose the aspect ratio, resolution, and duration (for video content).
Disadvantages:
Limited free access. The initial 25 credits are enough for 1–2 generations. A paid plan is required for full-scale use.
Different generation speeds. Some models process requests almost instantly, while others require more time.
Despite these drawbacks, they are not critical. Rather, they reflect the current state of generative AI development, where the result depends on many factors. Overall, the advantages of OpenGen.ai significantly outweigh its minor limitations.
Final Thoughts on Using OpenGen.ai
OpenGen.ai is an excellent service for working with generative AI. The selection of models and styles is broad enough to choose the optimal option rather than adapt to a single fixed one. Additional useful features, such as AI Filters and Explore, add even more value.
OpenGen.ai will be useful for content creators, marketers, designers, and anyone involved in working with visual content. It is convenient to have several tools in one dashboard.
The interface is not overloaded, navigation is straightforward, and created works are automatically saved in the “Library” tab. The initial balance is enough to explore the platform and create your first generation.
Rating: 4.7/5. OpenGen.ai demonstrates a high level of quality and versatility, making the process of creating AI content simple and accessible. |
October 30, 20260 Images0 visitsAlbum by willu akar |
