1.7 Best Test Management Tools in 20267 Best Test Management Tools in 2026: Features, Integrations, and Comparison
As software architectures increase in complexity and release cycles shrink from months to daily deployments, Quality Assurance (QA) teams face an unprecedented challenge: maintaining high test coverage without causing release bottlenecks.
Traditional test management spreadsheets and legacy tools often struggle to handle modern continuous integration and continuous deployment (CI/CD) workflows. Today’s engineering organizations require unified testing solutions that bridge manual test execution, automated runner results, real-time analytics, and emerging AI technologies.
In this comparative analysis, we evaluate seven top test management platforms, examining their primary use cases, core capabilities, pricing structures, and technical trade-offs to help software development teams choose the right tool for their specific operational needs.
How We Evaluated the Best Test Management Tools
To ensure an objective comparison, we evaluated each platform across five core criteria:
Framework & Automation Integration: Native support for popular testing frameworks (Playwright, Cypress, Jest, PyTest, Cucumber, Robot Framework) and multi-repo CI/CD pipelines.
Manual & Automated Workflow Synergy: The ability to unify manual test execution and automated runner results into a single visual dashboard.
Usability & Workflow Fit: Interface responsiveness, setup complexity, and adaptability for both software developers and dedicated QA engineers.
AI-Assisted Capabilities: Verified AI feature support for generating test scenarios, analyzing execution logs, or accelerating manual test creation based on official vendor specifications.
Traceability & Ecosystem Flexibility: Integration with project management platforms (Jira, GitHub, Azure DevOps, GitLab) without enforcing rigid workflow constraints.
Quick Comparison of 7 Test Management Tools
Platform
Testomat.io
TestRail
Xray
Zephyr Scale
Qase
PractiTest
Katalon
Best For
Unified Manual & Automated QA
Structured Enterprise Manual Suites
Native Jira-Centric QA
Scalable In-Jira Test Management
Developer-Friendly Modern QA
End-to-End Compliance & Traceability
End-to-End Low-Code Automation
Manual Testing
Native
Native
Native (Jira UI)
Native
Native
Native
Supported
Automation Integration
Native framework CLI sync
REST API, CLI & JUnit XML ingestion
REST API & CI/CD pipeline plugins
REST API & automation triggers
Public API, Webhooks & native SDKs
REST API & PractiTest FireCracker JAR tool
Native low-code automation suite
AI Capabilities
AI test generation & QA agent integrations
AI-assisted code drafting (TestRail Automate with AI)
Third-party / Atlassian Intelligence extensions
Atlassian Intelligence integration
AI scenario drafting & auto-completion
Smart insights & analytics-focused AI features
AI visual testing & auto-healing locators
Pricing & Trial
Tiered SaaS (Free plan / Free trial available)
Paid per user/month (30-day free trial, no free plan)
Paid per user/month (30-day free trial for Jira Cloud)
Paid per user/month (30-day free trial for Jira Cloud)
Tiered SaaS (Free plan / 14-day free trial available)
Paid per user/month (14-day free trial, no free plan)
Freemium / Tiered annual plans (Free trial available)
Primary Ecosystem Fit
Cloud / Multi-stack CI/CD
Cross-platform Enterprise
Atlassian Jira Ecosystem
Atlassian Jira Ecosystem
Modern SaaS & Developer Teams
Regulated & Enterprise QA
Integrated Automation Platform
1. Testomat.io — Best for Unified Manual and Automated Testing
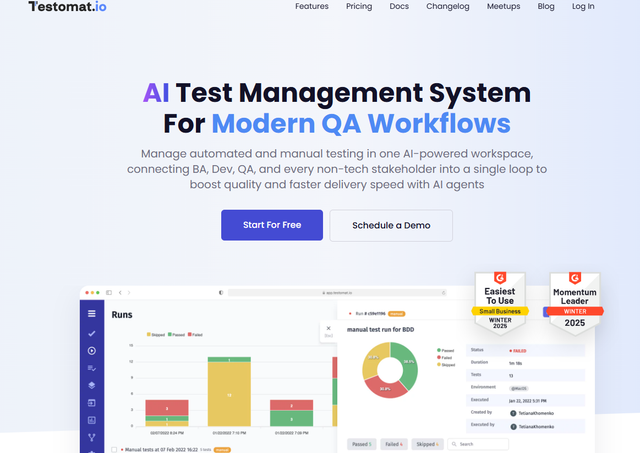
testomat is a cloud-based test management platform designed specifically for Agile teams operating in hybrid environments where manual testing and automated testing co-exist closely. Rather than requiring engineers to manually copy test structures into a standalone web portal, it synchronizes codebase-driven test scripts directly with a central visual dashboard.
Key Strengths & Core Capabilities
Code-to-Cloud Test Synchronization: Uses dedicated CLI utilities to parse automated test suites written in Playwright, Cypress, Jest, PyTest, Cucumber, and Robot Framework. It creates and updates matching test cases in the cloud management dashboard automatically whenever code changes are committed.
Unified Reporting Hub: Merges manual test runs with automated CI/CD pipeline execution results into unified dashboards, providing stakeholders with a single source of truth for build quality across multiple repositories.
AI-Assisted Test Management and QA Agents: Accelerates test design by generating structured manual test cases directly from user stories, product requirements, and Jira tickets. For teams seeking deeper workflow automation, integration with specialized external AI tools like an ai agent for qa testing allows developers to automate project-level triage and requirement parsing.
Flaky Test Analytics: Tracks historical execution data over time to highlight unstable tests, helping QA leads identify intermittent environment failures and maintain pipeline reliability.
End-to-End Workflow Example
In a typical continuous delivery setup, Testomat.io coordinates quality assurance across every stage of development:
Requirements: Product managers outline feature criteria in Jira or markdown docs.
Test Cases: QA engineers generate structured test cases using built-in AI assistance.
Automated Execution: Developers implement automated Playwright or Cypress tests locally; the CLI syncs these steps directly to the test management board.
CI/CD Results: Upon pull request creation, automated test runners execute the suite and report real-time status back to the dashboard.
Analytics: Quality leads analyze unified pass/fail rates and flaky test metrics across both manual and automated suites.
Operational Application: CI/CD Execution Gating
Rapid validation strategies are critical in continuous deployment environments. For example, teams can include smoke testing after each new build in their CI/CD validation process to quickly verify whether core application functionality works, preventing broken code from triggering long, resource-intensive regression suites.
Verified Limitations
Requires initial setup of CLI importers or API configuration to enable codebase synchronization for custom testing frameworks.
2. TestRail — Best for Structured Enterprise Manual Suites
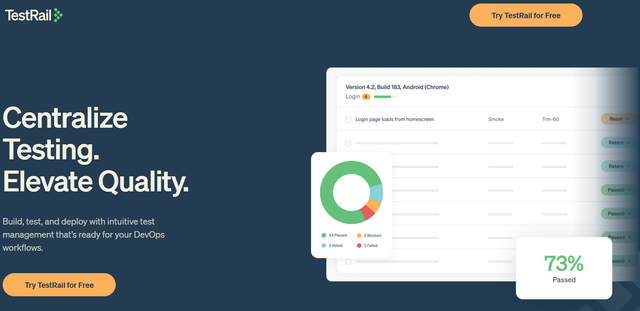
TestRail by Idera is one of the most widely adopted test case management systems, designed primarily for enterprise QA departments managing large, highly structured manual test repositories.
Key Strengths
Flexible hierarchical organization for enterprise test cases, milestone tracking, and audit-friendly execution logs.
Comprehensive built-in reporting templates for tracking release readiness and test coverage.
Extensive native integrations with issue-tracking platforms, including Jira, Redmine, and GitHub.
Integration Approach & AI Features
While historically centered on manual test management, TestRail supports automated result ingestion via its REST API, TestRail CLI, and JUnit XML parsers. Additionally, features like TestRail Automate with AI assist QA teams by generating initial automation script drafts based on manual test descriptions, which engineers can then review and refine.
Verified Limitations
Highly complex configurations across large enterprise projects may require dedicated administrative oversight to maintain clean user permission structures.
3. Xray — Best for Native Jira-Centric QA Workflows
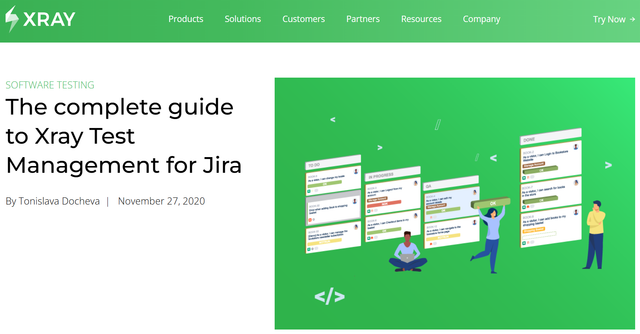
Xray is a specialized test management application built natively on the Atlassian Jira infrastructure. It models tests, test sets, preconditions, and test executions directly as native Jira issue types.
Key Strengths
Eliminates the need for separate external user accounts by operating entirely inside the Jira interface.
Establishes direct traceability between user stories, software requirements, and test execution outcomes on Jira boards.
Offers native support for Behavior-Driven Development (BDD), enabling teams to write Cucumber scenarios directly within Jira tickets.
Integration Approach
Xray ingests automated test results through dedicated REST APIs and CI/CD plugins (Jenkins, GitLab CI, GitHub Actions), mapping automated execution statuses back to corresponding Jira test issues.
Verified Limitations
Because it is built exclusively for the Atlassian platform, engineering teams that do not use Jira as their primary issue tracker cannot deploy Xray as a standalone tool.
4. Zephyr Scale — Best for Scalable In-Jira Management
Zephyr Scale (developed by SmartBear) is designed for organizations using Jira that require scalable test planning across multiple teams without clogging standard Jira issue hierarchies.
Key Strengths
Stores test assets within an optimized, dedicated database inside Jira, keeping project navigation fast even when managing thousands of test cases.
Supports cross-project test library sharing and version control for reusable test steps across different product releases.
Provides clear visual gadgets and sprint execution reports inside Jira dashboards.
Integration Approach
Zephyr Scale provides documented REST APIs and automation integration endpoints, allowing execution data from external frameworks like Selenium or JUnit to populate its reporting metrics.
Verified Limitations
Advanced reporting features that combine data from non-Atlassian development tools require custom API scripting to aggregate metrics externally.
5. Qase — Best for Modern Developer-Centric Teams
Qase is a modern SaaS test management platform recognized for its clean, responsive user interface and developer-friendly workflow integrations.
Key Strengths
Intuitive user experience with minimal onboarding overhead for both developers and QA engineers.
Built-in defect management that can automatically create issue tickets in GitHub, GitLab, or Jira when a test fails.
Public test reporting links and real-time execution views for fast stakeholder updates.
Integration Approach
Offers official SDKs for major programming languages (JavaScript/TypeScript, Python, Java) along with a flexible REST API, simplifying the process of pushing automated build results straight into test suites.
Verified Limitations
Advanced compliance framework controls (such as strict electronic signature workflows) are less tailored for heavily audited industries than specialized governance tools.
6. PractiTest — Best for Compliance and End-to-End Traceability
PractiTest is an enterprise test management solution built for QA organizations that operate under strict regulatory compliance requirements, such as medical technology, financial services, and defense engineering.
Key Strengths
Features an advanced hierarchical filter tree system instead of static folders, allowing users to slice test data by multiple metadata attributes.
Provides end-to-end traceability linking business requirements directly to test design, execution runs, and bug fixes.
Strong security controls, granular user permission levels, and compliance audit logging.
Integration Approach
PractiTest connects to external automation frameworks using its REST API and the PractiTest FireCracker utility—a dedicated JAR-based tool that parses XML test result files from CI/CD pipelines and maps them to PractiTest fields.
Verified Limitations
The tag- and filter-based organization model requires initial team training to set up efficient data categorization compared to traditional folder structures.
7. Katalon — Best for Integrated Low-Code Automation
Unlike standalone test management platforms, Katalon offers an integrated testing platform that combines low-code test authoring, automated execution, and centralized reporting within a unified product ecosystem.
Key Strengths
All-in-one suite for teams seeking codeless or low-code test creation across web, mobile, desktop, and API applications.
Centralized analytics hub (Katalon TestOps) providing execution dashboards and AI-assisted failure classification.
Built-in visual testing capabilities and self-healing object locators to maintain test script stability.
Integration Approach
Operates primarily within its proprietary software suite, while offering plugins for standard CI/CD build engines such as Jenkins, Azure DevOps, and GitLab.
Verified Limitations
Less specialized for engineering teams that prefer writing custom, code-first automation scripts (such as custom Playwright or Cypress framework setups) independently of a vendor ecosystem.
Which Test Management Tool Should You Choose?
Selecting the right platform depends on your team's existing infrastructure, engineering culture, and test automation maturity:
For Agile Teams with Hybrid QA (Manual + Code-First Automation): Testomat.io provides the most seamless bridge between code repositories, CI/CD pipelines, and visual test management.
For Jira-Bound Engineering Teams: Xray or Zephyr Scale offer deep Atlassian integration without requiring external software management.
For Regulated Enterprises & Compliance Workflows: TestRail and PractiTest supply strict structure, deep auditing logs, and formal requirement traceability.
For Fast-Growing SaaS Startups: Qase offers an easy-to-deploy, modern UI with developer-friendly APIs and SDKs.
For Low-Code Automation Focus: Katalon serves organizations looking for an all-in-one platform for visual test creation and execution tracking.
Frequently Asked Questions
What is the best test management tool in 2026?
The best tool depends on your team's operational requirements. For Agile teams combining manual QA with code-first automation (Playwright, Cypress, PyTest), Testomat.io is a top choice. For organizations whose entire workflow centers on Atlassian products, Xray or Zephyr Scale are ideal.
What is the best alternative to TestRail in 2026?
The best alternative depends on why you are looking to switch. If your team wants a modern cloud-first tool that syncs directly with automated codebases (Playwright, Cypress), Testomat.io is an excellent alternative. If your primary goal is tighter Jira integration, Xray or Zephyr Scale serve as strong alternatives.
Which test management tools support automated testing?
Most modern platforms support test automation. Solutions like Testomat.io offer native code synchronization via CLI tools, while platforms like TestRail, PractiTest (via PractiTest FireCracker), and Qase ingest execution results via REST APIs, SDKs, or XML report parsers.
What is the difference between test management and test automation?
Test management platforms plan, organize, track, and report on all testing activities across manual and automated workflows. Test automation tools (such as Playwright, Cypress, or Selenium) execute software scripts to verify functional application code automatically.
Which test management tool integrates with Playwright?
Testomat.io features dedicated CLI utilities that parse Playwright test suites and automatically update cloud test cases. Other platforms, including Qase, TestRail, and Xray, ingest Playwright test outputs using API uploaders or JUnit XML reporters.
Can AI improve test case management?
Yes. AI features in modern test management tools assist QA teams by generating manual test scenarios from user stories, summarizing complex execution failure logs, categorizing flaky test behavior, and streamlining project documentation tasks. | |
2.OpenGen.ai Detailed ReviewOpenGen.ai Tool Overview
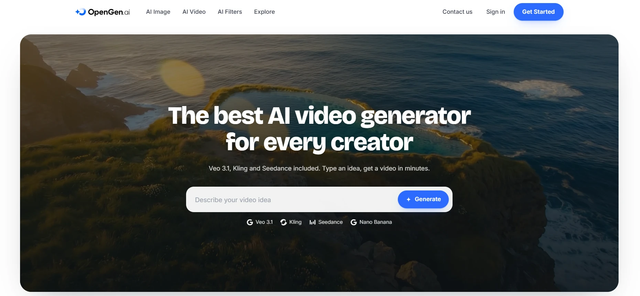
OpenGen.ai is a web platform for generating videos and visuals using artificial intelligence. After registering, users get a personal dashboard that brings together tools for working with videos, images, and photos. This means there is no need to pay for multiple subscriptions or get used to a new interface every time. All work is done in one unified space.
The service uses a model-based approach. The user describes an idea in text, selects the appropriate model, adjusts the generation parameters, and starts the process. The interface is built around a prompt input field. Everything is very simple.
More than 2 million creators already use OpenGen.ai. And this is not surprising, as the service gives the impression of being well-organized, with a wide range of tools and intuitive navigation. It is suitable for both beginners and experienced creators.
Next, let's take a closer look at the capabilities, features, and functionality of OpenGen.ai. You can also double check OpenGen.ai reviews on AITopTools, Trustindex and OpenTools AI.
Registration and Getting Started
The account creation process on OpenGen.ai is standard. On the landing page, you need to enter your email address and create a password. Alternatively, you can sign in using Google, Facebook, Apple, or Microsoft.

We decided to register for OpenGen.ai using email. Creating an account literally took 30 seconds. There was no identity verification or multiple CAPTCHAs – everything was very fast.
After that, the system redirects you to the homepage, which greets you with the question “What would you like to create today?” and a prompt input field. So, you can start working immediately without having to configure practically anything from the start.

After signing in, it becomes clear that the platform uses a credit system. For free access to the basic features, users receive an initial balance of 25 credits.

However, paid plans are available for full access to all models and generations (5-day full access and an annual plan). Still, this is common practice for services like OpenGen.ai. After all, users can evaluate the platform themselves before making a purchase.
Main Features of OpenGen.ai
The platform positions itself as “the best AI video generator for every creator,” and this is supported by its range of tools. OpenGen.ai is not limited to text-to-video generation. It is a full-fledged creative hub that offers:
AI Video Generator: create videos from text or photos.
AI Image Generator: generate images from text descriptions.
AI Filters: restyle photos using 24 styles.
Explore: a gallery of community creations for inspiration.
Thus, OpenGen.ai is convenient for a wide variety of tasks: creating advertisements, social media content, concept art, portrait editing, and much more.
In fact, all of the tools deserve attention because each has its own set of features and strengths. So, let's look at them one by one, starting with the most popular one – AI Video Generator.
“AI Video Generator” Section
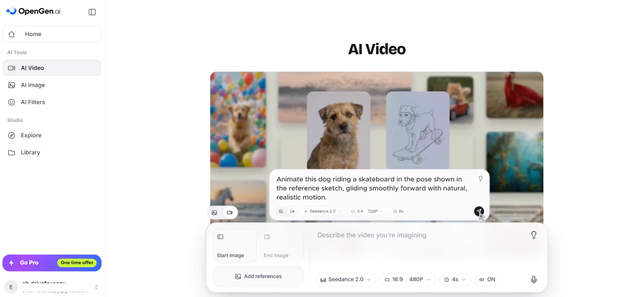
The AI Video section contains numerous tools for generating high-quality videos. The interface consists of a prompt input field, model selection, aspect ratio settings, resolution, and content duration.
1. Prompt Input Field
The central element is a large text field with the prompt “Describe the video you're imagining.” This is where you enter a description of the desired video. The field supports multiline text, allowing you to describe the scene, camera movement, lighting, and style in detail.
To the right of the field is a lightbulb icon – a hint or idea generator. This is a great feature, especially for beginners who do not yet know where to start.
2. Model Selection
A dropdown list of models is located below the input field. There are quite a few of them, but they all differ in their parameters (resolution, duration, etc.). In the upper-right corner of the selection window, there is a “Best for” filter that allows you to sort models by intended use.
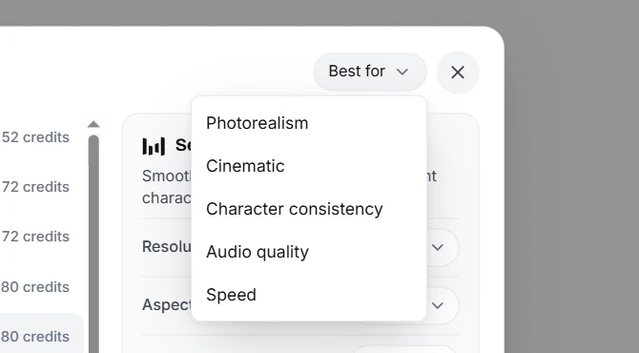
OpenGen.ai allows users to work with a number of leading AI models. There are currently 16:
Seedance 1.5 Pro – a model for creating videos with smooth motion.
HeyGen V3 Video Agent – creates videos with avatars and lip synchronization.
Seedance 2.0 Fast – a faster version of Seedance for draft videos.
Seedance 2.5 – video generation with support for multiple references.
Seedance 2.0 – multi-shot video with consistent characters.
Runway Aleph 2.0 – video editing based on a text description.
PixVerse V6 – fast, stylish clips.
Wan 2.7 – a versatile model for different styles.
Kling O1 – video generation with text support.
Runway Gen 4.5 – control over camera angles and style.
Gemini Omni Flash – fast generation for everyday tasks.
Kling 3.0 – cinematic video with realistic motion. Luma Dream Machine – smooth video from a prompt or image. Minimax Hailuo 2.3 – expressive character motion.
Luma Ray v3.2 – high detail.
Veo 3.1 – a Google model with native audio support and realistic physics.
Users can choose a model according to their task. There is no point in paying extra for a more expensive one if a cheaper option is sufficient for a particular job. For example, Veo 3.1 is better suited for realistic videos featuring people, while Seedance 2.0 is a better choice for a quick draft clip.
3. Aspect Ratio Settings
To the right of the model selection is a dropdown list for choosing the aspect ratio. The available options include:
16:9 – standard widescreen, for YouTube and advertising.
9:16 – vertical, for TikTok, Instagram Reels, and Stories.
1:1 – square, for Instagram posts.
4:3 – classic, for presentations.
3:4 – portrait, for mobile screens.
21:9 – cinematic, for widescreen videos.
This ensures that the video is generated in the desired format from the start. There is no need to crop the video after generation.
4. Resolution Selection
Each model supports its own range of resolutions. For example, Seedance 2.0 works in the 480p–4K range, while Kling O1 is limited to 720p. After selecting a model, the available parameters are set according to its capabilities.
In general, 480p is sufficient for generating drafts. For final renders, it is better to use 720p or higher.
5. Setting the Video Duration
Duration also depends on the model. Some support short clips, while others allow you to create longer scenes. After selecting a model, the available range is fixed.
You can choose from 4, 5, 6, 7, 8, 9, 10, 11, 12, 13, 14, and 15 seconds. Shorter clips are suitable for social media, while longer ones are better for scenes that require more time.
6. Additional Options
There are several additional settings below the input field. They relate to working with images and audio.
“Start Image” and “End Image” buttons. They allow you to animate a specific photo or define the beginning and end of a video.
“Add references” button. The model uses them as references when reproducing the desired style.
“ON/OFF” toggle for audio. Some models, such as Veo 3.1, support native audio generation, making videos even more realistic.
These options are optional. However, if you need a more precise result, they are indispensable.
“AI Image Generator” Section
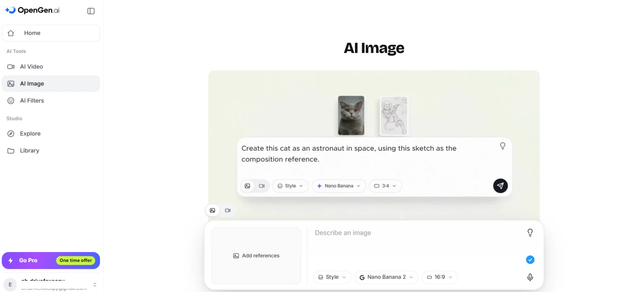
The AI Image section is designed for generating images from text descriptions and editing existing visuals.
1. Prompt Input Field
The field with the prompt “Describe an image” accepts a text description. To its right is a lightbulb icon for generating ideas.
2. Model Selection
The list of image models opens in a separate “Select Model” window. As with the AI Video Generator, there is also a “Best for” filter with the following categories: Photorealism, Character consistency, Speed, Text in images, Photo editing, and Illustration. There are currently 14 models available:
Grok – fast generation with a distinctive style.
Kling 3.0 Image – cinematic stills with depth.
Flux 2 Pro – studio-level detail with precise prompt adherence.
Qwen Image 2 – clean composition with multilingual text support.
Seedream 5 Lite – a lightweight version of Seedream with logical generation.
Seedream 4.5 – photorealism with cinematic lighting.
Seedream 5.0 Pro – web search and combined editing.
GPT Image 1.5 – precise prompt understanding for detailed visuals.
GPT Image 2 – understanding of complex prompts and typography.
Nano Banana – editing while preserving characters.
Nano Banana 2 – fast generation with good quality.
Nano Banana Pro – enhanced editing with clearer details and text.
Ideogram 3.0 – reliable text rendering for posters and logos.
Ideogram 4.0 – high resolution for posters and packaging.
The difference in credits between the models is significant (from 5 to 38). After selecting a model, a panel opens with its description and aspect ratio settings. The “Use Model” button confirms the selection.
3. Variety of Styles
The “Style” button opens 11 options. Photorealism produces an image that is difficult to distinguish from a photograph. Pixar 3D and Cartoon create a cartoon-like, animated look. Watercolour, Van Gogh, Pixel Art, Funko Pop, and Graffiti provide an artistic look. Cyberpunk and Surreal create a futuristic look.
4. Aspect Ratio
As with video, you can choose an aspect ratio: 16:9, 9:16, 1:1, 4:3, 3:4, or 21:9. So, creating images for any format is not a problem.
5. “Image to Image” Feature
This feature allows you to upload a reference image and reinterpret it in a particular style while preserving its structure. This is useful for creating design variations or adapting content for different platforms. You can add multiple references and combine elements from different images.
Testing the Feature and First Generation Experience
Since we had 25 credits, we decided to test the “Image to Image” feature and see how OpenGen.ai handles a real-world request.
First, we uploaded a portrait photo as a reference, selected the Nano Banana 2 model (20 credits), and entered the prompt: “Transform this portrait into a cyberpunk style with neon accents and futuristic clothing. @Image1”. The @Image1 symbol indicates the uploaded image. This is how the model understands which reference to use.

After starting the generation, the message “Generation started. Used 20 credits. It will appear in your library when it's ready” appeared. The credits were deducted immediately. The image appeared within a few seconds, with options to open it, view the details, and download it. Here is what we got:
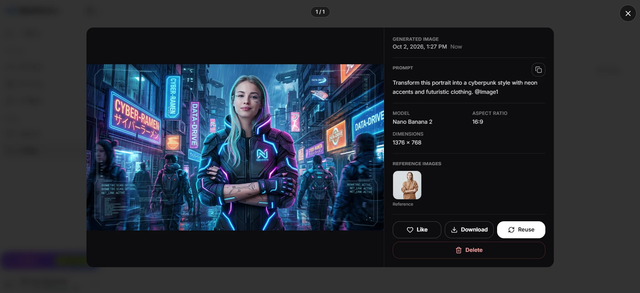
The panel on the right displays all the information about the generation: creation date, the full prompt text, the model used, aspect ratio (16:9), image dimensions (1376 × 768), and the reference image.
“AI Filters” Section
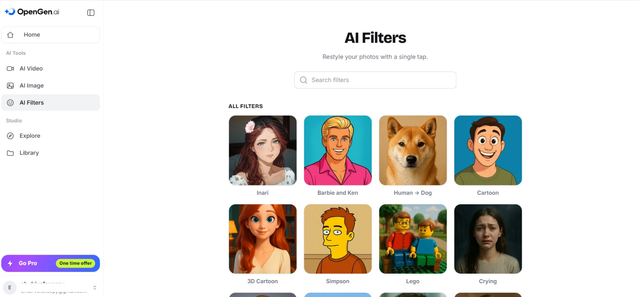
The AI Filters section contains a set of 24 ready-made presets for restyling photos. Each has its own panel with a description and a “before/after” example. For example, here is what is shown for the “Inari” filter:

After selecting a filter, a photo is uploaded. JPG, PNG, WebP, and HEIC formats are supported, with a maximum size of 10 MB. You can also select an image from the “Library.”
We tested the “Inari” filter on a portrait photo. After generation, a window with the result opened. It shows the filter name, model (Qwen Image 2), image dimensions (1024 × 1024), and reference. The result remained recognizable but had a distinct anime style:

Below the result, there are Download, Regenerate, Like, Reuse, and Delete buttons. If you click “Regenerate,” the service will generate a new version without requiring you to upload the photo again.
In summary, AI Filters are the fastest way to get a stylized image. There is no need to write a prompt or select a model. Simply upload a photo and click a filter.
“Explore” Section
The Explore section is a gallery of creations made by other users with different models. Dozens of visuals and videos are available to view, making it easy to get inspiration for your own experiments.
The gallery allows you to filter creations by type (Images, Videos) and view them in a convenient format. This makes it easier to understand how different models work and which prompts produce the best results.
Auxiliary “Library” Section

After the first generation, a new tab – “Library” – appears in the left panel. All created works, both images and videos, are stored here. In addition, users can:
view all generations in one place;
filter by type (All, Images, Videos);
mark favorite creations;
switch between grid and list views.
All of these features make it easier to work with a large number of generations. There is no need to remember exactly where an image or video was created.
Interface and Ease of Use
The platform has a clean and minimalist interface. The left navigation panel allows you to quickly switch between sections: Home, AI Video, AI Image, AI Filters, Explore, and Library. The user profile is located at the bottom of the panel.
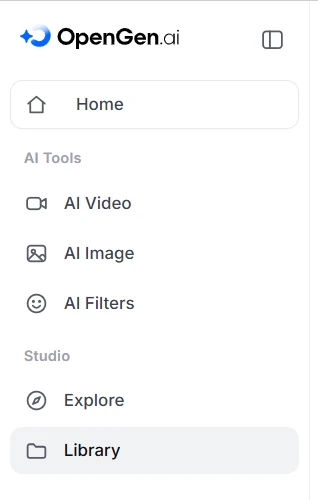
Switching between sections happens instantly. The page state is preserved, so when you return, you do not need to re-enter the prompt or settings.
The OpenGen.ai interface is responsive and works well on both desktop and mobile devices, although a larger screen is more convenient for complex settings (such as selecting video duration or resolution).
Customer Support
The “Contact us” page contains a feedback form. To submit a request, you need to provide your name, email, subject, and a text message of up to 3,000 characters. If necessary, you can attach a screenshot in PNG, JPEG, or WebP format. The maximum file size is 5 MB, with up to five files allowed.
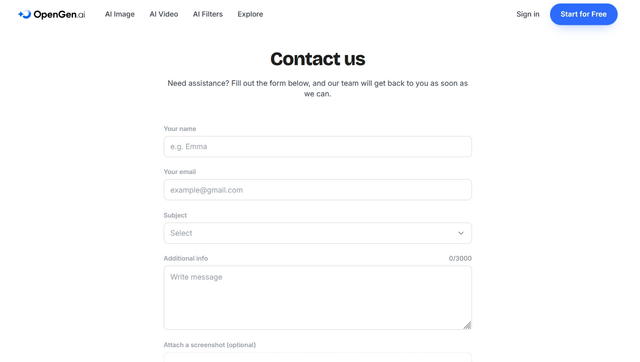
Further down the page, there is an FAQ section divided into three categories: General information, Account & security, and Subscription & billing. So, there is no need to read through everything to find an answer to a specific question.
Pros and Cons of OpenGen.ai
After testing OpenGen.ai, we can highlight several key features that have the greatest impact on the user experience. The platform demonstrates strong points in terms of model variety and interface convenience, but it also has some limitations worth considering.
Advantages:
Wide selection. Access to 16 models for video and 14 for images. There are also 11 styles for image generation and 24 filters for photo editing.
Versatility. Video and image generation, as well as restyling, are available in one unified space.
Convenient interface. An intuitive design that is not overloaded with unnecessary elements.
Fast registration. Creating an account takes only a few seconds.
Generation library. All created works are stored in the appropriate section. Nothing will get lost.
Flexible settings. Users can choose the aspect ratio, resolution, and duration (for video content).
Disadvantages:
Limited free access. The initial 25 credits are enough for 1–2 generations. A paid plan is required for full-scale use.
Different generation speeds. Some models process requests almost instantly, while others require more time.
Despite these drawbacks, they are not critical. Rather, they reflect the current state of generative AI development, where the result depends on many factors. Overall, the advantages of OpenGen.ai significantly outweigh its minor limitations.
Final Thoughts on Using OpenGen.ai
OpenGen.ai is an excellent service for working with generative AI. The selection of models and styles is broad enough to choose the optimal option rather than adapt to a single fixed one. Additional useful features, such as AI Filters and Explore, add even more value.
OpenGen.ai will be useful for content creators, marketers, designers, and anyone involved in working with visual content. It is convenient to have several tools in one dashboard.
The interface is not overloaded, navigation is straightforward, and created works are automatically saved in the “Library” tab. The initial balance is enough to explore the platform and create your first generation.
Rating: 4.7/5. OpenGen.ai demonstrates a high level of quality and versatility, making the process of creating AI content simple and accessible. | |
|
