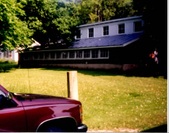
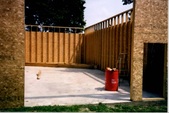
 This is where I want to put the shop so I need to tear this building down. Just not very useful as you can see low height of the roof. It was built as a chicken house in the 1930's. This is where I want to put the shop so I need to tear this building down. Just not very useful as you can see low height of the roof. It was built as a chicken house in the 1930's.
|  I'll pull all the nails so I can reuse the lumber for forms and bracing. Dad had plans for the fired brick so it will be a slow tear down. I'll pull all the nails so I can reuse the lumber for forms and bracing. Dad had plans for the fired brick so it will be a slow tear down.
|  I got all the roofing and lumber down and some of the family came on the brick tear down/lumber moving day. I got all the roofing and lumber down and some of the family came on the brick tear down/lumber moving day.
| 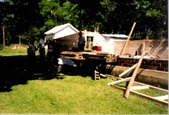 Lumber was all Full cut stuff. The brick is the fired surface type. Lumber was all Full cut stuff. The brick is the fired surface type.
|
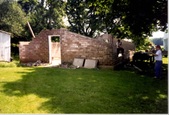
 Not a lot left when it's just the brick. Not a lot left when it's just the brick.
|  Once I had the brick off I got ready to tear out the floor. It was square and level with a 1/2" so I couldn't justify doing it even though I wanted to go bigger. I decided to use it and stick framed it with 14' sidewalls. Once I had the brick off I got ready to tear out the floor. It was square and level with a 1/2" so I couldn't justify doing it even though I wanted to go bigger. I decided to use it and stick framed it with 14' sidewalls.
| 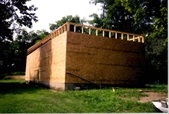 Building is 24' x 50' and first long sidewall we nailed 2 rows of OSB up from the bottom. WAY to heavy to lift but me and Dad got it with come a longs. Building is 24' x 50' and first long sidewall we nailed 2 rows of OSB up from the bottom. WAY to heavy to lift but me and Dad got it with come a longs.
| 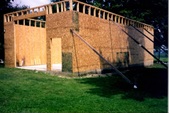 Other side we did just one but it was still bad and pulled it up again using a tree and truck. Did the ends and nailed the top plate and braced. Then the rest of the OSB. Other side we did just one but it was still bad and pulled it up again using a tree and truck. Did the ends and nailed the top plate and braced. Then the rest of the OSB.
|
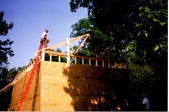 Ordered the trusses and set the first one with a backstop. Dad is up there. Ordered the trusses and set the first one with a backstop. Dad is up there.
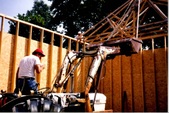
| 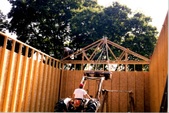 Borrowed a tractor from where I used to work and their homemade truss lifter. We build a couple big pole barns and used this. Just used pipe angled to a point. Pipe bolts to the bucket and welded together on the end with a short length of chain. A long chain hooks on the end to the bucket and it carry's the weight. Kind of like a 3 point lift that is easy to move. Borrowed a tractor from where I used to work and their homemade truss lifter. We build a couple big pole barns and used this. Just used pipe angled to a point. Pipe bolts to the bucket and welded together on the end with a short length of chain. A long chain hooks on the end to the bucket and it carry's the weight. Kind of like a 3 point lift that is easy to move.
|  First few always take longer till you get the braces going and some strength. First few always take longer till you get the braces going and some strength.
| 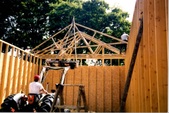 I ran the tractor and Dad nailed his side while our Neighbor, Billy Joe steadied them on the line till I ran up to nail his side. I ran the tractor and Dad nailed his side while our Neighbor, Billy Joe steadied them on the line till I ran up to nail his side.
|
 It was hot but at least it wasn't raining! the big door opening on the end made it nice to drive them in then swivel up. It was hot but at least it wasn't raining! the big door opening on the end made it nice to drive them in then swivel up.
|  Got them all on and starting to look like something. Got them all on and starting to look like something.
|  Made the door opening 12' x 12'. Made the door opening 12' x 12'.
|  I used OSB on the entire roof too and wanted to get it covered first before finishing the sides. OSB on roof makes it stronger and no drips. I used OSB on the entire roof too and wanted to get it covered first before finishing the sides. OSB on roof makes it stronger and no drips.
|
 Roof on and one step closer. Roof on and one step closer.
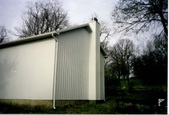
| 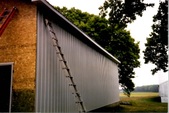 Finished the OSB on the sides and put on the metal. This goes quick. Finished the OSB on the sides and put on the metal. This goes quick.
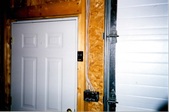
| 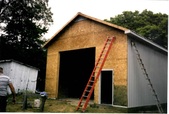 Put the walk in door and all the upper and lower trim on before covering. I then finished the rest of the siding. Put the walk in door and all the upper and lower trim on before covering. I then finished the rest of the siding.
|  Dad used to work at the Local Vocational school and I knew they did onsite projects. I dug the trench and gave them a set of plans of what I wanted and they bought all the materials at the schools discount. the kids did all the work of drilling, running wires and cable, placing boxes and pulling wire. I paid for materials and a Pizza party for them. Done in 5 hours. Dad used to work at the Local Vocational school and I knew they did onsite projects. I dug the trench and gave them a set of plans of what I wanted and they bought all the materials at the schools discount. the kids did all the work of drilling, running wires and cable, placing boxes and pulling wire. I paid for materials and a Pizza party for them. Done in 5 hours.
|
 The kids did a really nice job and they got some real life experience too. Win win. The kids did a really nice job and they got some real life experience too. Win win.
| 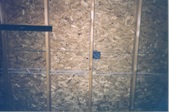 Sidewalls are 6 inches and I put a lot of outlets everywhere. Sidewalls are 6 inches and I put a lot of outlets everywhere.
| 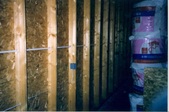 I'm going to totally insulate this too so heating or cooling will be easy. I'm going to totally insulate this too so heating or cooling will be easy.
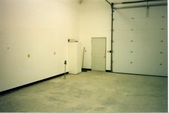
| 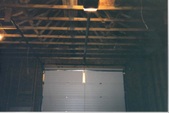 I installed the insulated overhead door. I installed the insulated overhead door.
|
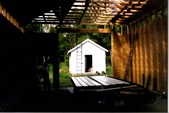
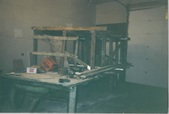 I drywalled the inside and here is my moveable platform. Drywall is not my favorite thing to do but I'll get it. I drywalled the inside and here is my moveable platform. Drywall is not my favorite thing to do but I'll get it.
| 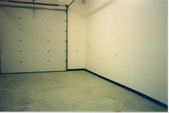 All finished and painted. All finished and painted.
|  I sprayed it so it went fast. You can see how nice the floor was. Couldn't bring myself to tear it up and the cost savings put me over the edge on keeping it. I sprayed it so it went fast. You can see how nice the floor was. Couldn't bring myself to tear it up and the cost savings put me over the edge on keeping it.
| 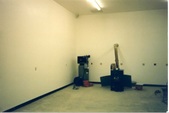 Stove and Air compressor in place. Stove and Air compressor in place.
|
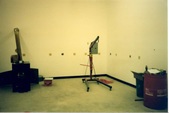 Told you I have outlets! Kids asked me why so many and I told them, I like to have options. Lots of 220 stuff. Told you I have outlets! Kids asked me why so many and I told them, I like to have options. Lots of 220 stuff.
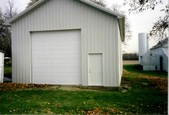
|  I hired a guy to do the spouting with a full length. I hired a guy to do the spouting with a full length.
|  They were in and out in just about an hour. They were in and out in just about an hour.
|  Put a chimney run on the end. and finished the trim work. Put a chimney run on the end. and finished the trim work.
|
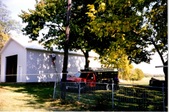
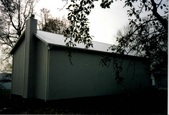
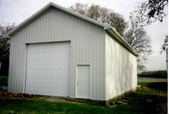 Building is done here and turned out nice. Building is done here and turned out nice.
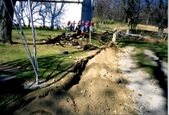
|  |  |  Decided to do some grading so the water won't be an issue. It was sloping towards the building so I dug out a smooth trench away and rough graded it out. Decided to do some grading so the water won't be an issue. It was sloping towards the building so I dug out a smooth trench away and rough graded it out.
|
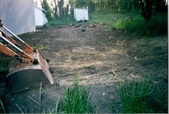 Don't have a dozer but a backhoe and box grader will get it done. Don't have a dozer but a backhoe and box grader will get it done.
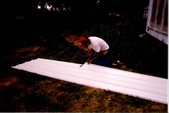
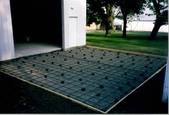
| 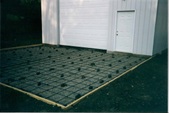 Going to pour a section in front of the door. I always do 1/2" rebar 16" on center 6 inches thick. Going to pour a section in front of the door. I always do 1/2" rebar 16" on center 6 inches thick.
| 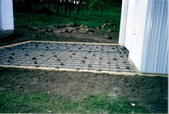 Backfilled the forms and staked them to grade. Put a center rail in too. Backfilled the forms and staked them to grade. Put a center rail in too.
|  Just doing this one section now as I have to move some other buildings and planning on a garage on the side of the house at a later date. Just doing this one section now as I have to move some other buildings and planning on a garage on the side of the house at a later date.
|
