1
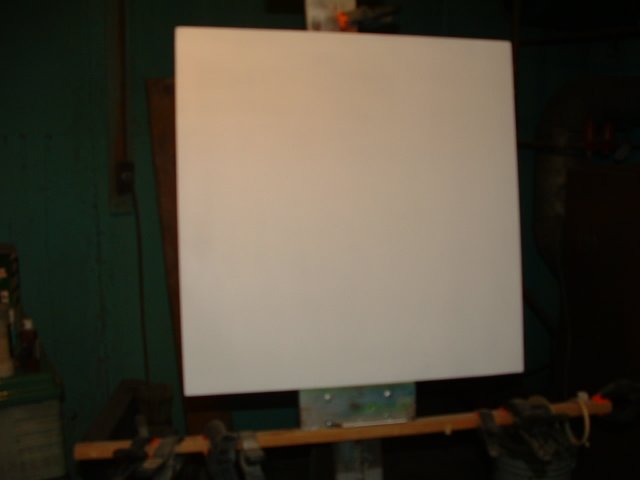
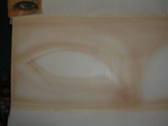
I'm starting with a piece of masonite. After a light sanding, I shot a coat of Aqua Flow white to try and avoid adhesion problems that I had last time I used this material.
| 
2
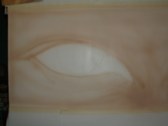
I sketched the eye with a piece of yellow chalk. I chose this because it's less likely to show up. I was right, I cannot see where I sketched it.I also dropped the chalk which shattered into a thousand pieces, so I'll have to try a darker color.
| 
3
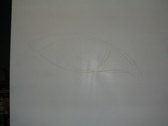
Since the yellow chalk is just about invisible, I had to settle for the next darkest color I had, green. After sketching the eye, I'm not so sure that was a good choice either.
| 
4
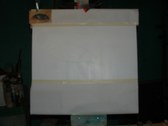
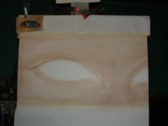
I masked off the top and bottom of the board, because I'm going to put lettering there. You can see my reference picture clipped to the upper left of the board.
|
5
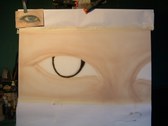
I start out with Createx Flesh color that I lightened with white.
| 
6
I lay it on heavier in the areas that will be darker. This is like building the foundation of a house, it lets me see the lay-out, and points out where I need to go next.
| 
7
After getting the paint on, I can see that where I sketched the right eye is lower than the left. It's fixable, but it'll cost me in time. I'm sure that there will be other DUHs before I finish this project. The competition always comes at a bad time for me, because February is a short month, and it's also the least profitable in my business, so I never have the time or money to get everything I need to do things right.
| 
8
I was unable to cover the green chalk with the fleshtone color, so I resort to one of my palette favorites...Shading Gray. It's hard to tell here, but on the pupil of the eye, the lines aren't hard, they gradually blend into the white. Here I went close on the inner ring to get a harder edge than the outer.
|
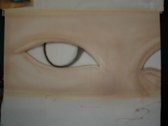
9
Now I fog the outer edges to soften them even more. I also did some shading on the skin. That's getting ahead of the game, I'll go into more detail with a shade of brown that won't look so out-of-place.
| 
10
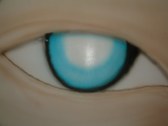
I mixed some pthalo green, pthalo blue with some transparent extender
to get this color. I shaded the iris, keeping the coverage light, this way I can build it up to get a darker, deeper shade, and yet use other colors without burying it.
| 
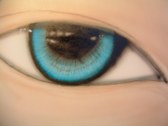
11
It's hard to tell in this shot, but I radiated lines out from the center to the edge. If you look closely at a photograph of an eye, it's amazing how many colors are in there.
| 
12
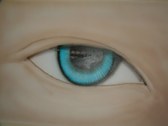
I filled in the pupil with numerous coats of shading gray. I then added lines radiating outward with that same color. This helps darken it, without just painting a solid blob.
|
13
I went over the blue rays to help them mix with the gray ones. I also added little blips from the outer edge pointing in.
| 
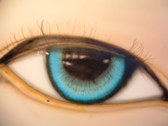
14
I had left the spots that are supposed to be reflections white. They'll need to be gone over when I get near the finish. I'm sure that some overspray will partially obscure them before I'm done. I'm happy that it's finally starting to look like an eye.
| 
15
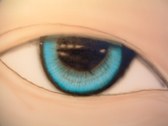
I touched up the reflections, just to see how well they work with the rest of the picture.
| 
16
I started to work on the surrounding skin. I first used Golden Yellow Oxide on the lower lid. It's too bright but I can cover that easily. I then added Burnt Sienna and Raw Sienna to get the brown brick color which I shaded the curve of the nose and the fold above the upper eyelid with.
|
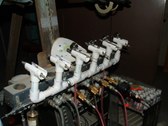
17
After having my HP-C fall off the holder and ruin the tip, I had to make a new airbrush holder to keep any more accidents from slowing my progress. I only have until March 2nd, so I better get cooking!
| 
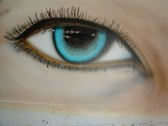
18
I start work on the eyelashes and the dark make-up adorning them. I use my Grex because I can get fine lines with it. Unfortunately, I cannot keep my hands steady enough to get a line that's not wavy.
| 
19
I've gotten this far, but I think I'm going to resort to using a regular brush for the lashes. These just don't "cut-it", in my opinion.
| 
20
I use Golden Raw Umber to darken the upper lids, without making them ghoulish looking.
|
21
After trying to airbrush eyelashes, that were about as straight as McDonalds French Fries, I decided to use a regular brush. The thinnest one I had, also was very short, so it wouldn't hold much paint. My attempts to brush the eyelashes were as shaky as my airbrushed versions. The only thing I saved, was time.
| 
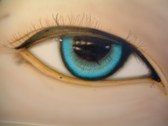
22
In the reference photo, there's a bluish tinge to the areas above and below the eye, so I use some opaque ultramarine to add that effect to the shading gray already there.
| 
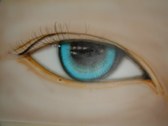
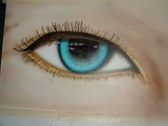
23
It's March first, I have one day left to finish this and get it submitted. Although I'm pleased with my progress, I still have a longgg way to go before it's done.
I've also added some of the blue to the corners of the eye. While I had it in the gun, I faded some in around the curve where the forehead blends into the nose.
| 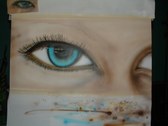
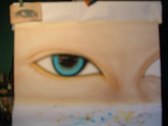
24
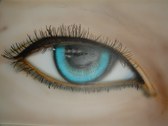
A wide shot of what I've got so far. In the photo, the eyebrows are barely visible, so I did them real lightly with a mix of raw umber and shading gray. They certainly look less jumbled than the eye lashes do. The more I work on this, the less happy I am with the eye lashes.
|