1
Smokey
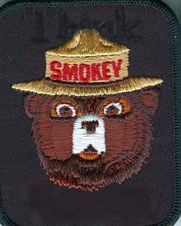
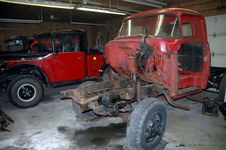
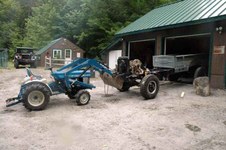
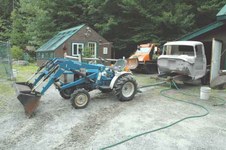
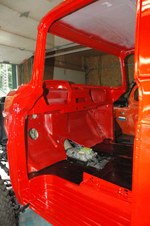
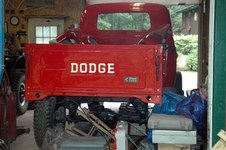
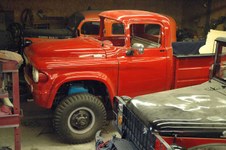
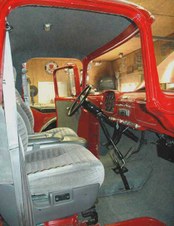
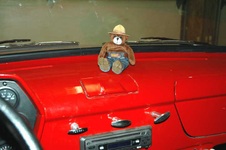
My truck spent its life as a Fire Department Brush Truck. In keeping with its history, Smokey is her name. Smokey will sit on the dash as shown in picture 159
| 
2
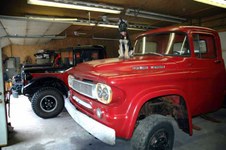
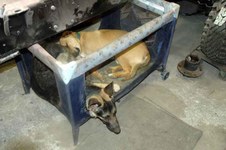
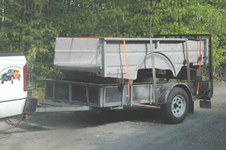
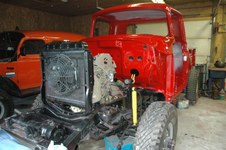
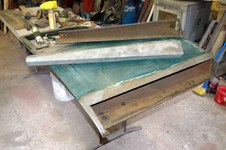
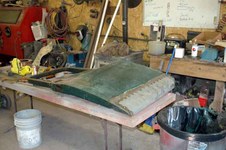
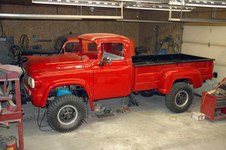
Smokey & Eahka
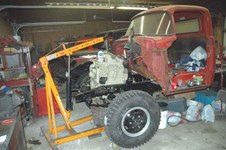
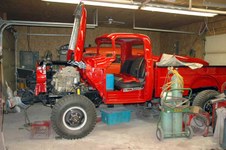
Tomorrow, 8/26/08 the tear down starts
| 
3
kevin-1.ie
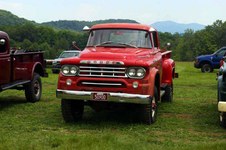
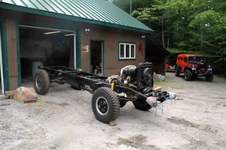
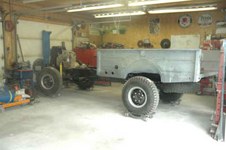
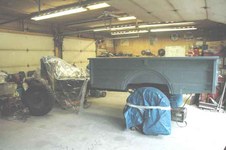
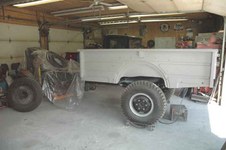
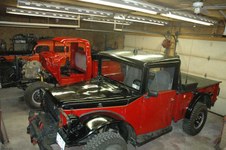
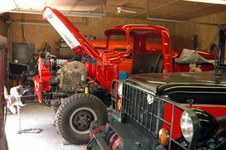
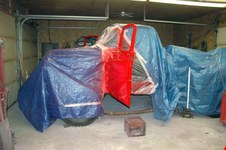
Kevin's PG/W300, a benchmark for me to follow.
|
4
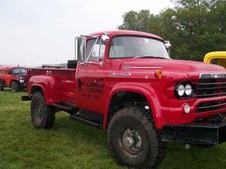
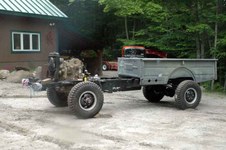
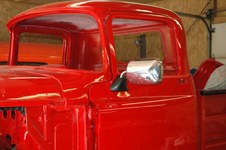
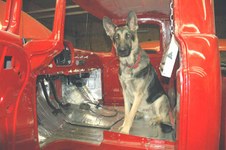
Ned's PG/W300, another benchmark for me to follow
| 
5
08 27 08a
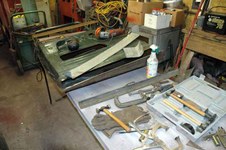
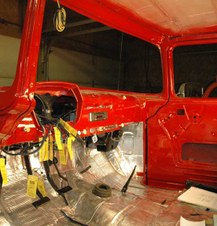
August 27, 2008
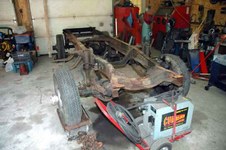
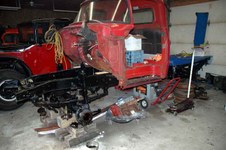
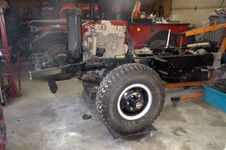
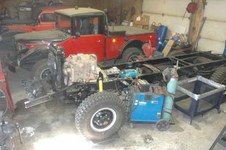
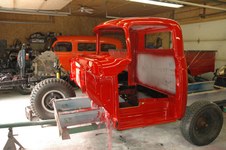
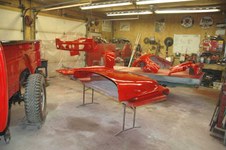
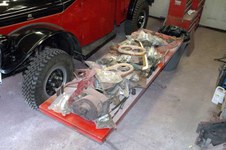
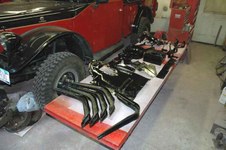
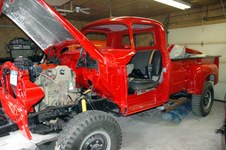
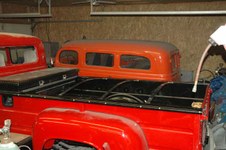
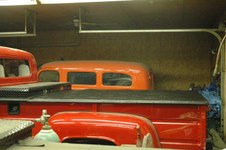
Now to measure under the cab for the new drive line, then pull the cab and finish stripping the frame for blasting
| 
6
8 28 08a
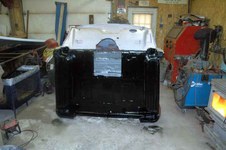
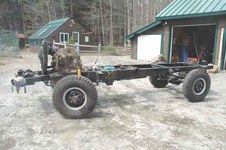
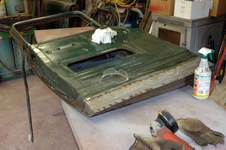
August 28, 2008
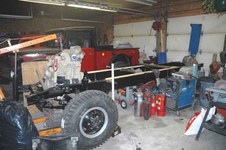
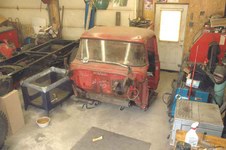
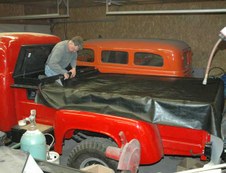
Cab off, now we can get serious and clean the frame prior to blasting and paint
|
7
08 31 08
August 31, 2008
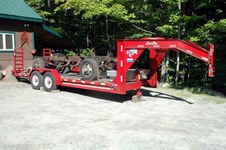
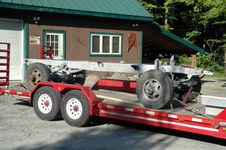
Frame stripped and loaded, ready to go and get blasted for painting.
Now to schedule my blast appointment.
| 
8
Sept-11,-2008a
September 11, 2008
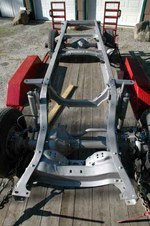
Finally a break in the rain, Frame blasted with Black Beauty. Bright and shinny as the day it was built.
| 
9
Sept-11,-2008b
|
10
09:13:08b
September 13, 2008
Frame shot with PPG MP-170 Epoxy primer. Heat is on in the shop so it will cure well overnight. Tomorrow I will shoot the top coat.
| 
11
09 14 08
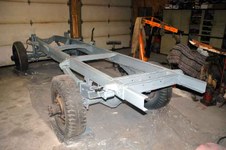
September 14, 2008
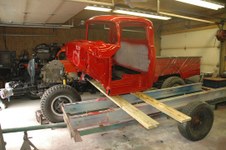
Frame shot with PPG, Hardened MOA Chassis Black. Once its well cured, I will temporarily put 2 sleepers on the frame rails and set the cab back on for engine placement and fab'ing the engine/transmission mounts. Then the cab goes in storage before the snow flies
| 
12
10 4 08
October 4, 2008
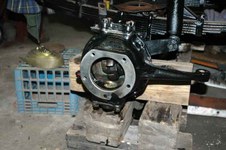
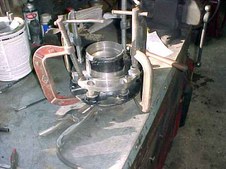
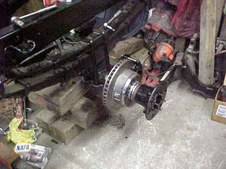
Frame is up on cribbing, hubs/brake backing plates off. Now to rebuild the front steering knuckles. With the felt gaskets off, I can feel the bearing/bushing is in serious need of rebuild.
|
13
PG-Knuckle
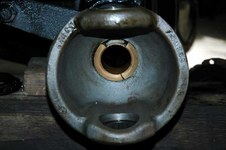
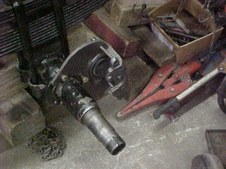
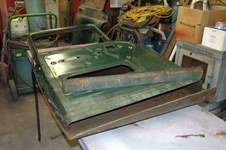
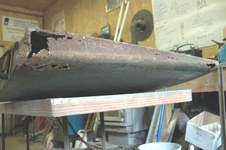
October 5, 2008
Steering knuckles were in serious need of rebuild. Left knuckle top cone bushing badly worn. Right axle bushing and spindle bushing worn, cracked and the axle bushing fragmented.
| 
14
10 26 08a
October 26, 2008
All Bronze axle/spindle bushing replaced
| 
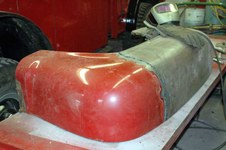
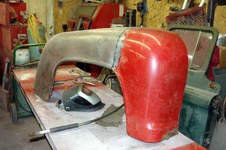
15
10 26 08b
October 26, 2008
Knuckle updated to bearings on top and bottom trunnions. Same part number as PW/M37/WC
Cone 23100, Cup 23256
|
16
10 26 08c
October 26, 2008
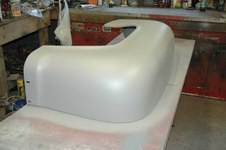
Steering knuckles/hubs now back to Zero Time.
| 
17
11-18-08
1999 Dodge NV-4500, 1993 Dodge NP-205 are ready for install.
Tomorrow the measure stick with the little marks comes out. Count the little marks and see how the oil burner will sit.
| 
18
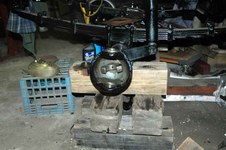
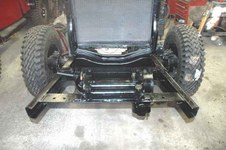
11 19 08
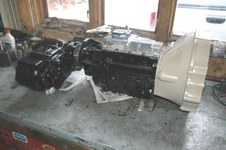
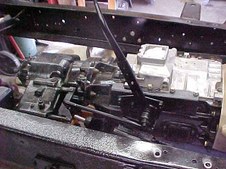
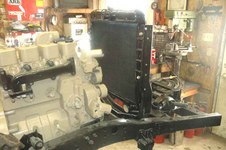
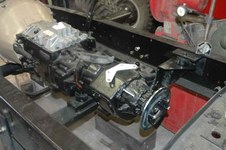
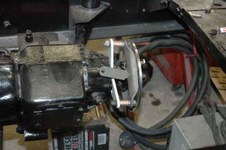
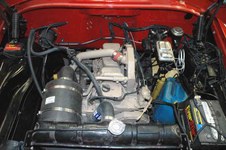
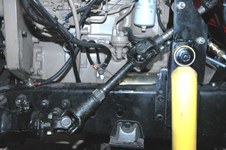
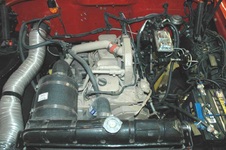
In my past experience, PW/WC/M37 require a reverse oil sump, and a notch modification in the oil pan on Cummins 4B series engine. The PG as you can see, wants a front sump oil pan, no notch. With the engine sitting as in the picture, the shift tower on the NV-4500 will fall right where it should be in the cab. Its nice to have all this differential clearance.
|
19
11 20 08
Wheels and Radiator Support shot with PPG MP-170 Epoxy Primer. Heats on in the shop to get a good cure
| 
20
12 11 08
December 11, 2008
Engine is ready to set in frame. Tomorrow if the snow storm permits, I will be going for steel for engine mounts, transmission cross member stc. Also pick up my STA Superlugs mounted on the W300 wheels. Soon all these sub assemblies will start to fall together.
| 
21
121908
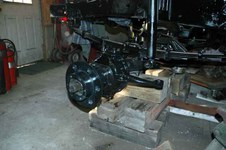
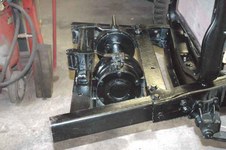
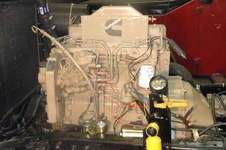
December 19, 2008
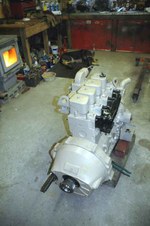
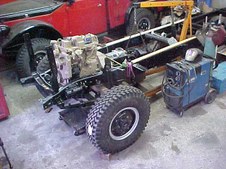
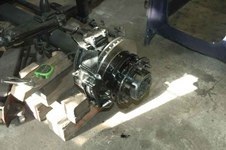
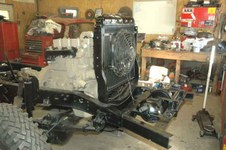
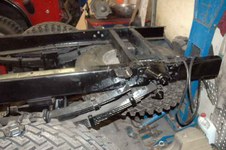
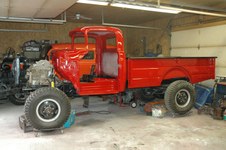
Cummins 4BTA in place at 4 degrees down angle to match the rear differential pinion and be parallel.
Now to fab the transmission cross member and hang the NV-4500 and married T Case.
|
22
122208
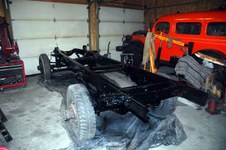
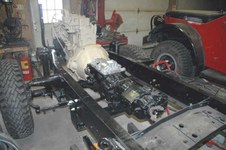
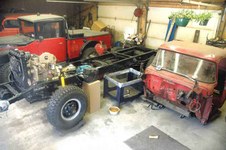
December 22, 2008
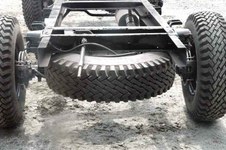
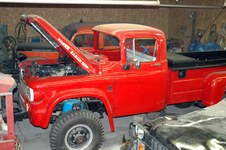
Engine is located, Cab off. Now everything is in the open to complete the rolling driving chassis.
| 
23
Decembere-28,-2008
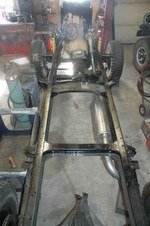
NV-4500 and Married NP-205 installed. Now to fab a cross member for the NV-4500 and the drive train is all complete.
| 
24
123108
December 31, 2008
My unspoken wish was to have the Cummins/NV-4500/NP-205 totally installed prior to 1/1/09. I beat the clock by 11 hours 47 minutes. Now to get ready for New Years Eve
Happy New Year to all
|
25
January 4, 2009
1993 Dodge T Case Shifter modified and new brackets made.
| 
26
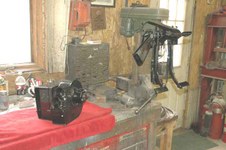
Januarey 5, 1009
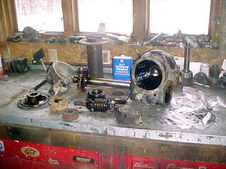
While waiting for my Disk Brakes to arrive on 1/9, I decided to rebuild the Braden LU-2. It was in serious need of a rebuild. Careful heat and a lot of wax and all bolts came out easily.
| 
27
January 5, 2009
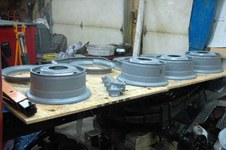
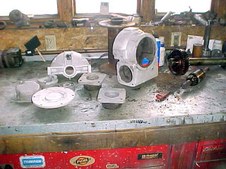
45 minutes in the blast cabinet and all parts are like new. Tomorrow, blast the drum and then assemble and paint.
|
28
January 7, 2009
Starting to build up winch mounts
| 
29
January 7 2009
Original Dodge Roller Fairlead will be used n completed winch mounts.
| 
30
January 7, 2009
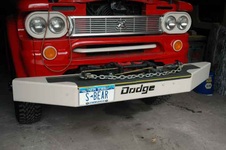
Undecided on front BOOMPER. I will wait until I the body on, then decide on type and style of Bumper.
|
31
01011209c
| 
32
January 12, 2009
Winch complete, now to move on to disk brakes
| 
33
January 18, 2009 a
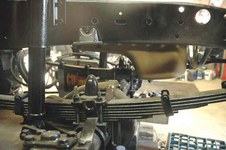
Mocking up the rear caliper bracket so caliper pins clear the spring pak
|
34
january 18, 2009
Front Disk's mocked up. Now for Machine work to adapt to W300 hubs
| 
35
January 24, 2009
Machine work done on front hubs. Here I am welding the rotor flange on the Dodge W300 Front Hubs. The hubs now have some machine work to bring them to true.
| 
36
January 25, 2009
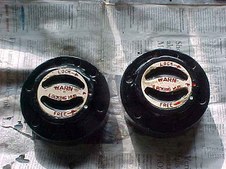
Warm Hubs disassembled, inspected, cleaned, New O Rings and painted.
|
37
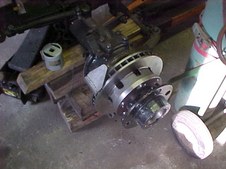
January 27, 2009
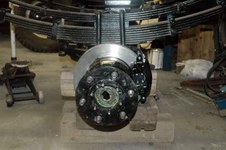
Front Disk Brakes Complete, fit like a glove.
| 
38
January 27, 2009
Rear Side of front Disk Brakes
| 
39
January 27, 2009
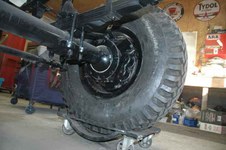
Left Side Complete with Rebuilt Warn Hub. Ran out of time, in the morning all thats left is to put the tire on and take Smokey off the cribbing. Then I can watch the latest Winter Snow Storm coming this way.
|
40
January 30, 2009
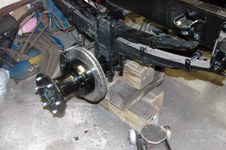
Machine work done on hub to accept the Rotor Flange. In the picture, I have located the rotor flange position and then welded it to the hub. Now back to my friend to have the rotor flange turned to remove any runout. I will get them back early next week and can finish the disk brakes.
| 
41
February 5, 2009
Radiator all rebuilt; New Core, Inlet and outlet ports changed in size to match the B3.9 ports, new pressure neck.
| 
42
February 5, 2009
Electric fan mount designed to allow moving forward if I decide to use CAC. Wont know about the CAC until I get the front clip back in place for clearances.
|
43
February 5, 2009
Starting to fab disk Ebrake. Tomorrow is finish the rear disk brakes and hopefully get Smokey off the cribbing back on Rubber.
| 
44
February 6, 2009
Left rear disk brake complete
| 
45
February 6, 2009
Right Rear Disk Brake complete
|
46
February 6, 2009
Hoku got up early this morning wanting his food. Good thing, I got a very early start. The disk brakes wont get juiced until I get the cab back on as the MC/Hydroboost are firewall mounted. Working alone, I am happy to get her back on rubber, off the cribbing.
| 
47
February 11. 2009
None of the large Shock Manufactures, nor NAPA list a shock for the 1960, W300 Application. My NAPA dealer worked with Monroe using the dimensions of the original shocks to find the proper replacement. These shocks are Monroe Gas Magnums; Monroe # 66630, NAPA # 66630
| 
48
February 11. 2009
Disk Ebrake is complete. When my special order pads arrive, its a simple stuff'em in. Brake will get the cable after Cab is back in place
|
49
February 14, 2009
Dodge Ram spare tire mount, winch and trapeze installed to carry the STA Super Lug spare. Hopefully, tomorrow the exhaust system will be complete
| 
50
April-17-2009b
Spare tire winch assembly
| 
51
February 15, 2009
Exhaust system complete. The muffler is a 1st Gen Dodge Diesel, the NAPA # is 18371. I use this muffler on all my trucks.
|

52
February 25, 2009
Non planned work stop. Waiting for parts, which wont be here until the second week of March. I'm banging my head LOL
| 
53
March-14,-2009
Smokey is ALIVE!
Installed my new injectors and lines, purged the air in the lines and she cranked right up. Runs Great. On close look, the design for the Power Giant Nose will not easily lend to CAC. I have a JWAC coming next week. Remove the CAC intake and bolt down the JWAC Intake and she is Blessed. WIll be starting on the Cab soon. To much Ice and Snow to move the chassis to my cellar and bring out the trailer
with all the sheet metal.
| 
54
March 21, 2009
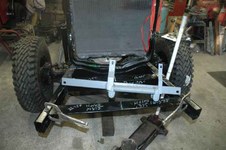
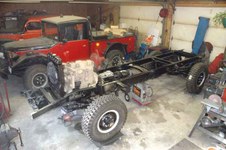
Rolling frame is complete, work done;
Cummins 4BTA, Dodge NV-4500, Dodge NP-205, 4 wheel disk brakes, Saginaw power steering, recored and modified radiator, rebuilt LU-2 winch, fab'ed winch mounts, rebuilt steering knuckles, rebuilt Warn hubs, disk Ebrake, differentials flushed and checked, 1st gen Dodge exhaust system, new shocks, single wheel rear hubs, STA Super Lug tires, Dodge wheels with wide lock rings, Dodge spare tire winch system,
frame blasted bright and shiny, Pickle X 20 on all steel, PPG MP-170 Epoxy primer, PPG hardened MOA chassis black, wiring to the rear for all lights.
|
55
03032109a
| 
56
03032109b
| 
57
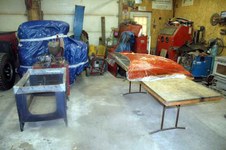
March 21, 2009
The cab is first for a little body work and make ready for paint. In 4 weeks or so, the snow/ice will be gone and i can move the frame to the cellar garage and bring out the trailer with all the sheet metal parts. There will be a lot more room to work with the frame moved out.
|
58
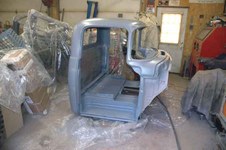
April 1, 2009
Bottom of cab; Pickle X 20, PPG MP-170 epoxy pimmer, PPG hardened MOA chassis black.
Firewall; Pickle X 20, PPG MP-170,
PPG, MP-182
| 
59
April-14,-2008
Hard day in the shop.....its Nap Time LOL
| 
60
April 16, 2009
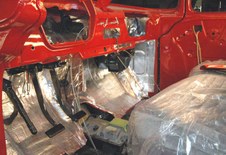
Cab has Pickle X 20 applied, then primed with PPG, MP-170 Epoxy. Roof and rear of cab have 1 inch sound deadening and heat insulation.
|
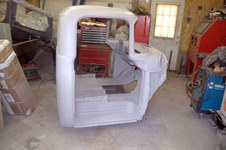
61
April 16, 2009
PPG, MP-182, 2K High Build Primer. Next the front fenders.
| 
62
April-17-2009a
Ice is gone, ground dried up. Completed chassis now going in my cellar while I prep and paint all body sheet metal. Next time it comes will be to marry the chassis to sheet metal. Tomorrow, convert my shop into a body shop.
| 
63
April-18-2009
All set now to do the paint prep.
|
64
May-05-2009
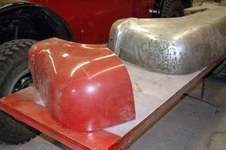
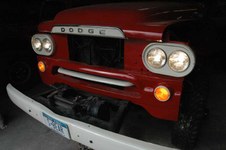
Front nose shot with PPG MP-170 Epoxy. Tomorrow I will shoot MP-182 Hi Build 2K. Then everything from the cab forward is in primer. All thats left is the bed and 2 rear fenders, then color.
| 
65
May-17-2009
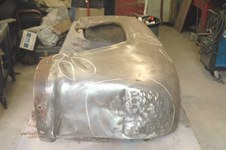
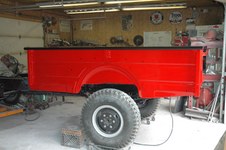
Last rear fender. Looks like it took a Cannon Ball hit. Someone in the past really worked on this one with a big hammer. Lots of dents on the other end and top. After this, all that is left is the bed, then color.
| 
66
May-21-2009
Bed back from Blaster.
|
67
May-24-2009
I need a break from the dreaded body work/paint prep. Taking a few weeks off to do another fun project.
| 
68
June-6-2009a
Today the bed comes off the 55 gallon drums and back on the frame.
Much safer, I dont like working under it sitting on drums. Rain is forecast in the afternoon.
| 
69
June-6-2009c
|
70
June-6-2009b
As Smokey goes in, rain started. No problem, the bare steel is coated with Pickle X-20
| 
71
June-6-2009-d
This Giant Power thingie is long with the bed on. Had to put it in on a angle so I can get by my work bench.
| 
72
July 2 2009
Finally, bed is shot with PPG, MP170
epoxy primer. Now when cured, I will shoot PPG, MP-182 2K Hi Build primer. Then wet sanding on all parts starts.
|
73
July-4-2009
PPG, MP-182, 2K high Build primer. Now to wet sand all parts. Color is coming soon........I hope LOL
| 
74
July-19-2009
Wet Sanding the Cab. I had to un-blow the tires on the trailer so it would fit in the Bombardiers space.
| 
75
July 17 2009
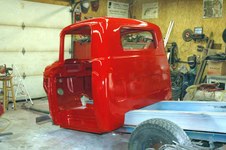
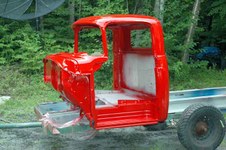
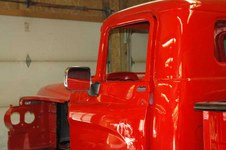
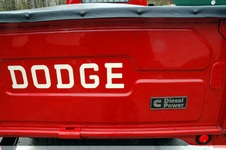
The color is 2005 Dodge Viper Red.
|
76
July-22-2009a
| 
77
July-22-2009b
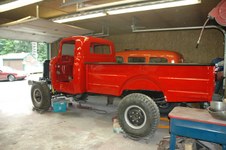
Tomorrow, the Cab goes on the Chassis. I thought this day would never come. Now to paint rest of the sheet metal.
| 
78
July-23-2009-a
|
79
July-23-2009-b
| 
80
July-23-2009-c
| 
81
July-23-2009-d
|
82
JUly-23-2009-e
| 
83
July-23-2009-f
| 
84
JUly-23-2009-g
|
85
July-28-2009a
Took the plastic tent ( spray booth) down for the last time. All sheet metal now shot. When the clear is cured, the parts will go in the bed for storage until needed. I could not live without the 4 wheel dollies to move Smokey around the shop.
| 
86
July-28-2009-b
| 
87
July-30-2009a
Nice, the hood hinges will lock open at 90 degrees for great clearance when working on the engine.
|
88
July-30-2009b
Normal 40 Degree hood opening. Underside of hood is now sound proofed as I did on the Bandit. It really makes a huge difference.
| 
89
August-1-2009
Shop now cleaned and put back in order, ready for the next siege.
All the small parts, everything on the table now goes to the Blast Cabinet, Repair and Painting. Its like invisible work, days spent and nothing showing up on Smokey.
| 
90
August-8-2009
All parts now basted and shot with PPG, JE Acrylic Enamel (Black). Every piece, every sq inch of Smokey is Blasted and painted.
|
91
August-9-2009a
| 
92
August-9-2009b
| 
93
August-9-2009c
50.8 degrees outside and rain, good day to work on the Cannon Ball hit on the Right Rear fender. New donor section will be grafted in to replace the damage.
|
94
August-9-2009d
Damaged leading nose cut off and new donor section welded in place.
| 
95
August-9-2009e
Weld, let cool, weld, let cool, then plenish the spot welds. Tomorrow a little more welding then grind her smooth. Slow going, dont want any heat warps.
| 
96
August-19-2009
When I shoot red on the glove box door and some other small parts, the fender will be included.
|
97
August-20-2009
Doors were saved to last, you need to be in good spirits to strip doors and work on them LOL ! Both doors need rust reconstruction on the bottoms
| 
98
August-21-2009
Two repair panels fab'ed. Inside of the door is treated with Pickle X 20 and drying. Tomorrow I will weld in the panels and shoot PPG MP-170 Epoxy Primed in the door, followed with PPG MOA.
| 
99
August-22-2009
|
100
August-30-2009
1 Year 4 days into Smokeys build. Door finished, one more door to go
| 
101
August-30-2009-b
Last Door, a certified train wreck. The entire bottom will have to be reconstructed.
| 
102
August-31-2009
New repair panel fab'ed, bottom cut off door. Now to treat surface rust inside the door. There was no primer or paint in either door. No wonder they rust so bad.
|
103
Sept-1-2009
Tomorrow, a little more welding and then prep for paint
| 
104
Sept-6-2009
Doors Painted. The Body/Paint Shop is closed LOL.
| 
105
Sept-6-2009b
Went out after dinner to take the masking off. Now, I can sleep well tonight.
|
106
Sept-8-2009a
| 
107
Sept-8-2009-b
| 
108
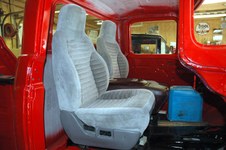
Sept-10-2009
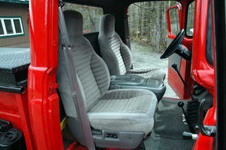
Grand Cherokee, full power seats
|
109
Oct-1-2009
Heater is rebuilt. New Brushes in motor and a new heater core.
Starting to fab the Hydroboost mount to Dodge PG Hanging Pedals
Hydroboost is Chevy 1991 V3500. NAPA 52-7307
Brake Master is Chevy 1991 V3500 NAPA 39435 1 & 5/16" bore JD8 Option
Following parts are all from Chevy/GM, Push rod 377397
Spring P15581525, Spring 471736
Baffle 360859
| 
110
Oct-10-2009
First layer of soundproofing.
Heater installed. With engine at 180, she will melt steel.
| 
111
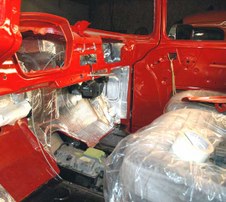
Oct-11-2009
Suspended pedals, hydroboost, clutch MC, windshield wiper system, ebrake, go pedal
|
112
Oct-21-2009
Starting to come to life
| 
113
Oct-22-2009
| 
114
November-12-2009
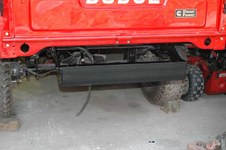
Rear bumper mount. Drops off frame is .375" plate. Channel is C5x11. When the paint is cured tomorrow, the real bumper gets bolted on.
|
115
November-17-2009
Tomorrow to start aligning the sheet metal.
Shop Dust Never Sleeps !
| 
116
November-21-2009b
This thingie might just roll again LOL
| 
117
Thanksgiving-2009
Eahka's new game is to get in the cab and take Nap Time. In picture #2, he sat on the hood, now he is 104 pounds.
|
118
December-4-2009,jpg
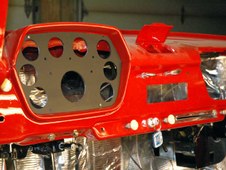
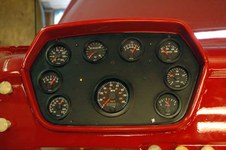
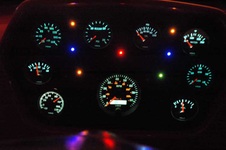
Entire truck is wired. Dash panel should be back from Powder Coaters soon. Then finally mount gauges.
| 
119
December-20-2009
| 
120
Januarey-0910
Door glass, new window channels, new sweeps, cross bed tool box, fuel fill all in place. New custom fuel tank will be here on 1/12/10. Then I can put the blue fuel tank under the fender away LOL
|
121
January-13-2009
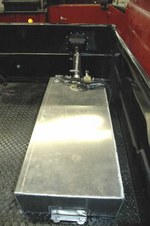
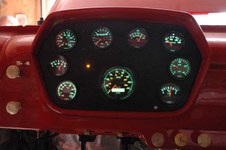
Tank half full, primed and engine running off tank. I am going to miss the blue jug LOL. All aluminum 40"x16.5"x8", 23 gallons. Now to get ready for the new gauges due Friday.
| 
122
January-14-2009
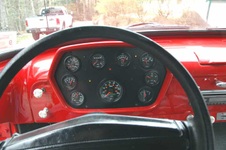
If UPS does their job, dash gauges this weekend.
| 
123
January-18-2009-a
|
124
January-18-2009-b
| 
125
January-24-2009
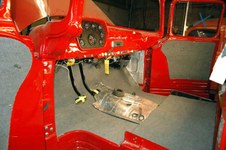
Interior starting. Measure a lot, cut once. The wood pellet bags are great weights to hold the carpet down while the glue dries.
| 
126
january-25-2009
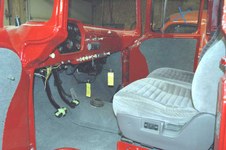
One more day on the carpet for the tranny cover and kick panels.
|
127
January-27-2009
| 
128
February-13-2009a
Steering Gear
| 
129
February-13-2009b
Sure wish she had drive shafts and the brakes were juiced. My road is bare, cant wait for the first drive.
Smokey is licensed and insured....ready to roll
|
130
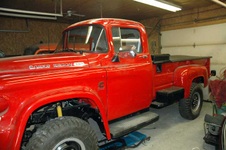
February-27-2010a
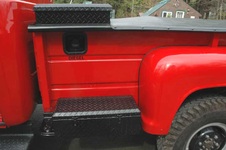
Running Boards Line-X'ed
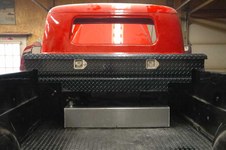
Diamond Plate Tool Box
(2) 5 gallon Jerry cans on right running board opposite tool box.
| 
131
March-17-2009
| 
132
March-20-2009
I could not find original rubber pedal pads. NAPA 6701108 snap right on after a tad of sculpting of the steel pad with a flap disk.
|
133
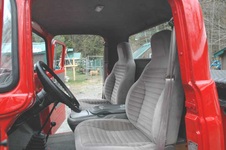
April-03-2010
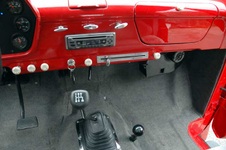
Headliner all done. Handcrafted in my own shop. Boots on the two shift levers and the cab is all complete inside.
| 
134
April-10-2010-a
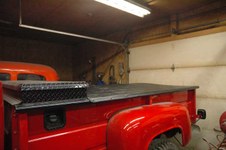
Tonneau Cover Bows and Cross Bed Lock Channel in place
| 
135
April-10-2010
Tonneau cover being laid out amd marked for sewing. Hopefully by mid next week it will be done and on Smokey. One more item off the punch list
|
136
April-13-2010a
Tonneau Cover complete. One more thing off the final punch list
| 
137
April-13-2010b
| 
138
April-15-2010
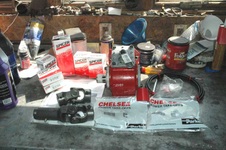
New Chelsea PTO and winch drive line arrived today.
|
139
April-15-2010
Glass people came today, now I have front windshield and rear window. Wipers are on and work great. Tomorrow, I go pickup my new drive shafts. Busy weekend ahead
| 
140
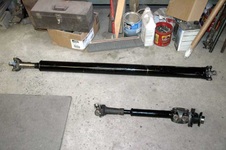
April-16-2010
Picked up my drive shafts. Now between the PTO and Drive Shafts, I have work for this weekend.
| 
141
0
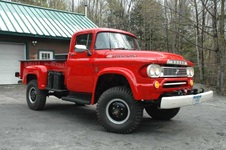
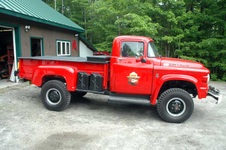
Smokey Bear roll out on April 28, 2010
From the first phone call to buy Smokey to roll out was 19 months 27 days
|
142
1
| 
143
2
| 
144
3
|
145
4b
| 
146
6
| 
147
7
|
148
10
| 
149
11
| 
150
12
|
151
Smokey-Doll
| 
152
14
| 
153
15
|
154
16a
| 
155
16b
| 
156
17
|
157
Smokey-Logo
| 
158
Engine
No new pictures will be added to Smokeys Album....The Build is complete
| 
159
DSC 6542
|