1
| 
2
| 
3
| 
4
|
5
| 
6
| 
7
| 
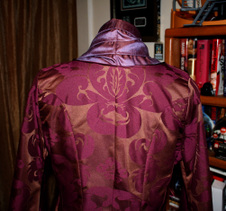
8
|
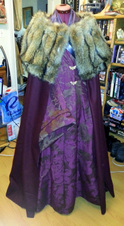
9
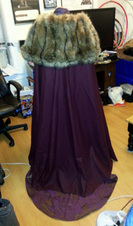
| 
10
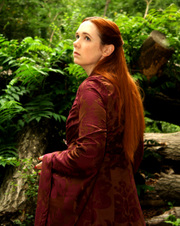
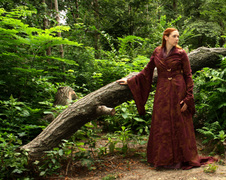
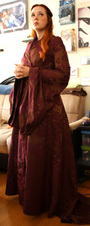
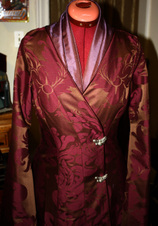
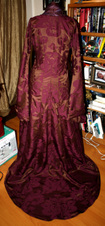
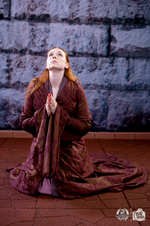
Robe front dress with bee closures (couldn't find dragonflies), sleeve and front edges piped with a burgundy piping. Nice long bell sleeves. There is a "scarf" for the neckline and a petti-skirt for underneath.
| 
11
Front bodice detail. You can see the pattern alterations on the front here. I added those additional princess seams just under the shoulder by cutting up the pattern and sewing it back together.
You can also see how I changed the neckline and made it an open front.
| 
12
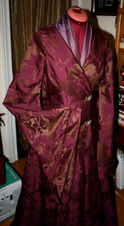
Long drapey sleeves with folded over detail and piping.
The sleeve shape was my own design.
|
13
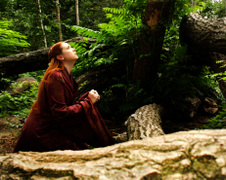
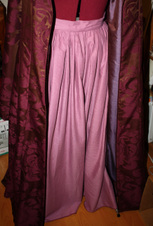
Petti-skirt for body under the dress. I didn't want to make a full chemise as I didn't want to die of heat (there's the scarf already).
You can also see how the dress opens in the front here as well.
| 
14
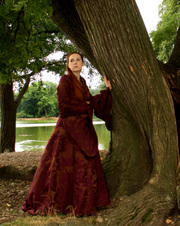
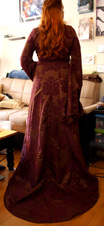
Back with a longer train than hers. I'm a sucker for a beautiful train. I love how the fabric patterns match up nicely :)
| 
15
Back bodice detail.
You can see the adjustments I made in the pattern pieces here. The princess seams coming from just below the shoulder were added, and the center back was sewn up the middle.
| 
16
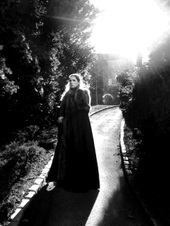
Winterfell cloak for my Sansa dress.
I made a gored cloak from 3 yards of light coating wool in a burgundy color.
The cloak closes with an old belt that is snapped to the upper front with heavy-weight snaps. It crosses over the front of the chest and then closes with in the back with the original belt buckle.
The fur mantle was made from reclaimed fur from a coat my mother-in-law was having altered. She gave me the scraps rather than toss them.
|
17
Winterfell cloak for my Sansa dress.
The back is train-less for ease of wear. Carrying the dress train around is enough as it is.
| 
18
McCall's 4491 Medieval Dress
| 
19
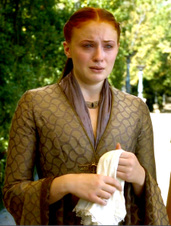
Reference Shot
You can see the scarf she wears under the bodice and how long it is here as well as the underskirt. Most of her dresses are of this build, just with varied fabrics.
| 
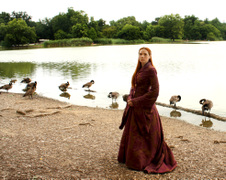
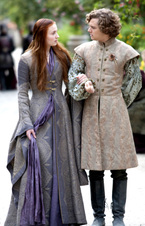
20
Reference Shot
This was the fabric inspiration for mine. I wasn't looking to find the exact one, but mine came pretty close in pattern, it's just darker in color.
|
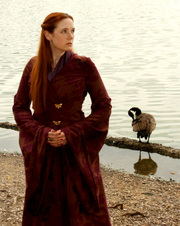
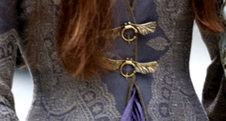
21
Reference Shot
Here you can see the scarf and the edging detail on the front and sleeves. I made my sleeves similar to hers here, how they fold over and are trimmed. This is also a pretty good shot of the dragonfly cloak clasp.
| 
22
| 
23
| 
24
"This is a fabulous dress! Co..."
View Comments...
|
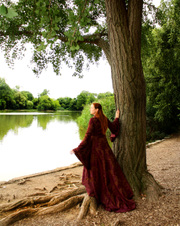
25
This photo was taken by Will as David was shooting. The color was so off due to it being a camera phone photo, so I made it into a black and white pic in photo shop and softened the overall feel.
| |