
1
Generations of Stone Mason experiance
| 
2
"dial before digging" call 811 to mark all underground utilities
| 
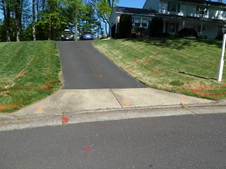
3
measure twice, dig once
|

4
alot of measuring
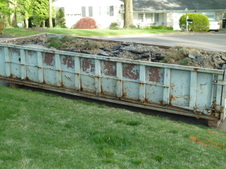
| 
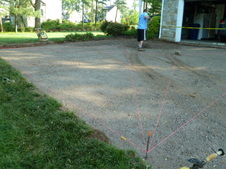
5
from side to side
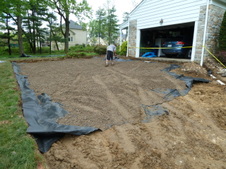
| 
6
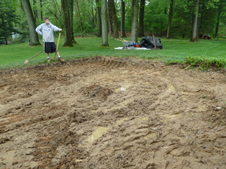
elevation reference is established across existing drive
|

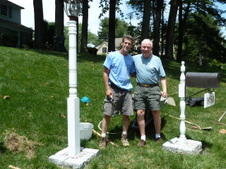
7
equipment in place Al Falcone ready
| 
8
Let the project begin
| 
9
Ground broken
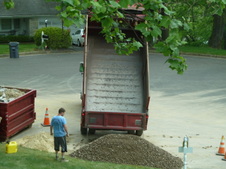
Monday 05/06/2013
|

10
step #1 excavate driveway
| 
11
fill 20 cu yd container
| 
12
HARD LABOR
|

13
container #1
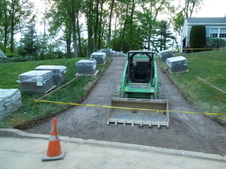
| 
14
excavating in preparation for 10" crushed stone+2"sand & 3"paver
| 
15
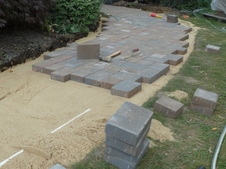
End Day 1
|

16
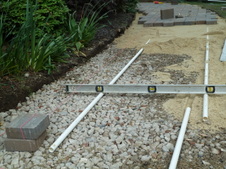
Day 2 Tue 5/7
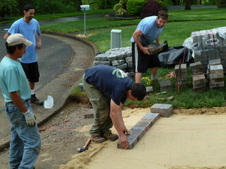
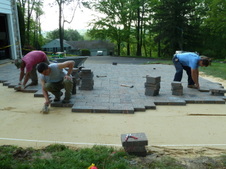
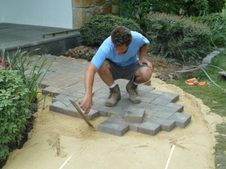
Hand dug
| 
17
Rocks & Roots
| 
18
restore & repair roof rainwater
Drainage system
|

19
3" pcv pipe
| 
20
connected to existing pipe to curb
| 
21
container #2
|

22
containers 3 & 4
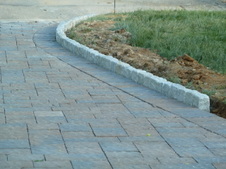
End of day 2
| 
23
Day 3 Wed 5/8
heavy rain = MUD
| 
24
when the going gets tough
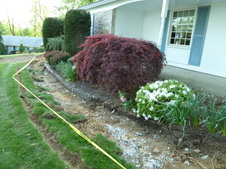
|

25
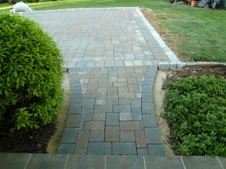
the tough get SHOVELING
| 
26
Day 4 Thu. 5/9
First tri axel arrives
| 
27
Delivers modified crushed concrete
|

28
23 THOUSAND pounds
| 
29
Spread on top of fabric base
| 
30
deposited by "bucket"
|
31
raked evenly to 2" layer
| 
32
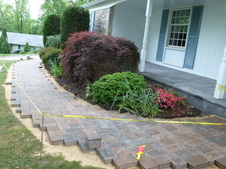
With a Smile :)
| 
33
tamping by Albert
|

34
then repeated and raked
and again and again
| 
35
Day 4 Ends
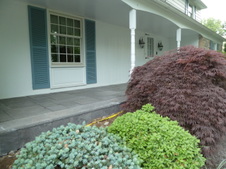
| 
36
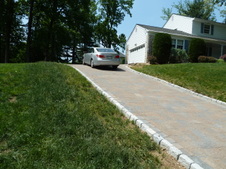
Day 5 Fri.5/10
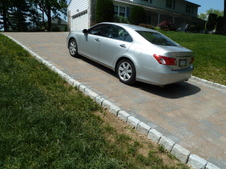
Begin marking elevation angles of car park area
|

37
area regraded
| 
38
spread to conform with elevation angles
| 
39
EP Henry "Driveway" pavers arrive
|

40
18 Pallets
| 
41
placed around drive in preparation for setting
| 
42
Mix of 3 sizes plus border
|
43
End of Day 5
| 
44
Day 6 Sat.5/11
spread & grade sand
| 
45
unload pallets & arrnge pavers by size
|

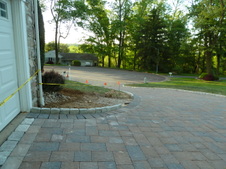
46
finishing touch with sand
| 
47
string center line of drive and horizontal top line of apron
| 
48
begin laying top row of apron with Coventry 4 pavers
|

49
continue up with "random"instalation of Coventry 3 pavers
| 
50
Al Falcone and Pablo proceed paver by paver with a random pattern
| 
51
Progress continues, 2 men laying
others assist supplying
|

52
Another load of sand arrives
| 
53
Pablo begins the laying the apron with 2 rows of Belgium block
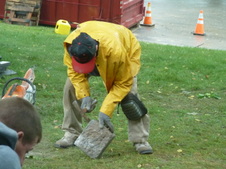
| 
54
Cut to prepare for "sailor Course"
Coventry 4 Border
|

55
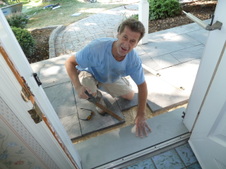
EPH Coventry 3 dakota blend
Random Installation
| 
56
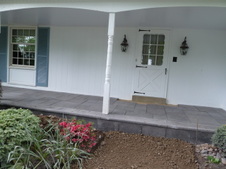
End of day 6
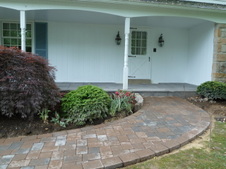
| 
57
Day 7 (Sun./Mothers Day)5/12
Al Falcone / Wed Anniversary
|

58
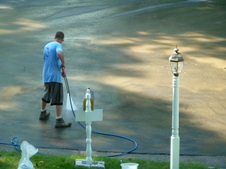
Dedicated to completing the project :)
| 
59
Nice Job, Getting near the finish
| 
60
next, finish border,sweep coat of bonding sand into seams, tamp,sweep 2nd layer polymeric sand into seams prior to watering
|

61
+ add Belgium Blocks along the border
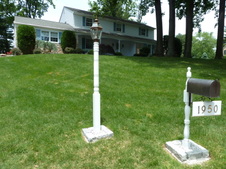
END OF DAY 7
| 
62
Day 8 Mon. 5/13
final del. of modified crushed concrete for front walk
| 
63
Work begins to finish the borders
|

64
Course of Belgium soldiers ends parking area
| 
65
Al cuts & shapes 1st Belgium for driveway border
| 
66
Chips to get proper starting fit
|

67
Chips some more
| 
68
The placement continues one by one
| 
69
Uniformity and a natural appearance is achieved
|

70
Result speaks for itself End Day 8
| 
71
Day 9 Tue 5/14
begins with celebration of second & final load of stone to build front porch & walkway
| 
72
Ernie carefully transits up lawn sparing the turf
|

73
Guided by Al Falcone to a Perfect lie among the trees
| 
74
until 10 pallets are placed
| 
75
close proximity to their area
|

76
120ft Border for new Rose Garden & Forsythia bed
end Day 9
| 
77
Day 10 Wed. 5/15
Al prepares bedding sand for rear walkway to car parking
| 
78
EP Henry Pavers are carefully placed in "I" Pattern
|

79
Tap Tap
| 
80
Al & son Albert mark the arc for the border
| 
81
Satisfied with the uniformity of both sides
|

82
Achieves the perfect result
| 
83
Work continues to complete borders
| 
84
around the entire perimeter
|

85
Belgium course across garage enterance
| 
86
around to front walk
| 
87
then on down to curb
End Day 10 Wed. 5/15
|

88
Day 11&12 Thu. 5/16 Fri.5/17
Next bonding sand is carefully swept into EVERY seam between all stones
| 
89
two men spend over an hour
| 
90
"Before" bonding sand
|

91
"After" spreading bonding sand
| 
92
Next step the entire area is power tamped after which a 2nd sweep of more bonding mixture
| 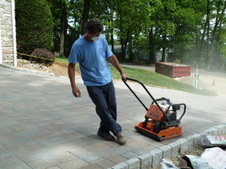
93
careful to cover every inch of surface
|

94
nothing is missed
| 
95
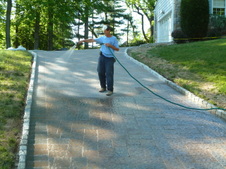
then comes the water shower to create the bonding
| 
96
the gentle showering is repeated three times careful not to erode any of the sand away
|

97
after completing third watering the driveway must cure 48hrs prior to use
end Day 12
| 
98
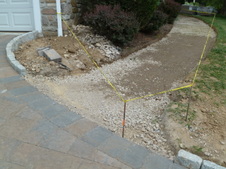
Day 13 (of consecutive work) devoted to clean up of perimiter and work area
| 
99
+ spreading & tamping the modified crushed concrete to prepare the front walk for pavers
|

100
New walkway widened to 4ft
| 
101
the area along the edge of front porch is trenched to prepare for new stone facing
| 
102
tamped to desired level
|
103
and Day 13 (Sat) ends followed by a well deserved Sunday of rest
| 
104
Day 14 Mon. 5/20
If you Love what you do, it isn't work
| 
105
Check level
|

106
Border set in cement creates dam for sand
| 
107
Tapped straight and level
| 
108
Post jacked up and cut to rest on top of border
|

109
true and level continous border is created
| 
110
End of Day 14 after start of setting random size Devon stone in bed of sand
| 
111
Day 15 Tue. 5/21 Front Porch
|

112
Complete setting Devon Stone
| 
113
WOW ! what a difference
| 
114
First "Test Drive"
|
115
smooth ride
| 
116
perfect transition
| 
117
MADE IT !
|

118
Test Drive #2
| 
119
this is FUN
| 
120
SUCCESS !
|

121
End Day 15
| 
122
Day 16 Wed.5/22
| 
123
Face stone is cut and fitted in cement
|

124
YES !
| 
125
A "Brand New Appearance"
| 
126
End Day 16
|

127
Day 17 Thu. 5/23
More crushed concrete
| 
128
More raking level
| 
129
More tamping/compacting
|

130
Until Al is satisfied
| 
131
Then the pavers are laid in the selected "I" pattern
| 
132
Meticulously
|

133
Preparation is the key to obtaining desired result
| 
134
This would challange the best puzzler
| 
135
Al is a Perfectionest
|
136
this work requires know how and skill
| 
137
Every thing comes together
| 
138
Next comes the real tricky part
|

139
End of Day 17
Approaching the "Finish Line"
| 
140
Day 18 Fri. 5/24
Chilly, Windy, Pouring Rain
HardCore Hardscappers Weather
| 
141
Al cuts in front walk for "sailor course" border
|

142
Walkway meets Driveway
| 
143
Cuting each paver to fit
| 
144
Walkway Complete
|

145
Next add the "Curb Stone" border
| 
146
Perfect arc to straight away
| 
147
Nice Work Al
|
148
Welcome to our home
End day 18 begin 3 day weekend
| 
149
DAY 19 Tue 5/28
Working in the rain, AGAIN
| 
150
95.7 FM keeps everyones spirits up
|

151
Beautiful !
| 
152
Just like the picture in the catalog
| 
153
This takes a lot more effort than delivering mail in bad weather
|

154
Continue placing EPHenry curbstone
| 
155
Stone after Stone
| 
156
Cutting to achieve perfect fit
|

157
On it gos
| 
158
Chipping away when required
| 
159
Albert supplies cement & stones
|

160
and assistance
| 
161
Front walk is perfect
| 
162
I think we've got it
|

163
TRULY AMAZING CRAFTMANSHIP
| 
164
Border for plant & shrub beds
| 
165
Each side for beds, front level w/lawn
|

166
Very nice
| 
167
End Day 19
| 
168
DAY 20 Wed 5/29/13 Container #5
Final full 20 yard container is picked up
|

169
Powerful equipment
| 
170
We have "Lift Off"
| 
171
Settle Down
|

172
Start your engine
| 
173
We hate to see you go
| 
174
Remove storm door
|

175
Face front step
| 
176
end day 20
Door placed for cutting to resize
| 
177
DAY 21 Thu. 5/30/13
Cut to fit & install stone door tread
|

178
Custom fit
| 
179
Finished Porch
| 
180
Only one like it in the neighborhood
|

181
Falcone work of art/masterpiece
| 
182
Wet Look
| 
183
More wet look
|

184
end day 21
| 
185
DAY 22 Fri. 5/31/13
"LAST DAY"
| 
186
Clean Up
|

187
Finishing Touch
| 
188
Weedwacker Proof
| 
189
"Falcone & Son"
|
190
Falcone & Apprentice
| 
191
Son & Apprentice
| 
192
Express our Thanks & Appreciation
|

193
For a "Job Well Done"
| 
194
Final Settlement of our account
| 
195
Owners of our "Dream Driveway"
|

196
"Wonderful Walkways"
| 
197
"Perfect Porch"
| 
198
and "Lovelier Location"
|

199
Next Step
| 
200
New Porch Furniture
| 
201
Will complete the Front Porch
|