1
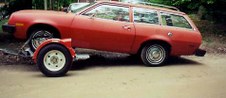
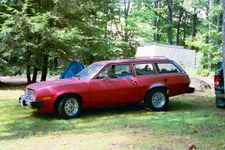
Picked it up in Cape Cod Mass.
| 
2
99,500 miles
| 
3
Runs good.
|

4
2.3l Four cyl.
| 
5
Plans are for a turbo engine swap.
| 
6
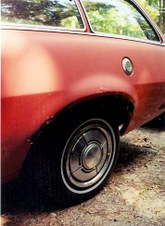
Some rust. It gets worse.
|
7
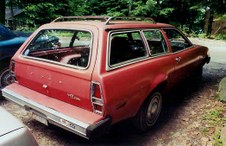
Not too bad.
| 
8
| 
9
|

10
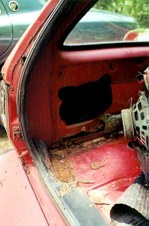
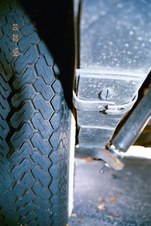
Passenger side rear corner.
| 
11
Pretty solid.
| 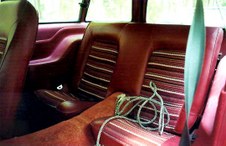
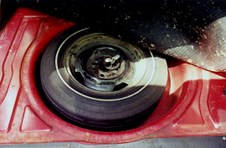
12
Ive already ripped the carpet and insulation out.
|

13
The carpet was a little wet and stunk of moth balls.
| 
14
| 
15
|

16
This is going to be fun.
| 
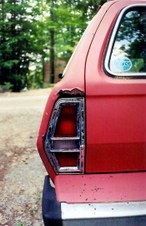
17
Trying out the fit of the Escort light.
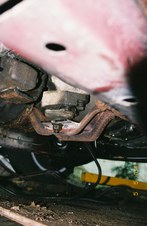
Im test fitting the 92 Escort wagon taillight.
| 
18
Close to what theyre going to look like.
I put the lights on a couple paint can tops.
|

19
Test fit.
The lights will be higher up.About in the stock location.
| 
20
Good line.
The curve of the light is almost the same as the body. Should be a fairly easy mod.
UPDATE: the tail light swap has been put on hold until the engine swap is completed.
| 
21
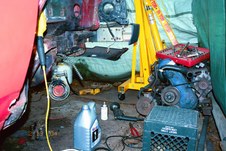
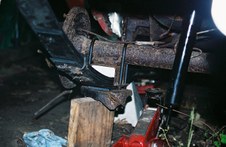
Turbo motor on temp hoist.
I had to make a temporary hoist to get the motor out of the bed of my truck. Then I had to figure out a way to get the motor down to the shed in the back.
|

22
Turbo motor on dolly.
This is what I came up with. I pulled the bag off the lawnmower. Drilled a hole on the front of the deck, drilled a hole in the handle of the dolly. Stuck a pin through them and swung the handle of the mower back. I was able to steer pretty good. It was down hill also.
| 
23
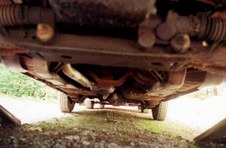
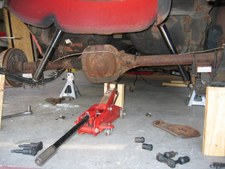
Pinto under carport fall
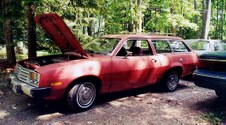
These pictures are better.
These 2 pictures were taken on a nice late fall day. The Pinto is on jackstands and the front suspension is soaking in rust penetrant.
| 
24
Pinto under car port fall, passenger side.
The back passenger wheel is on a couple small planks. Its not floating in the air like it looks.
|

25
Plastic garage, front, snowstorm.
The "walls" are up and this shot was during an early snowstorm. The roof has about 18" of snow on it and is holding up well. I wont let that much build up on it again though.
| 
26
Inside the plastic garage
I have a small propane heater that takes the bite out of the winter. The "walls" help keep the wind and snow out too. This shot was taken during the beginning of the suspension rebuild.
| 
27
Passenger side front wheel well bare
Just what the title says, bare. The rack and pinnion is giving me a hard time but ended up coming off. Everything is getting replaced. The metal is going to be bead blasted and painted.
|

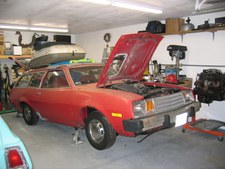
28
Engine and transmission are out.
I was kind of at a stand still with the suspension so I decided to pull the engine and trans. Now I can clean the engine compartment and start figuring where the wire harness will go. Once I get the sand blaster which has been ordered, the work on the suspension will resume.
| 
29
Front coil spring comparison
This shot of the old original spring (on the left) and the new Moog spring, shows what age has done to the old spring.
| 
30
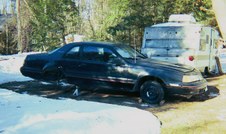
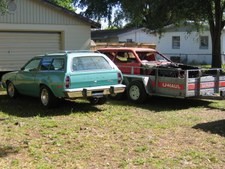
TurboCoupe parts donar car.
I couldnt pass this up on E-Bay. Now I have an engine and trans that Ive driven. Plus an La3 computer and extra parts. Ive sold the rims and axle out of it so far. The trailer in the back is used for storage.
|

31
Turbo Coupe axle on pallet.
Heres the axle getting ready to ship.
| 
32
The axle coffin.
Heres the crate finished and ready to ship to the axles new owner. I will be looking for an 8" axle to swap in the wagon.
| 
33
Strong wind damage
We had a storm that brought high winds whipping through here. The zip ties I have holding the tarps broke and the tarp fell a little. Everything else stayed put. Easy fix. Check out how much snow there is now on the sides.
|

34
After engine and trans were removed
This picture will help me out alot when I go to put everything back.
| 
35
Heres my heater
Its not much. The heater worked well 20*F and above days. Look close and youll see a little snow next to it. The snow on the other side of the plastic walls is about 30" deep.
| 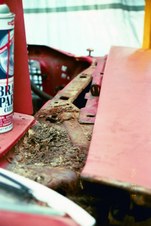
36
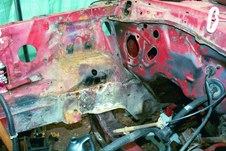
Found more rust
This is what I found under the passenger side front fender. There was rust, dead leaves and broken acorn shells.
|

37
Another view
There are some rust holes under that mess. Ill use POR-15 on this area.
| 
38
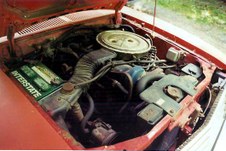
Engine bay
Ive started to remove the stuff in the engine bay. The voltage regulator. etc, etc.
| 
39
Top view
|

40
Gaining access to the cowl area
By removing the hood hinges Im able to access a small part of the cowel area. I took the hard plastic end off my shopvac hose and shoved the hose into the hole. I was able to get most of the crud out.
| 
41
Yuck
| 
42
Working in the cold
The little heater is trying hard to get the garage up to at least 20*.
|
43
Brrrrr
Heres another shot. Look closely at the engine. The snow outside is higher than the engine and is pushing the wall against it.
| 
44
Inside passenger side
Im removing the heater box so I gain access to the cowl area from underneath. The turbo exhaust elbow comes real close to the heater motor. Its best to remove the whole box.
| 
45
|

46
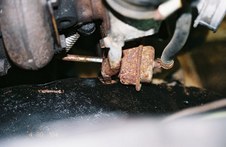
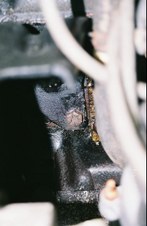
Doesnt want to come out
This is the passenger side steering rack bolt. The bushing sleeve has rusted itself to the bolt and wont give up. I had to cut the sleeve as close to the crossmember as possible with a cut off disk in an angle grinder. Then I used a dremel to finish it. I was very careful not to cut the bolt.
| 
47
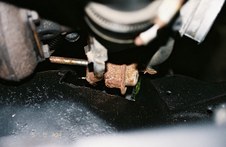
Ha
After squirting a lot of rust buster and prying the sleeve open the bolt finally came out. Oh... the 8 pound ax helped too. ;)
| 
48
Fresh air hole for the heater
This what I found after removing the heater box. This is looking up from the passenger side floor. Im starting to think that Im going to be looking for a body that is in better shape once this is finished.
Ill swap all the good stuff in it.
|

49
Drivers side is ready to be put back together
| 
50
| 
51
Cramped working space
This just shows how little room there is.
|

52
Ready to paint the engine bay
| 
53
Ready to paint the engine bay
I masked over all the holes that go from the engine bay to the wheel well areas so overspray wont go through. Im also ready to start the POR-15 on the cowel area.
| 
54
Looking better
This is after one coat of POR-15 applied. The second coat gets applied when the first coat is almost dry. Thats about 4-5 hours.
|

55
Shiny
| 
56
| 
57
Coming together
The passenger side is loosly bolted together. I had to buy used upper arms because the originals were rusted through. I applied POR-15 and the Chassis Black top coat to the upper and lower arms, the struts, the upper arm hold downs and a few misc. bolts and washers.
|

58
Drivers side
You can see the Hiedts 2" drop spindle here. I had to bend new front brake lines because of rust. You can see my first attempt here. They came out better the second time. Ive replaced the coil spring isolaters also.
| 
59
| 
60
Spring is here
I had a beautiful day to pull the engine and trans from the Turbo Coupe.
|

61
| 
62
| 
63
Heres a tip
The header panel is not plastic and wont bend. Whoops its fiberglass. I had to reposition the chain on the hoist and rested the engine on the front. Yes there is an engine behind all those pulleys and brackets.
|

64
Newer and older
The turbo engine and 5 speed next to the Pinto engine. The oil pans and oil pick ups need to be swapped.
| 
65
| 
66
|

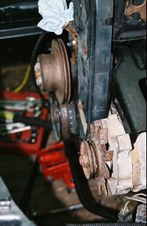
67
Passenger side front
I still have to bolt the calipers on and connect the rubber brake lines. The tie-rod ends have to be bolted on also. The back of the stock 13" rims hit the lower arms so I turned them around. Mounting them inside out made them clear.
| 
68
| 
69
2169900-R1-007-2
|

70
T-5 transmission
The factory hole for the transmission shift lever needs to enlarged by about 2 inches for the T-5 trans lever.
| 
71
2169900-R1-015-6
| 
72
2169900-R1-017-7
|

73
2169900-R1-019-8
| 
74
2169900-R1-021-9
| 
75
2169900-R1-023-10
|

76
2169900-R1-025-11
| 
77
2169900-R1-027-12
| 
78
2169900-R1-031-14
|

79
2169900-R1-033-15
| 
80
2169900-R1-035-16
| 
81
2169900-R1-037-17
|

82
2169900-R1-039-18
| 
83
2169900-R1-041-19
| 
84
2169900-R1-043-20
|

85
2169900-R1-045-21
| 
86
2169900-R1-051-24
| 
87
2169900-R1-053-25
|

88
2243400-R1-006-1A
| 
89
2243400-R1-008-2A
| 
90
2243400-R1-012-4A
|
91
2243400-R1-014-5A
| 
92
2243400-R1-018-7A
| 
93
2243400-R1-020-8A
|

94
2243400-R1-024-10A
| 
95
2243400-R1-032-14A
| 
96
2243400-R1-034-15A
|

97
2243400-R1-040-18A
| 
98
2243400-R1-042-19A
| 
99
2243400-R1-048-22A
|

100
2243400-R1-050-23A
| 
101
2243400-R1-052-24A
| 
102
2243400-R1-044-20A
|

103
2473400-R1-007-2
| 
104
2473400-R1-021-9
| 
105
2473400-R1-023-10
|

106
2473400-R1-025-11
| 
107
2473400-R1-047-22
| 
108
2473400-R1-049-23
|

109
2568000-R1-020-8A
| 
110
2568000-R1-026-11A
| 
111
2568000-R1-028-12A
|

112
2568000-R1-030-13A
| 
113
2568000-R1-032-14A
| 
114
2568000-R1-054-25A
|

115
PR02701030801
| 
116
PR02701030802
| 
117
PR02701030803
|

118
PR02701030804
| 
119
PR02701030805
| 
120
PR02701030806
|

121
PR02701030807
| 
122
PR02701030808
| 
123
PR02701032927
|
124
PR02701032926
| 
125
misc pics 004
| 
126
misc pics 004 1
|

127
misc pics 006 1
| 
128
misc pics 007
| 
129
misc pics 010 2
|

130
misc pics 013
| 
131
78 pinto 019
| 
132
78 pinto 062
|