 | 1.
Peli Motto Costume Fabrics:
Mason Chino Twill (Pumpkin) - Fabric Wholesale Direct
Cotton Jersey (Teal) - FWD
Upcycled Leather Jacket for the sleeves, knees, and belt
Textured knit from Joann Fabrics
Other:
4 bottles of liquid RIT dye in dark brown
Vintage Moto boots from Poshmark
SHIMA brand motorcycle gloves (amazon)
CAT Knee pad inserts from Amazon
Simplicity 8722 Jumpsuit pattern View A, modified
Tulip ColorShot fabric spray paint in brown and black |
| 392 Visits
126 Images
Shared Album | |
|
 |
|
 | 3.
TFA General Leia Jumpsuit | Costume was not made by my. Belt buckle made by my friend Cate. Belt is a black leather 2" wide blank that I added snaps to in the back. |
| 111 Visits
15 Images
Shared Album | |
|
 | 4.
Costumes for Porgs | Lt Kaydel Porg Connix and Poerg Dameron |
| 144 Visits
9 Images
Shared Album | |
|
 | 5.
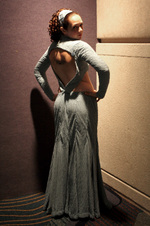
Kaydel Ko Connix - TLJ Resistance Jacket I made this in 3 days based off a single reference of Billie Lourd in this costume with Carrie Fisher in "Vanity Fair". I then used images of other resistance officers to get a better idea of how the back of the jacket looked as well.
Corduroy 21 Wale in Ginger
Silk Lining
fleece for the batting for the quilting |
| 1280 Visits
50 Images
Shared Album | |
|
 | 6.
Kaydel Ko Connix | Lt. Connix from "The Force Awakens", played by Billie Lourd. |
| 604 Visits
31 Images
Shared Album | |
|
 | 7.
Ahsoka Tano: "Cargo of Doom" Many thanks to my friend Teresa for most of this costume! She let me adopt her Ahsoka since it was no longer being worn by her. All I had to do was make a new belt (since my hips are larger), make new boots and spat, make new buckles for the spats, and experiment with make-up.
Please do not ask me where she got the montrals, she said they were purchased from a person the RPF a few years ago, and they no longer make them. All I know of them is that they are latex and fit my tiny head perfectly lol.
The body suit has a Baltogs label inside, but it doesn't appear they make it any longer. |
| 1815 Visits
69 Images
Shared Album | |
|
 | 8.
Padme Battle Handmaiden (Feb 10, 2012)Fabrics:
Silke/Rayon Velvet in a pinkish raisin color - 8 yards
Coordinating Satin - 6 yards
Cotton stretch in fuschia-esque color (2 yards)
Vintage Gold Jacquard Trim that is exact to the original (no longer available from my supplier) - 12 yards
7" Raisin colored invisible zipper
Raisin Thread for the cost and Gold Thread for the trim
Black men's belt from Kohls with a buckle made by my friend Andres and etched from thick foam
I created this to wear to the "Puppetry Arts Theater" Star Wars Sleep Over at "Ripley's Believe it or Not!" in Times Square, NYC.
It was put together in under a week, sewing in my spare time after work (so about 2-3 hours each night for 4 days) I spent the Thursday before the event finishing up sewing the trim on the lining and velvet outer coat, sewing the lining and coat together, and hemming it all. I also made the pants and finished up around 4am Friday morning. The coat pattern came from my friend Rachel O in exchange for trimmings. I used her pattern as a jumping point for this costume. I'd had it in my stash for about a year and forgot about it until about 3 weeks before the event. For the lining I self lined the collar and placket facings, the rest was lined in the satin. I made the lining first, testing the fit as I went to make sure the collar area wouldn't gape (a common problem if you have a small neck). I thencompleted the velvet outer layer.
Before sewing the lining to the velvet, I sewed all the trim to each half first. I did the lining trim first, wearing the lining and then marking about where I thought the trim should sit. I then carefully pinned the lining to the velvet about every 1/2" to prevent it from walking across the velvet and shifting. This was VERY time consumingas I had to pin it in sections, stitch it, pin another section, keep stitching, and repeat until done. I started at the bottom front edge of the coat, worked my way up and over the shoulder and stopped right before reaching the belt line (about 3" up). I skipped that 3" to leave room for the belt to go under it, and stitched the rest of the trim down side of the back half. This was repeated for the other side. This probably took about 3-4 hours alone. I drafted the pattern from a pair of leggings I had around and were 5 pieces (two front, two back, waist band). I sewed the trim to the leg seams before sewing the inside and front/back seams to make it easier. I pinned the trim the same as I did with the coat, every 1/2" or so to prevent it from walking on the velvet. The waist band was folded in half, ironed, and then the edges folded into the middle and ironed again so there wouldn't be any raw edges. I then sandwhiched the raw edge of the top of the pants between the waistband and topstiched it in place very close to the edge. The leg hems were simply double folded and stitched down. They close with a hidden side zip to make getting them on and off easier (hidden under the trim). The shirt is just a long sleeved tee shirt with pintuck like details on the sleeves and chest. It eats up fabrics and I can't remeber exactly how long each measurement was. I can't find my progress shots of this as it was taken with my actual camera (not phone) and I have a feeling that memory card may have been formatted. I'm too lazy to take new pictures at the moment, once I do, they'll be here. Luckily my cotton was 60" wide, so this helped a lot.
The hair was a lot easier to make than I thought. I used a $2 pack of hair that actually matched my own, a few hair ties, ribbon, and a LOT of tacky spray glue. The tacky spray glue left the hair still slightly tacky, but it was needed to make sure it didn't frizz out all over the place. I made a pony tail with my own hair, waxed the heck out of my bangs to keep them back, and plopped the piece over my ponytail. I took my hair and split it into two and wrapped it around the center of the piece. The piece essentially looks like an hour glass shape with the bottom slightly bigger than the stop, and flattened out. IT was very lightweight, and only took a few minutes to do. I was worried it would be a disaster, but looked pretty good. I may remake this so it's not sticky as I have another pack of $2 hair. My own hair was 'waxed' into place to prevent my shorter bangs from become frizzy and coming out of the pins I had them held back with. |
| 1408 Visits
13 Images
Shared Album | |
|
 | 9.
The Clone Wars "Bombad Jedi" Padme (December 2010)Padme's costume from The Clone Wars 3D Animated series. This costume is very similar in design to her Geonosis Arena costume, except for some minor seam details and the leg/arm padding.
I don't have any in progress shots like I usually do since this was a last minute rush costume. I drafted everything myself. I based the pant pattern after a pair of leggings I had. I used a turtle neck for the shirt pattern. It's a pretty basic costume really, so I was able to get it done in under a day's time.
I will probably remake this, as the fabric is not what I would prefer, and very sheer. This works for now though. |
| 1468 Visits
5 Images
Shared Album | |
|
 | 10.
Padme Naboo Family Gown - Deleted Scene (TBA at Celebration V)I could only buy 6 yards, all that my budget would allow at $10/yd. I managed to make it work with some clever pattern placement though ;-) I'm stingy with my fabric and like to avoid wasting as little as possible. I studied the gown from various angles (yay for the runway shots!) and drafted a pattern for the skirt and bodice. Patterning the bodice took a little thinking, but I was quite happy with my results.
The skirt was a breeze to put together after a little tweaking on the mock up. The front panel is self lined from what I can tell in the runway shots and the rest of the skirt is unlined. You can see the hem from the inside quite clearly (I need to hand sew this *ugh*). I sewed a ribbon into the waist and folded it over and hand stitched it down. Two dress hooks keep it closed and there is one small hook/eye half way down the front to keep the panel shut.
The bodice was a little harder with all the fancy seams and lack of seams where there usually would be (in the arm area). I went through 4 mock ups here until I found what I liked. The top portion where the neck is connected is interfaced and self lined, the bottom portion that has the strap thingy is the same way. The middle section with the sleeves is just one layer of fabric, I would have self lined this too, but I ran out of fabric :-( The one layer works fine, it just leaves the inside looking a little less finished than I prefer. The wrist hem is hand stitched as well. I managed to finish the bodice in about 3 hours. All that is left on it is the beading. I would KILL for some of those trocus shells, but I lack the funds and time right now to dye/drill them :-( I managed to find some beads that will work for now, but I want those shells eventually.
July 15, 2010 O M G!!! Perfect fabric was found in NYC!!! |
| 2246 Visits
22 Images
Shared Album | |
|
 | 11.
ROTS Padme Water "End" Dress Another gorgeos piece made by Michaela. She made the robe for this by hand dying and painting fabric and sequins. I'll be adding more 'flames' to the cloak as well as sequins throughout. I'll also be re-making the underdress that is worn with this since her original was a tiny bit short on me... I will find another use for that :-)
This is technically an "In Progress" piece, but I figured I'd just keep it here anyway. |
| 10027 Visits
1 Images
Shared Album | |
|
 | 12.
Tatooine Light Blue Midriff (September 13, 2008)February 14, 2009 I debuted this costume at Farpoint for the Masquerade and took home 3 First Place prizes!!! Best Workmanship, First in Sci-Fi, and Best in Show!!!
December 22, 2008 The skirt is done!!! All I need to make now is the head piece.
October 12, 2008
- The top is done! It's all painted, the beads are on the hood, and it's done! It fits great, but there is a LOT of fabric in it, it's quite heavy. Once its on though it's quite comfy :-D
September 14, 2008
- I've started my mock up, and thanks to my friend Michaela for the hood and cape patterns, it went much easier than expected! I started by drafting my own wrap top pattern and then used her patterns to complete the top.
- This costume is a fabric eater! I've already gone through 6 yards of fabric, I hope that 11 will be enough after self lining the cape and hood, and then making the skirt.
- Fabric purchased from my friend Karen who had enough extra from her own project :-) |
| 2564 Visits
47 Images
Shared Album | |
|
 | 13.
Slave Leia (April 18, 2008)UPDATE: 08/06/08 - Completed Modesty Robe for Dragon Con!
UPDATE: 07/26/08 - Pictures from the Central Park photo shoot with David Ng of www.ng-master.com
I made the boots from an old pair of cowboy style boots and a beige-olive Micro Suede. The skirts are made from a burgundy poly that had a really nice flowiness to it. I want to switch to silk when I have a bit more money.
Materials:
½ yard Beige/Olive/Tan Micro Suede or Real Suede
1 Pair of stiff sided, preferably flat heeled, knee high boots
Elmer’s Household Cement or e6000 glue
Pair of Sharp Scissors
Slave Leia Boot Toppers
How To:
- Place the boot topper over the boot to where it should lie. Trace around the top of the topper with a sharpie marker.
- Cut the excess leather from the boot.
- There is no exact science to how I did the covering, I just started laying the fabric down and cutting it out to the shape of the boot. Start at the toe and work your way to the top of the boot. When joining the seams, fold the fabric under ¼ inch and overlap so there are no raw edges.
- You only need to apply glue to the edges of the fabric, do not put it on the entire piece or you will have staining from the glue and possible bunching of fabric.
- Glue the Topper to the top edge of the boot, following the curve as you go.
- Wear and look hawt!
|
| 2384 Visits
42 Images
Gallery Album | |
|
 | 14.
Opera Twilek - Koyi Mateil - NEW! (June 26, 2006)Update! Feb 17, 2008 - I Wore this costume to Farpoint 2008 and Placed in 3 Categories for Masquerade!
*Best Beading
*3rd Place Sci-Fi (you try beating a cute kid and Robot Chicken Vader lol)
*Best Recreation
May 31, 2007 - Wore this to Celebration 4 in Los Angeles and LOVED it! Even though I didn't win the costume contest it was still a lot of fun being on stage and showing off my work :-D
May 06, 2007 - More Beading, LOTS of beading. I also bought shoes to go with the dress :-)
April 29, 2007 - I started the beading! It's going faster than I expecting and I hope to have it done soon :-D
April 28, 2007 - I did a makeup trial on my arm to see how the colors look :-D They photograph a little orangey, but in real life it looks like the movie color.
January 12, 2007 - I tried the Ben Nye Color Foundation in Tan #2 (PC11), the texture and weight of the foundation is great, the color is not. When I have a free day I'm going to try more colors to see what I like best.
June 26, 2006 - The Lekku have arrived! OMG they are soooooooooo gorgeous!
Research started in March 2006!
Lekku by Pam's Twilek Creations
http://members.aol.com/Mitji/Twilek.htm |
| 2778 Visits
47 Images
Gallery Album | |
|
 |
|
 | 16.
ANH Senate Princess Leia (March 16, 2007)This is my Princess Leia Version 4. My first 3 were sold because I was not totally happy with the end result (size, fabric choices, etc).
Jet Set Poly from Joann.com - $2.79/yd at 10 Yards
Leather for Belt - $15 (enough for 4 belts though)
Aluminum Sheeting for belt plates - free
Buttons for belt plates - $0.50 each at 7 buttons
Snaps for Belt - appx $0.50 each at 4 snaps
Total Cost -$50 approximately
Jet Set Poly from Joann.com
http://www.joann.com/catalog.jhtml?CATID=96027&PRODID=122901&source=search
Leia Belt Tutorial from Jedi-Academy
http://www.jedi-academy.com/leia_anh_belt.html
My poor attempt at how I made this dress
I made the dress without any commercial patterns since it's easy enough.
I laid out 9 yards of fabric double folded on itself (4 layers) and then folded it in half from neck to floor hem (so that the right and left sides would be mirrored).
I then drew out the shape of the dress and sleeve. I pinned all the layers together so there wouldn't be any shifting when I was cutting, and then cut it out.
I then opened it all up, pinned the two really long layers together (NOT at the neck though - you need this open to turn the dress right-side out), and sewed all the edges.
The dress was then turned right-side out through the neck opening, and the seams were ironed flat.
I then laid out the dress folding it along the top of the sleeves (so there wouldn't be any seams on the top of the dress) so the sides and floor hem matched up. I then pinned it in place leaving the slits on the sides open and sewed it together.
The collar was easy, it was made as long as my neck is around (12.5"), and about 7" high, fodl the collar in half length-wise and sew the ends (short sides) shut. Turn this right-side out and iron flat.
The 'hood' was made about 16" wide and 36" long. I did a rolled hem along the long edges before sewing it to the dress.
I then gathered the short ends to about 4" in length and sewed them in place along the edges (to keep the gathers from moving while sewing it to the dress).
I stay-stitched the edge of the neckline on the dress and then layered the dress, hood, and collar in place. These were pinned and then sewn.
For the gathers in the front of the dress I used a smocking stitch to keep them in place. These are hidden under the belt while the dress is worn.
EDIT: Version 4 of the dress. The top and bottom sections have a waist seam because my arms are too long to use the fabric selvage edge to edge.
There is elastic sewn to the waist to give instant gathers, this is all hidden at the natural waist by the belt. This version fits so much better than the old one. The sleeves are finally long enough and the hem is at the perfect length after blousing the waist over the belt a little.
The belt was made using the Obi-Wan's Jedi Academy tutorial (see link above). |
| 7897 Visits
45 Images
Gallery Album | |
|
 | 17.
Imperial Officer (February 6, 2007)08/07/08 My new Imperial Morale Corps Tee Shirt - designed by me and using almost 500 Swarovski Rhinestones!
07/26/08 Photos from the Central Park photoshoot with David Ng of www.ng-master.com
02/24/08 Swagger Stick! Andres made the stick for me and I painted and wrapped it :-) MOW!
Update - 2/13/06 I tried my hand at constructing my own Imperial hat by drafting patterns and going from there. I've found that I need to shorten the front 'flap' and shorten the height of the side crown. I also need to change the angle of the brim to point down a bit. But not to shabby for my first attempt with making my own pattern :-D |
| 8111 Visits
49 Images
Gallery Album | |
|
 | 18.
Clone Wars Snow Bunny Padme Update: Nov 29, 2009 - A long overdue update on this costume. This costume has been with me in some shape or form since 2004. After 5 years and two capes, it was time for an overhaul. I've bought brand new boots (pic coming soon), and replaced the trim and lining on cape #2... making this version 3. The new lining is a silk charmeuse and the new trim is genuine fox fur trim that I had to dye a light blue.
I'll be honest with myself here, my new trim is a tiny bit darker than I would have liked, but I can't fix it now that it is done. It's not bad, just darker than my old trim, so not what I'm used to. The new cape is so luxurious and soft :-)
Update! 8/23/06
I purchase a new body suit and hoodie from River's Edge Dancewear (http://www.riversedgedancewear.com/). I'll see how they look when they come in. Here are pictures of my two Star Wars Clonewars Snow Bunny Padme capes. The first one was made with the wrong colors. The fleece was an off white, the lining was white, and the trim was way too blue. My new one has all the correct colors now. The fleece is a super soft pile in bright white, the lining is an ice blue silk, and the trim is a soft baby blue marribou feather boa. The first one has since been given away.
The body suit was purchased at www.dannyswarehouse.com - they are a discount surplus dance supply store - everything is $10 there. I can't guaruntee that they have the body suit in stock right now, but keep checking.
The hoodie was purchased online for $12 as well (sorry I can't remember where, but it was another dance supply place).
The trim on the second cape was bought at a local trim shop for $6 a boa (6 feet per boa). You can get them online or ebay too.
The boots were purchased on ebay, but the seller was very rude to me and I won't recomend them to anyone. Just search 'white boots' on ebay - you'll find MANY pairs.
Fabrics were purchased online and at local fabric stores.
The gloves were an ebay purchase as well - for $5.
I made the belt and holster from white leather wrapped around cardboard (holds GREAT). The gun was purchased from a friend locally.
Clone Wars Snow Bunny Outfit
1. Cape
I used a bright white cotton polar fleece that had a nice soft pile. White is a must, whether you use fleece, plush, or velvet. The inside is lined in an ice/baby blue, this is visible in the maquette and the cartoon. I used a silk for the lining, very plain, but still stylish enough for Padme. The Blue trim on the maqutte looks like a very flowy puffy trim - so I used ostritch feather trim for mine (3" diameter). It flows and moves with the slightest breeze and is very lightweight so it won't drag your cape down. The cape is a half circle with a hood and has two little balls on strings. I keep my cloak closed with a hook and eye, its easier than tying it closed all the time.
2. Body suit
I used a white lycra unitard for mine, but you can use pants and a shirt too. Though the way the belt sits, I recomend very low rise pants and a long shirt. Some shots in the cartoon you can see a zipper in the front (like when she takes off the cloak to distract the droids), some you can't. I say go with what works for you. Obviously a unitard will have a zipper, most likely in the front. Unitards are availble at dance supply stores.
3. Balaclava (Hoodie under the cape)
Since Padme wears one, I think it's an essetial peice. It's actually part of the body suit, but a seperate peice is more comfortable. Not only does it mean you don't need a hair do, but it will keep all your hair out of your face :-) When I couldn't find mine the second time I wore it at C3, I was constantly trying to keep my hair out of my face, and had nothing to anchor the hood to. I found that a well placed saftey pin kept my cape hood up in even the windiest conditions in Indy :-) The little hoodie can be bought at a dance supply store for about $12.
4. Boots
As long as they are white and knee high, it works. I think that 2" heel is the highest I'd go on it though - no 6" gogo boots. They also need the little feather/fur trim on top. For my trim I took a peice that was long enough to wrap around my leg where the top of the boot sat, and sewed a hook and eye to the ends to keep it on. This way I can use the boots for other costumes as well.
5. Gloves
I used white cotton gloves that came up past my wrist a bit. I sewed four hook and eyes onto the gloves and trim so it can be removed and the gloves cleaned easier.
6. Belt, Hoster, and Gun
Its pretty much like the Ep 2 Battle padme belt. I used white leather and made the holster for my gun. The gun I used is the Ep 2 small blaster (thanks to Reaper). In some shots you can make out a pouch and others you can't, I think its an option. |
| 3460 Visits
46 Images
Gallery Album | |
|
 | 19.
AOTC Meadow Picnic Dress January 1, 2008 - I made the Brooch for this from Sculpy and Swarovski Rhinestones!
I LOVE this costume, it's so pretty and feminine without being too costumey feeling. I managed to get the hair pretty dead on, and I like the way it looks as a regular hair do as well lol.
This dress was made perfectly by Obi-Dawn from the C&P boards - she did a PHENOMENAL job on all the details. The corset embroidery alone is drop dead gorgeous, and spot on.
Prizes
3rd Place Journeyman Catagory - New York Comic Con, February 25, 2006 |
| 6432 Visits
32 Images
Gallery Album | |
|
 | 20.
Black Corset Dress - Version 3 UPDATE: 01/19/09 The new Brooch piece is done (version 3)! It looks 10 times better than my old one... and it's not falling apart this time!
UPDATE: 01/18/09 I finished the new corset! I kept the old gauntlets since they worked and looked fine :-)
UPDATE: 01/05/09 I finished adding the strands of beads and velvet to the necklace base. Using black eyelets and black beading wire it is super sturdy and hangs great.
UPDATE: 12/22/08 I've started beading the necklace!!! TONS of beads have been used so far, but luckily it's not that heavy :-)
UPDATE: 08/22/08 So, in the last week I've bought new fabric that looks WAY better than the old floral lace I had, bought beads for the necklace, and started beaded the 'brooch' on the necklace. I've also included a photo with a detailed description of how the strings on the necklace look to me :-)
Black Fireside Corset Dress
1. Black Pleather/Leather corset
I found that pleather worked better for me. It's easier to sew since it's thinner, and came pre-lined. It was also fairly cheap at $5 yd (54" wide).
2. Black Pleather/Leather Gauntlets
These use the same material as the corset.
3. Mermaid style Skirt
This can be silver, grey or white underneath with a black lace/burnout velvet overlay. The skirt is a mermaid style which has a slight flare at the bottom for a small train and is tighter fitting up top. Vogue has a great pattern (Number 2810) for the corset and skirt together. It just takes a few tiny mods. http://store.sewingtoday.com/cgi-bin/voguepatterns/shop.cgi?s.item.V2810=x&TI=20003&page=3
4. Beaded Necklace
This was beaded fairly simply with 4mm round faceted beads and 12mm round faceted beads. There is also a round beaded brooch at the top of the neklace. You can find a pre-made sequined/beaded applique, or you can embroider/bead your own fairly easily.
5. Silver Headbands
These can be bought or made from metal / plastic/craft foam (painted metallic).
6. Feather Capelet (Optional - as its not worn in some scenes).
This is made with feather trim.
7. Hair
Its a simple braid with the two side strands twisted at the temples and added to the braid. The original also had hair woven into the braid, but a regular braid works too. |
| 5866 Visits
64 Images
Shared Album | |
|
 | 21.
Clone Wars Red Sorrow Dress - Retired I made this based off the Clone Wars series sneak peek picture. After sketching it myself and guessing at what the bottom may look like, I decided to create it in the fabric form.
I used a bright pink Poly crepe (about 4 yards I think) and a deep reddish pink velvet with a dark pink lining.
I can't remember off the top of my head what pattern I used, but a basic long sleeved dress pattern should be fine. I modified a cloak pattern(Simplicity 5794) to allow for the slits on the side. Unfortunately the velvet was a stretch and it disagreed with me when sewing and got all bunched up. I'm going to fix that eventually.
The brooch was made of scuply and was clear coated after applying antique-gold rub-n-buff to the outer peice. When I made it I placed a peice of metal mesh on the back and baked it into the brooch. I then 'sewed' on a strong metal snap with thin gauge wire so I had something to attach the brooch to the dress with. After that I glued the pink peice to the gold peice. I'll get a picture of the back soon. |
| 2408 Visits
8 Images
Shared Album | |
|
 | 22.
Clone Wars Purple Diamonds Dress - Sold (While I work on it)This costume was sold in late 2006 to a friend.
The headpeice is now lost in the abyss somewhere :-( If I ever locate it, I'll be happy.
I went to C3 and had a BLAST! I wore this costume in the contest (even though I didn't win) and had a lot of fun. Unfortunately my headpiece fell apart the day before we left for C3 and I had to improvise VERY quickly. I will be remaking the headpiece and the train (once again LOL). I think I'm going to either make the petals larger, or make them ruffles instead. I'm not too sure at the moment. I have a long time to go before C4 and I can think about until then. I got a lot of great comments on it, even though my hair was falling out by contest time :( I can't wait to finish it for good (HA, yeah right LOL). Thanks to Cassandra and lija from TFN for the pictures of my dress. I had left my camera in the hotel room (dead batteries) and was unable to take pictures. |
| 4331 Visits
39 Images
Shared Album | |
|
 |
|
 | 24.
Imperial Pilots Wanted Chick - Sold This is a project in the making until I get it just the way I want it. I only have this one reference photo from the Star Wars Visionaries by artist Feng Zhu.
Prizes
2nd Place Female at I-Con Masquerade; March 25, 2006
Best in Show - One Man Star Wars Show, Costume Contest, October 31, 2005 - Judged by the Producers of Broadway plays, Spamalot and The Producers.
Update! 01-21-07
I bought a mannaquin off ebay to use for the chest plate since the one I have is WAY too big for me. I'll have to see how this works out :-)
Update! 03-27-06
A few photos of the Feme Tie from I-con this weekend! Photo's courtesy of Cristina and Mike :-)
Still to do...
- Make more boxes for the belt.
- Paint the Chest box I made - DONE 3/1/06
- buy more rivets so I can finish the chest armor. I already riveted the shoulder straps to the back, but I ran out when it came to riveting the velcro to the straps and the front :-(
- Rivet elastic straps on the shin armor so I don't have to tape it to my leg anymore.
- Rivet straps to the shoulder bells and straps to keep those on without tape as well.
- Get a new body suit
- Make gloves with the silver part on top. I think I'm going to make gauntlets like I did for my Padme costume, this way I don't have to take off the entire long glove if I need to. I'll have shorter glove with the wrist armor on it as well.
- Make wrist armor.
- Make new boot spats, my old ones don't fit the way I want them too.
- Work on the helmet to make it wearable, it hurts to wear it as it is now. |
| 4626 Visits
28 Images
Gallery Album | |
| |